Teaching Manners: The Importance of Eye Contact

Welcome to lesson Number 1 in 10 Simple Manners to Teach Your Children. (This may contain affiliate links.)

In the “every child was perfect” generation (ha ha–just a little joke), children were taught to make respectful eye contact. Not the “I can do what I want” eye contact, also known as insolence. Not the “I’m looking but not listening” eye contact, which is called day dreaming. But legitimate eye contact.

This quality must be extremely rare in today’s youth, because when I talk to a young person (teen or child) who not only makes eye contact but holds it, I notice. Pay attention and you’ll see what I’m talking about.

Now, eye contact is a tricky thing, because, of course, there is the autism spectrum, of which I will not even pretend to be an expert…not even for cookies. Then there are kids (like I was) who are simply painfully, agonizingly shy. There are also the kids who for some reason or another have no respect for authority and use a lack of eye contact to communicate that. These groups have more to overcome than the kids who simply don’t even realize eye contact is a thing, much less an important thing. I’m not tackling all those topics in a li’l ol’ blog post. Let’s just give some ideas here and you can see what works for your set of blessings.


It really matters!

Some people (adults included) are completely unaware of what eye contact says or does. I love this description I came across this morning in Come Rain or Come Shine {affiliate link} by Jan Karon, as Father Tim remembers his dog:

When he had the need to talk to someone who would actually listen, his dog had been his go-to. Had Barnabus dozed off? No. Had he gazed around the room as others sometimes did? Never. His dog had kept his gaze fixed steadily on his master, as if he were entranced by every word, even those unspoken.

Let’s learn from faithful old Barnabus.

Eye contact makes people feel that what they have to say is important. It makes them feel like you are listening, that you care, that they are worthy of your time. That’s a pretty big deal. It also makes people realize that you, eye-contact-holder, are (potentially) a good listener. (Actually listening helps, too.)

Once kids realize how important eye contact is, many of them will start working on it on their own. That’s my favorite.

What color?

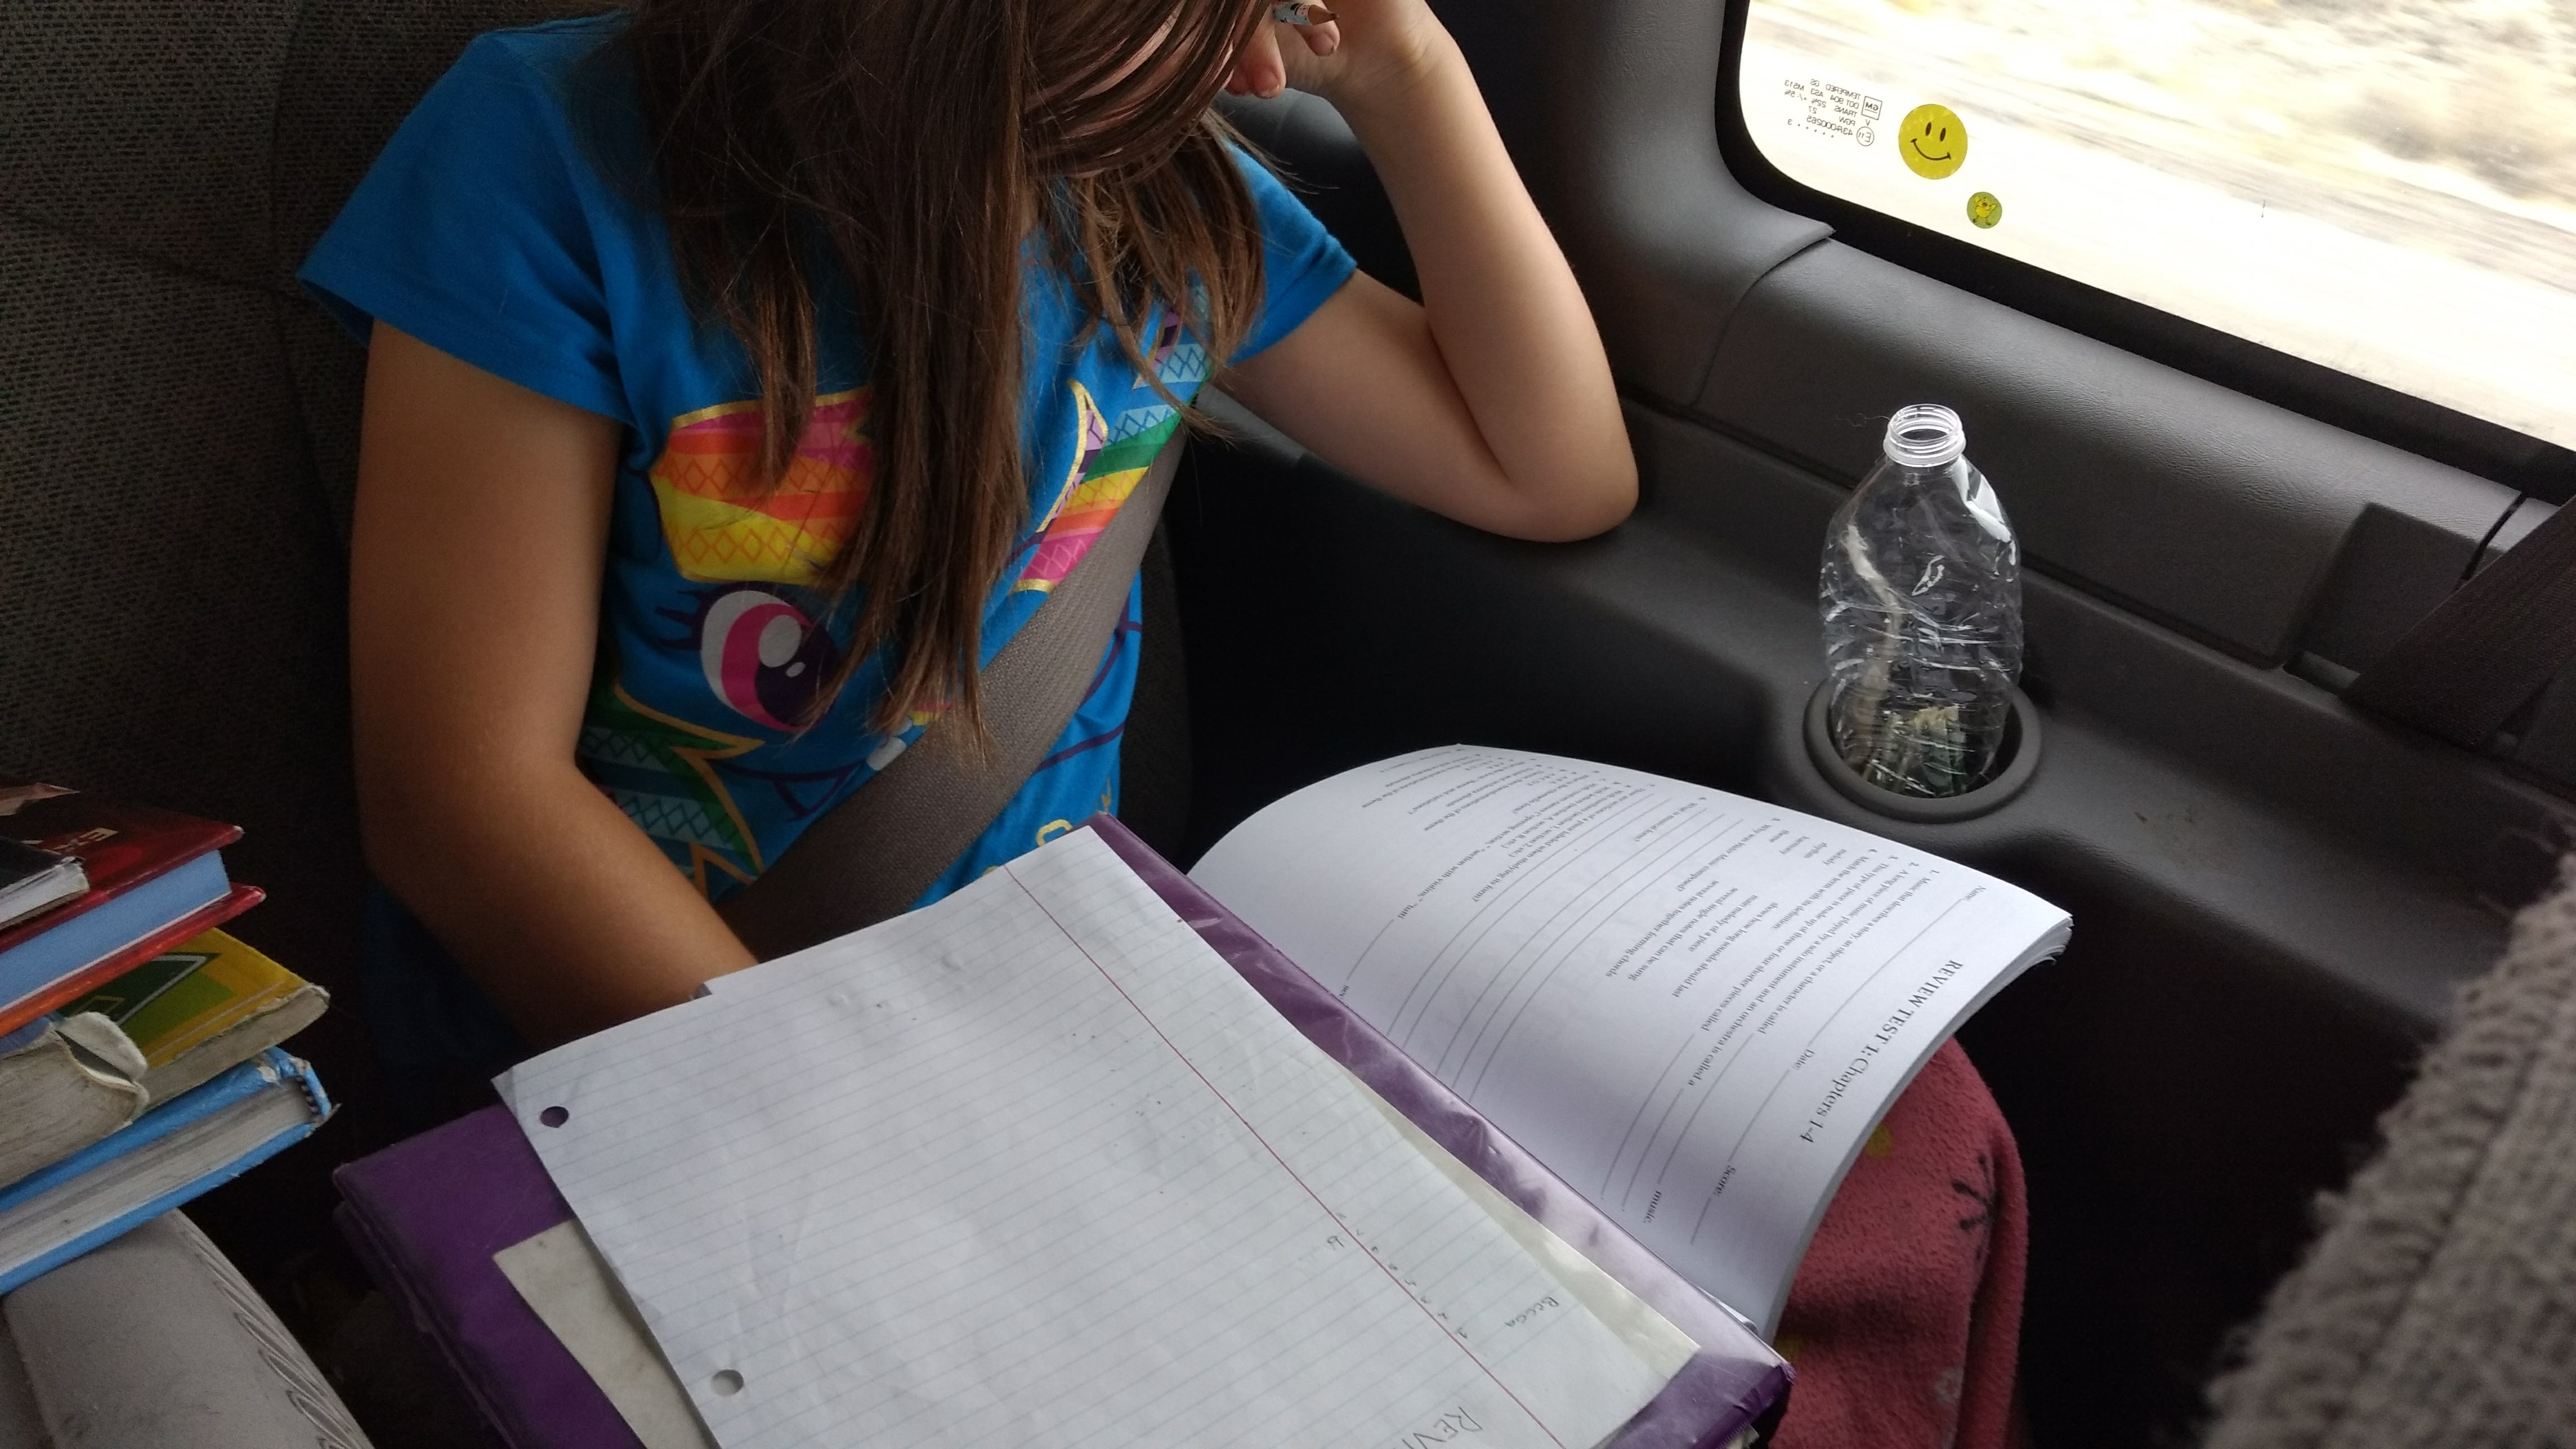
When one of our children was three, she was agonizingly shy. She pretty much spent her socializing-with-adults time pretending nobody could see her, and since we are on the road full-time in a ministry life, that’s a tough place to be.

So we worked with her step by step. One of the steps we took was encouraging momentary eye contact (not holding it for long). We told her to see what color the eyes were of every person that said hello (or goodbye or how about a cookie) to her. That gave her about two or three seconds of eye contact with each person who spoke to her, which was significantly up from zero! Eventually we told her that some people have different colored eyes, which made her peek at both eyes. It didn’t help her listening skills, but she was three.

Demonstrate.

Show your child how it feels to have your eyes on something else when they’re trying to talk to you. Set up the situation by saying you’re going to try something and then asking a question and looking everywhere but at the child. Then discuss that feeling.

Most importantly of all, exemplify good eye contact when your kids talk. Kids say 5000 things just before breakfast, so this used to be really hard for me, you know, trying to feed my family and not burn the trailer down and making eye contact, until I realized that it was okay (and desirable) to say, “I’m sorry. I can’t listen to you just yet. Give me a minute and then I can pay attention better.” And then I can give them my complete attention when I say I will.

Also, put down the phone! ‘Kay? ‘Kay. Seriously. Just do it.

Remind.

When my little ones (and sometimes other sized ones) are talking to me and their eyes are wandering around the room or they’re looking at the floor, I will say the phrase that I’m sure has become annoying but will stick in their heads (and probably their grandchildren’s heads), “My eyes are up here.” The reminder shifts their eyes to my face.

Sometimes I say, “My eyes are up here. Ask me again.” And on a really nice day, I will say, “My eyes are up here. Ask me again, please.”

Teach it.

When learning social skills, we set up role plays with our kids. “Hi, I am the appropriately named Mrs. Pastor’s Wife. How are you today?” And so the conversation would go as the child practiced eye contact and some other skills.

Practice.

One of the most common forms of practice my kids have experienced is having to repeat a question, but with eye contact (see remind section) before I will answer. (Obviously not if a child is upset–training works best in calm situations.)

Practicing at home is ideal. You can ask the child a question he obviously knows the answer to, and tell him to practice good eye contact. Simple.

The best and most difficult practice is the real world. After observing my kids in the real world, I will mention, for example, that they need to hold eye contact longer, that their eyes wander when their mouths are moving, or that looking at a dude’s shoes is not the same as looking at his face.


Marathon practice.

I just watched a video of a father and son sitting face to face with rolled up magazines in their hands (I might opt for squirt guns or M&Ms). They had a two-minute timer set, and they were required to maintain eye contact the entire time as they asked and answered questions. If one of them broke eye contact, the other would swat him in the leg with the magazine. In my family, that would be funny, but in some families or with children with less secure backgrounds, the magazine swat is not a good idea. Adjust as you see fit.


Moderate.

Sometimes it’s hard to look someone directly in the eye. It’s okay (although perhaps distracting for some of the more acrobatic faces) to look at their eyebrows. Foreheads work. Make cheeks or mouths.

Advanced skills.

It’s sometimes creepy when you’re talking to someone and that person is staring intensely at your eyes without blinking or breaking contact for, like, five minutes. You kind of wonder if the mind is still there, because only zombies don’t blink. (Is this true? Do zombies blink?)

Teach your kids that it’s okay to look away while they’re thinking of an answer. It’s also perfectly normal to look up or sideways about every 10 seconds. Looking down, however, shows disinterest. I don’t know who writes these rules.

Your direct eye contact is one of the best compliments you can give another human being. You are subliminally telling them that you are listening, they matter, and that what they have to say is important.”

~Susan C. Young, The Art of Body Language: 8 Ways to Optimize Non-Verbal Communication for Positive Impact

Don’t be a zombie.

My last zombie pointer is not to ignore the world around you. I have one child who is a stickler for the rules. This child will not look away from the eyes if the building explodes and seagulls start pecking everyone’s knees and Darth Vader comes back to life. Practice natural. I know, oxymoron.

So…start small, explain the importance, practice, and don’t be a zombie. Easy, right? Ha.

What are your best pointers for improving eye contact in kids and teens?

This post is part of the Five Days of Homeschool Blog Hop from Homeschool Review Crew.


Ten Simple Manners to Teach Your Children

10 Manners to Teach Your Kids

There were eight pieces of fudge on the little plate at the end of the refreshment buffet on Sunday after the morning service at the church we visited. There were 110 people in attendance.

If I had made that fudge, I would have eaten all eight pieces myself rather than subject 102 people to fudgeless disappointment. I’m considerate that way. But that’s not the point. The point is that a girl of around 10 came up to the table and took four pieces. Four! Do the math.

Another time we were invited to a scanty church potluck where fried chicken was the main course, with a few meager sides to beef it up a tad. Having let an unrelated teen go ahead of him, my husband (the guest of honor) stood at the end of the line. When he and the teen arrived at the buffet table, there were two large pieces of chicken left in the bucket, and two people left in line. The teen took both pieces.

At that same church potluck, a late arrival showed up with a couple pizzas. No sooner had the pizzas been set down, then one of the leaders of the church said to his own kids (who had been near the front of the line and still had chicken on their plates), “Hurry and get some pizza before everyone else takes it!” What does that say to our kids? I’ll tell you what it says–me first

And try talking to most people with kids for more than 30 seconds without interruption after interruption. It’s exasperating! (Especially when it’s my kids!)

These are just a few of the many instances that set my children off on a tirade about manners, and how rare common courtesy is in their generation. It was the fudge incident that made one of my daughters demand that children everywhere learn manners…and she wasn’t planning to have any fudge.

Manners matter.

I don’t expect that my children place their knives at the proper angle to indicate they are finished eating and I don’t harp too terribly much about elbows on the table, even though they cause spills and bumps and limited room. (Okay, maybe I do harp about the elbows on the table.) I do, however, expect my family to master common courtesy, because that’s what manners are, respect and courtesy for the comfort of those around you.

Ten basic manners to instill in your children:

  1. Let others go first.
  2. Give up your seat.
  3. Chew with your mouth shut…and eat quietly.
  4. Don’t talk with food in your mouth.
  5. Say please, thank you, and excuse me.
  6. Take one…or none.
  7. Share.
  8. Make eye contact.
  9. Shake hands.
  10. Don’t interrupt.

These can all be summed up in the Biblical concept of putting others ahead of yourself. All of them!

Please don’t think my family has these manners mastered–everybody in life needs training or tweaking, because that’s part of the journey. But we’re always working on them. Train, tweak, train, tweak…see? Let’s work on them together! I’ll be addressing some of these manners this week right here and then once a month, and also focusing on them monthly with my own family in our real world.

Please subscribe to my weekly newsletter and follow on Facebook and Instagram to join in the fun.

Please take the time to make the world a better place beginning with your child…please!

Thank you!

What manners do you like to see in children?

This post is part of a week of blog hopping hosted by The Schoolhouse Review Crew: 5 Days of Homeschool Blog Hop.


Apologia Anatomy–Brains, Hearts, and the God Who Made Them {Review}

There are a few things we’ve used in our homeschooling from the dawn of time (our homeschooling time, that is). Apologia is one of our mainstays. To be a mainstay for my family, you have to be fantastic, because I am a member of SGA–Second Guessers Anonymous. And Apologia, in our book, is fantastic–no second guessing there!

They sent us Exploring Creation with Human Anatomy and Physiology for the purpose of this review, and to totally educate our elementary and middle school kiddos on the fine workings of the human body.

They sent us the following:

  • Textbook
  • Notebooking Journal
  • Junior Notebooking Journal
  • MP3 Audio CD

The components of the course.

The textbook is broken up into 14 lessons covering each of the main body systems, as well as an introduction to anatomy and physiology, a chapter on the senses, a chapter on growth and development, and a chapter on health and nutrition.

As is the case with all the Apologia Young Explorers books, they approach science in a Charlotte Mason style, which is ideal for us. Each chapter is broken up into short sections. There are pauses encouraging students to retell what they’ve learned (narrations) or to answer a few questions.

Each chapter also includes lab activities. The supplies can mostly be found at home, but you can also order a supplement including all the objects you will need for the activities organized according to chapter and activity.

A personal person project runs throughout the course. Your student builds a body adding each system as the student learns about it.

Because Apologia is an apologetics course, there are also Creator-focused sections such as Why Did God Create Me in Growth and Development, Creation Confirmation in the Digestive and Renal System, and Our Faithful Father in Immune and Lymphatic Systems.

The textbook is officially the only item you need to complete this course, making it budget friendly.

There is also an mp3 audio disc available. The recording is professional and easy to listen to. It includes the textbook read by Jeannie Fulbright, the author herself. (She’s an interesting person, so look her up on social media!)

Two notebooking journals are sold separately also. They are not necessary, but they are extremely helpful. There is a junior notebook which is recommended for kindergarten through second or third grade, and then another for third or fourth on up. Both are consumable and meant for one student. They contain copywork, coloring pages, puzzles, notebook pages, and lab record forms, among other things. Your child will use it for his personal person, his experiments, note-taking, making little bookslets, and refreshing his memory on all the wonderful things he’s learned.

A note about the immersion method.

The Apologia approach to science at the elementary and middle school levels is immersion. If you want to understand more about that, watch this video. They explain it better than I do. What I can tell you is how well the immersion method has worked for my family.

We have gone through most of the Apologia Young Explorer science courses, and my children come out of them with a thorough understanding of, interest in, and appreciation of the subject they studied for the year. I find it far superior to the little-bit-of-everything approach to science I grew up with, which doesn’t give you the opportunity to completely fall in love with a subject. I guess it doesn’t give you the chance to totally hate it either. Ha.

What did we do?

As with all the Apologia Young Explorer texts we use, I read aloud from the textbook to my current students, and usually someone younger who hangs around for the fun and the intriguing photos throughout the book. I may read an entire section (maybe 15 minutes max), but usually I read for no more than 5-7 minutes so that everything can sink in and I can hold the kids’ attention. (I have a kindergartener in the mix.)

I ask the questions when they pop up and will often ask for narrations on shorter sections. I almost always ask for a narration the next day as a review. We do this four or five days a week.

I do not use the audio disc because, first of all, it doesn’t play in our van, which is where we do our science readings–on our drives. Secondly, while the reading only takes 5-7 minutes, we discuss quite a bit as we go, often smack dab in the middle of a paragraph. That would be a little less natural with an audio recording, although the discussion could take place at the breaks. I also improvise as I read a bit, because it’s what I do–it certainly isn’t necessary, because the text is highly readable. Honestly, if the disc played in our van, I would probably use it.

As far as the experiments are concerned, we did not buy the supplement package due to budgeting and storage. (Remember, we live in a travel trailer–all ten of us.) We do some of the labs and experiments, but not all of them. We pick those which would help us understand the project best and use supplies we have on hand, like this mummifying experiment that the girls did on their own from chapter 1.

Well, maybe not quite as on their own as they would have liked.

Two-year-old assistants are exciting.

If we can’t do an experiment due to time, driving, or supplies, we have no problem going back and performing an experiment from a previous lesson when the supplies are available. It’s a great review.

We’ve also been known to get creative about supplies. For example, Elijah made this heart from chapter 8, and the only appropriate ingredient he had were the graham crackers.

That’s totally a heart!

The experiments definitely add to the program and aren’t burdensome, so I recommend doing at least one or two per chapter if not all of them.

My readers (third and sixth grade) are able to perform the majority of the experiments without help. My kindergartener is capable of being actively involved, but needs help with the reading and reaching things. She’s still tiny.

My third and sixth graders are using the regular journals. The third grader was originally going to use the junior journal, but decided it was a little too simple. She’s right on the border, so we purchased a regular journal. My kindergartener is using the junior journal, but it’s really too advanced for her. Basically, she dictates to me some of what she has learned and illustrates it. She also does the copywork and coloring. If you do get them, each child needs her own.

Again, the journals are not essential for the course, so if finances are an issue, don’t let the journal costs keep you from using the course. They do, however, add significantly to the course in my opinion. I like that the reading age kids can follow the guidelines within the journal and I don’t have to guide them through anything. Technically, they could read the textbook and do the labs and the notebooks entirely on their own, but I feel the benefit immensely from the discussion we have.

Just some thoughts on age.

We move more slowly than recommended through the course because we have a kindergartener in the mix. Otherwise, the recommended pace of two weeks per lesson is quite reasonable.

While I include all ages of my elementary school kids in my Apologia science studies, I would not begin with Anatomy and Physiology if my oldest was under, say, third grade. This is one of the more difficult topics, despite how well it is all explained. It seems easier for my littlest kids to grasp the concepts in astronomy and even botany. Still, I wouldn’t hesitate for a moment to include the younger set when I’m teaching this to older students. Just don’t expect them to grasp it all, and be ready to repeat it when they’re older. and can easily be completed in one full school year of solid learning.

 In summary

This is our second time working through Apologia Anatomy and Physiology. It is a program that strongly prepared our previous set of children for their high school level biology and other science studies, also through Apologia. Highly recommended–all 20 thumbs (and four paws) way way up.

You probably want to know what other people think about. You can read other Crew reviews right here or click on the banner below:

Connect with Apologia on social media:


Classical Christian Music Appreciation Course {Review}

Memoria Press is one of my top curriculum companies. Recently they offered us a chance to check out their Music Appreciation I book. I may have drooled a little.

If you are a full-fledged classical Christian educator, you’re probably already familiar with Memoria; if you aren’t, you should be, because you’ll fall in love with their complete grade level curricula sets. If you’re a different sort of educator who takes a classical bent toward some things, then check out their individual courses, such as, oh, this Music Appreciation course!

Let’s talk about that a bit. Actually, a lot.

Memoria Press Music Appreciation Course: What It Is

The Music Appreciation Course is a single book with two CDs. (The picture below shows the book open and closed–it’s the same book. I mean, they have two of the same book. You will get one book. You understand!) The book includes chronological lessons covering the history of western music. Lessons are broken up into several sections. Each lesson references a single portion of a work by a single composer. The works are available online, and the website links directly to them. This is the only internet access you will need.

Each lesson goes through the following:

  1. Listen to the selected peace. I wrote peace instead of piece, but you know what? Every time I play it, the van gets quiet and people really listen, and then they get loud as they start dancing and grooving and percussionating (real word) to the music. It’s very peaceful. And each peace-piece is extremely well performed and produced on an oral and visual level–no high school bands or home recordings (sorry high school bands and home recorders). All the selections are available on YouTube and iTunes. I don’t get iTunes on my not i-phone, so I can’t tell you the quality there.
  2. A brief history of the composer and the piece. This is brief, like a full page, but super interesting! It’s well-written and captivating, and I’m ultra picky.
  3. A little lesson (and I mean little) in some sort of music theory. It’s done little by little, topic by topic, and builds upon or repeats with a slight expansion of previous topics. It’s really quite interesting and accessible.
  4. Listening exercises to learn and use the new music theory knowledge. This is where the discs come in. They are not mp3s from my understanding, because my Flintstone van doesn’t play mp3s and it plays these discs. Each lesson is different, but essentially the disc plays a small section of a piece, like one theme, section, or line, to emphasize what was discussed in the music theory lesson. It is well done, although, ahem, my family of professional musicians wasn’t super excited about the Twinkle Twinkle singing and would have preferred a more soothing voice. That’s the only complaint so far! (I say this because audio and voice quality are curriculum winners or killers for people in the audio field, just like poor video production or artwork or writing will kill an item for someone in the video, art, or writing fields. You audio people are completely safe with this program so far…after Twinkle Twinkle in lesson 1.)
  5. Another little history lesson, but this is more music-based than composer-based.
  6. Review. The review is great. It’s sort of like this: Hey, did you catch this and that and that and this? I use it each week to review quickly some of the previous lessons, especially the music theory if there was something I didn’t think everyone was solid on.
  7. Extra practice. This is, uh, a little extra practice–sort of a “listen again for this” opportunity. It’s great to tie everything together. My kids often say, “Again!” After which I say, “I didn’t hear a please….” But we do it again anyway.

After four lessons there is a test. The tests are all together in the back of the book and so are the answers. I had my kids do the tests on a separate sheet of paper. I trust them with the answers right there, but someone spilled coffee on a bunch of paper, and it had to be used up. Truth.

Age Recommendations

Memoria Press–such a lovely name–recommends this for grades 3-5, which makes me feel like an dunce, because I’ve learned a ton through this program! My husband studied music theory in college and is a professional musician, so he knows most of the theory, although it’s a good review for him. I took piano lessons for four years and took the obligatory music class in high school which basically taught me how much I looooooaaaaaathe group projects and that Kansas is a state and a music group. Essentially what I think they’re saying is that children in grades 3-5 are ready for this information, and that it is a good age to start them.

That said, I am using this program exclusively in the van when the entire family, including Steve the husband and dad and professional musician, are awake. That means everyone from 2 to 21 and parents are all enjoying this course together. Some parts are review for some people, but we have all  learned something, and most of us have learned quite a bit…and we’re a musical family.

I would definitely say my kindergartener, who is 6, is too young to fully benefit from the program, but she is learning things, is being exposed to phenomenal music, is becoming more familiar with names of musical greats, and is listening to music in a different manner, even if she can’t pronounce ritornello. I wouldn’t hesitate (and obviously didn’t hesitate) to include younglings in the mix with the older kids.

My third grader is in the recommended age group and is the reason we accepted this course. She is completely enjoying the program and doing quite well in it. She is, however, highly interested in the subject and has a good head on her shoulders when she chooses to use it. If a child finds this frustrating at age 8 or 9, I would definitely hold off a year or two and come back to it later.

Outside of the age group on the older end, I have a sixth grader (12), freshman (15), junior (17), college senior (19), and a 21-year-old. They are all listening and learning, although the 21-year-old is an accomplished pianist and knows some of this already, but it’s great review. I wouldn’t hesitate for a second to use this with high schoolers. Not one second!

And then there’s the two-year-old.

Ha ha. Potato chip boy doesn’t like anything to be louder than he is, but he too is getting into the music. My favorite for him so far is one of the earlier lessons–Vivaldi’s winter–during which the children match the poem to the song so they can hear the music as stomping feet or chattering teeth or howling wind. Mine reenacted that…for a long time…and quite enthusiastically. That might explain the blown tire.

How We Make It Work

We do one lesson a week and only when everyone is available and only on driving weeks…which is most weeks, since we drive all the time! We follow the program exactly as written. First we listen to the piece. Then we read the history. That’s it for the day–maybe 10-15 minutes depending on the length of the piece. (We do a minute or two of review at the beginning, so make that 12-17 minutes if you want to be picky, and right now I’m feeling pretty picky.)

Next driving day we do an ever-so-brief (30 seconds) review and then study and practice the musical concept taught that day. This is about 20 minutes max.

Next driving day or the same day if people want more (usually same day), we go through the review and practice sections and listen to the piece again with our newfound knowledge. The entire lesson takes us no more than an hour, and usually less. The only reason it takes us up to an hour is because we listen again and again to some sections or pieces, either because we love them or because we want to practice some more.

(That picture is after they finished listening, because my camera and phone and listening device are one and the same, but this is what the participants look like sitting in the van. )

Every four weeks there is a test based on four lessons. For my large group, I pass around the book and let them take it on their own (10 minutes for most, although the third grader took about 30), or I ask questions aloud and have them write answers. There is a listen-and-identify section that we do together. The reviews we do before each lesson are mostly sufficient to prepare them for the tests, but they can also go back and review on their own if they’re so inclined. Also, once they’ve taken the test, I let them go back and use the book for any answers they didn’t know.

(She did more than one problem–I took the picture at the start of this examination because, confession time, I fall asleep a lot in the van. Plus I forget things.)

That’s it. It’s super simple. Everything is laid out beautifully, understandably, simply.

I know I say we’re a musical family, but personally I’m kind of a musical dunce. I teach my kids basic piano and make them sing hymns in harmony, but I don’t know stuff–you know, stuff. Even I can do this course. Sometimes I might have trouble finding a theme or detecting an instrument or something, but it’s all a matter of ear training, patience, and practice–there’s no rush! And if you don’t “get” something, it’s okay. You will still garner quite a bit of interesting information from this course.

There is a technological side to this course. When the technology brain cells were handed out, a bird ate mine. True story…maybe. But I don’t let that handicap stop me. Here’s what I did to make this work for us in the van. (Some of you are going to be like, “DUH! That’s so easy!” To you I say, “Show me the pastern and coronet on a horse, diagram the Preamble to the Constitution, make me some chocolate without sugar, and treat this diaper rash with no chemicals.” We all have our gifts.)

I made a shortcut on my phone to the website where all the videos are linked–I don’t remember how I did that, so ask YouTube instead of me. Each week when we want to listen, I simply tap the shortcut icon, select my selection, and BAM! It’s playing on my phone.

That’s a screenshot of my phone’s app page. I know–so many apps! And in Spanish! Ugh. See the shortcut in the upper righthand corner? Easier than pie.

To run it through the van speakers, I plugged my phone into the van’s input using my headphone cord so the van speakers are like my headphones…but louder and less private. I can’t take a picture of it, because, again, my camera is on my phone, and the music is playing on my phone, and my phone is hooked up, so here’s a picture of my van’s radio.

Wow, that was helpful.

That’s all the tech advice necessary, unless you don’t know how to play CDs. I won’t judge.

Our Final Assessment

I love this course and the offspring do as well. I’m setting aside what we were previously doing and continuing with this course until I’ve done the whole thing. Then I am hoarding it so I can do it again later when the younglings are old enough to gain more from it.

It is exactly what I was hoping it would be, except more interesting. Sometimes I want to do three lessons in a week! But I stuff a potato chip in my mouth and sit on my hands.

Memoria offers a free sample page right here, so check it out if this sounds like something that might interest your crew.

You know what though–I shouldn’t be surprised. We love everything we’ve ever gotten from Memoria Press.

More From Memoria and the Homeschool Review Crew

Other members of the Homeschool Review Crew reviewed numerous other publications:

And here’s my review on their Fourth Grade Literature Guide Set.

To read their reviews, click right here or on the banner below:

For information on their other great books, including sales and new publications, follow Memoria Press on social media:


Homeschool Diploma — A Personalized Diploma Experience {Review}

We’ve been homeschooling for so long that I’ve noticed an odd pattern emerging from people who ask us questions about our education lifestyle. One of the questions we hear, strangely enough, is “What about a diploma?!”

I used to say that we were going to make our own, which had people looking up the number for social services faster than you could say “burger and fries.” Thankfully, Homeschool Diploma has appeased our curious questioners with their array of diplomas, specifically their Standard High School Diploma and the Personalized High School Diploma.

High School Diploma with 7

All my longtime followers already heard me gush about Homeschool Diploma and how they made me cry happy tears a couple years back when we ordered a diploma for Hannah. You can read all about that right here. I don’t want to repeat myself, so I’m going to talk to you today about the numerous options you have for personalizing a diploma from Homeschool Diploma.

Homeschool Diploma offers numerous options, including the following:

I want to walk you through the numerous options involved in personalizing the high school diploma we created for Marissa. Wait, what?! Isn’t Marissa graduating from college in a few weeks? Yes, yes she is. Here’s what happened. At 16 she sort of morphed from high school into college and we never really celebrated. We just called her a high school dropout and that was that. Ha! So we ordered a high school diploma for her backdated to 2015 when she was sweet 16. Next week we’ll be giving it to her at her big high school graduation bash, which is just us at Red Robin using all the birthday money I’ve been saving up. Got that? Good.

Okay, onto the details that make the personalized diploma so special.

Size options

You can go for the standard 8.5×11, the more compact 6×8, or the totally portable wallet size.

Seal options

There are three standard gold seals to choose from, and several upgraded seals for an additional charge. You can focus on home education, Christian education, or one of the other options. You classical educators will be thrilled to know there’s even an option for you.

Names

The name of your graduate and school are up to you, of course. We are boring and used our daughter’s real name.

You can include your city and state if you wish. We use our country, since we’re a USA traveling roadschool.

Wording

This is one of my favorite parts. The wording options are quite extensive. You can choose a more state-like diploma, an honors diploma, a thanks to God option, or the Godly wisdom wording, which is my personal favorite and what we chose for both our graduates so far.

There are also options for single parent homes, double parent homes, or excluding the parents altogether if, you know, the lunches they packed for four years weren’t worthy of having their names on the diploma. Very possible!

Verse or Motto

You have the option of choosing a verse or motto for the diploma. There are a number of options or you can add your own. We have used our girls’ confirmation verses to make them even more meaningful, particularly since our girls have chosen their own confirmation verses.

Dates and Signature Lines

You can backdate, forward date, or present date your diploma. You can also choose how to label your signature lines. We did the simple Father and Mother, although I was considering King and Queen.

Paper and Lettering

There are two paper options, and this was super hard for me, because you can’t go wrong with either one, which makes it super hard for me. I know–weirdo!

The lettering options include hand-lettered calligraphy for an additional fee. We opted for printed…I think. I can’t remember.

Honors Seal

You can opt to add an honors seal in English or Latin. I always use the Latin because Latin is cool. Why? Because my high school Latin teacher said it was, and if Mr. Winter said it, you know it’s true.

Diploma Cover

You have choices of colors and seals or no seal at all.

You may also upgrade and add your graduate’s . name to the outside of the diploma, a nice little touch. We got the name on the outside for Marissa, but not for Hannah. Apparently we like Marissa better.

Add-ons

You may order an archive copy so you’ll have a copy for your records. This is also where you order the wallet-size copy. We got one for Hannah, but not for Marissa. Apparently we like Hannah better.

Cap and Gown and Tassel

You may add a cap, gown, and tassel, or just a tassel, or nothing at all. Hannah got a cap and tassel. Marissa only got a tassel. We really do like Hannah better!

If you need to back-date your tassel charm, that’s no problem at all! You have a seriously huge array of options for tassel colors and charms. We don’t have school colors, so I go with colors the girls like, which is not easy, so I think I’m choosing school colors before Elisabeth graduates next year.

Extras

You can add a ring for your grad, invitations, a darling little gold tassel for your diploma, a pen–so much stuff!

Shipping

You have the option of saying, “Oh, rats! I forgot to order a diploma for the gaduation ceremony that is taking place in two sleeps!” You can get it made and shipped super fast.

Customer Service

I have communicated with Homeschool Diploma a number of times over the past couple of years, and I always feel like I’m talking to an old friend–not the old that’s awkward to talk to because you stopped sending Christmas cards and they didn’t. I mean the old friend that you see after ten years and it’s like you never missed a beat, you know what I mean?

Now then, let me say again that you can go back and read my other review of our first diploma experience with Homeschool Diploma right here. You can also go see what other Homeschool Crew Review team members think of their diplomas, gowns, hats, and other fun goodies by clicking here or on the banner below:

You can also follow Homeschool Diploma on social media:


A Few Easter “Necessities” for a Simple Celebration

Top Easter Posts from The Simple Homemaker--for real people in real life homes.

In case you’re wracking your brain trying to remember how on earth to boil eggs, what on earth to do with those eggs, and what in tarnation (wherever that is) to serve on Easter, I’ve got a few reminders from years past.

The Jelly Bean Gospel: You can buy this, but why not make it with your kids.

Jelly Bean Pinnable

How to Boil a Perfect Egg: This tutorial from our entertaining firstborn works every time.

Perfect Hardboiled Eggs (1)

This simple tip will, sadly, break the tradition of your children going to church with dye up to their wrists.

Use a Whisk To Remove Eggs from Boiling Water or Dye Pinnable

Creative Easter Egg Design: It ain’t Pin-worthy, but it is fun!

PicMonkey Collage (1)

How to Peel Hard-Boiled Eggs: Everyone has a method–this is ours.

Peeling Hard Boiled Eggs Pinnable

Deviled Eggs and Egg Chick Recipes: Too fun to eat–not!


Egg Chicks pinnable

Recipe for Egg Salad: Stick with the basics, or transform the humble egg into a work of culinary art!

Egg Salad Sands

How to Bake a Ham: Cheapest ham, best results.

Ham Pinnable

How to Keep Potatoes from Browning: A simple make-ahead tip.

How to Keep Potatoes From Browning


Easter Recipe Round-up: Just pick something from each category and you’re all set…except you still have to make it.

36-Easter-Recipes-Pinnable.jpg

10 Ways to Use Up Easter Eggs: In case you have 9 dozen, like we do.

Use Up Easter Eggs

And if you still need an Easter basket idea, it’s not too late to get this Faith Builder’s Bible from Amazon (affiliate link):

Faith Builders Bible -- A Review by a Homeschool Mom and Her Son

And it’s never ever too late to give your children a sense of the Resurrection…even after Easter.

Sense of Resurrection Feature

Have a blessed Easter, don’t eat too much chocolate, and remember what the empty tomb really means–Jesus (God) lived and died for you, and then He came back to life. Why? So you could do the exact same thing. Don’t try to figure it out–we can’t love like that. Just appreciate it.


St. Patrick’s Day Breakfast Recipe: Shamrock Eggs

Did you know that the British-born St. Patrick was kidnapped and enslaved by the Irish?  Eventually he escaped.  In later years he became a missionary, and whom did he serve?  The Irish, his former enslavers.

Pause for effect.

In honor of St. Patrick’s selfless love, here is a recipe for shamrock eggs.  I don’t see a connection either.

(Shamrock Eggs are adapted slightly from this recipe for bell pepper ring eggs at Meatless Monday.)

St. Patrick’s Day Breakfast Recipe: Shamrock Eggs

Ingredients

St. Patrick’s Day Breakfast Recipe: Shamrock Eggs

  • 1 green bell pepper
  • 4-6 eggs
  • oil* or butter (mmmmmm, butter)
  • water
  • salt and pepper to taste

Directions

Slice the pepper into 4-6 rings.

St. Patrick’s Day Breakfast Recipe: Shamrock Eggs

Bribe matching small people to remove the seeds and other guts.

St. Patrick’s Day Breakfast Recipe: Shamrock Eggs

Heat the oil or butter (mmmmm, butter) in a pan set on medium-low-ish heat.

Drop the pepper rings, heretofore known as shamrocks, into the pan.

Crack an egg into a bowl and pour it gently into a shamrock. Repeat for each shamrock, or crack the eggs straight into the shamrocks.

St. Patrick’s Day Breakfast Recipe: Shamrock Eggs

Drop a couple tablespoons of water into the pan and cover immediately to trap in the steam.  If you have a glass cover, watch for the eggs to firm up, or just lift the cover and peek after about 3-5 minutes. This will create the perfect sunny-side up eggs. (Thanks to Jan the Pepper Jam Lady in Yorba Linda for that tip!) Cook longer for more firmly set yolks.

St. Patrick’s Day Breakfast Recipe: Shamrock Eggs

That’s it! Serve with Screaming Baby Biscuits and a pint of Irish ale. Oh, wait…breakfast.  Never mind the ale.

St. Patrick’s Day Breakfast Recipe: Shamrock Eggs

If you love green peppers, you’ll like these eggs.  If you don’t like green peppers, these will make you gag.  I’m nothing if not honest…to a fault.  Speaking of being honest, I don’t drink Irish ale for breakfast…or at all.

*My cooking oil of choice is coconut oil for its health benefits.  When I don’t want the coconut flavor, I opt for expeller-pressed ultra clean, which has no noticeable flavor.

Here’s the short and sweet printable version.

St. Patrick’s Day Breakfast: Shamrock Eggs
Recipe Type: Breakfast
Prep time: 10 mins
Cook time: 5 mins
Total time: 15 mins
Serves: 2-6
A charming and healthy shamrock shaped egg dish with only a few ingredients.
Ingredients
  • 1 green bell pepper
  • 4-6 eggs
  • oil or butter
  • water
  • salt and pepper to taste
Instructions
  1. Slice peppers into 4-6 rings. Remove seeds and core.
  2. Heat oil or butter in a pan on medium-low heat.
  3. Toss the pepper rings into the pan.
  4. Crack the eggs into the pepper rings.
  5. Splash a couple tablespoons of water into the pan and immediately cover.
  6. Cook for 3-5 minutes for soft eggs, longer for a firmer set.

What is your go-to St. Patrick’s Day breakfast re.cipe?

Special thanks to Donna and Ann from Apron Strings for the original recipe.

Linked up to Weekend Whatever, Pennywise PlatterFat Tuesday, Hearts 4 Home, Frugal Days, Sustainable Ways, Food Trip Friday