Did you know that the British-born St. Patrick was kidnapped and enslaved by the Irish? Eventually he escaped. In later years he became a missionary, and whom did he serve? The Irish, his former enslavers.
Pause for effect.
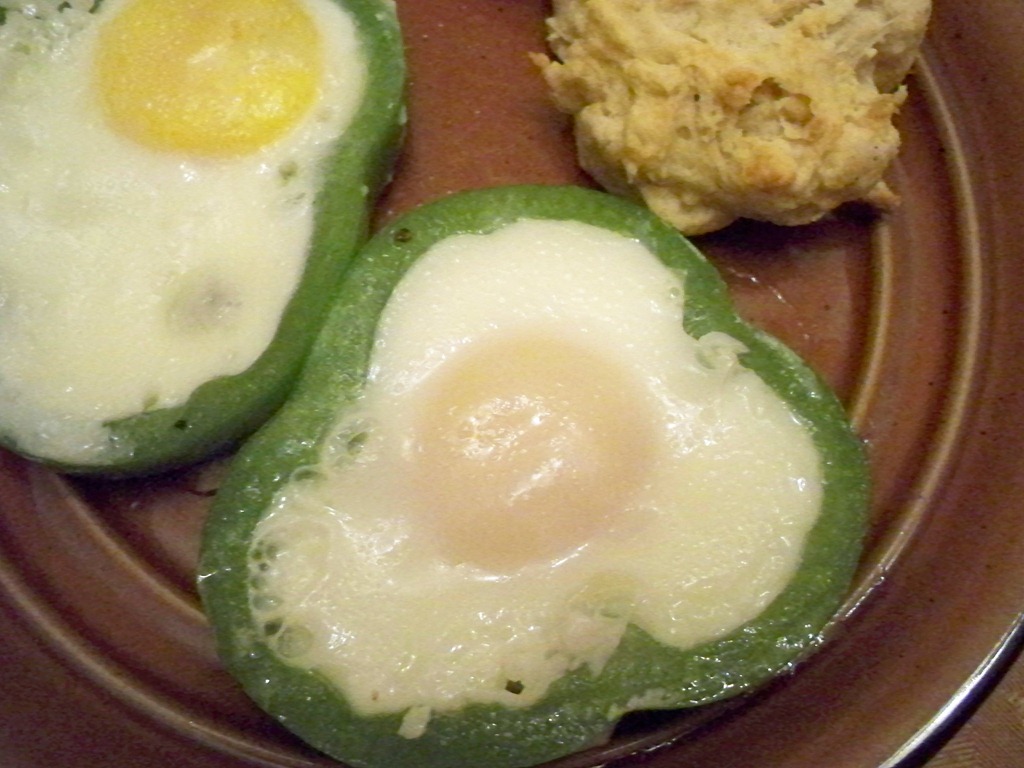
In honor of St. Patrick’s selfless love, here is a recipe for shamrock eggs. I don’t see a connection either.
Bribe matching small people to remove the seeds and other guts.
Heat the oil or butter (mmmmm, butter) in a pan set on medium-low-ish heat.
Drop the pepper rings, heretofore known as shamrocks, into the pan.
Crack an egg into a bowl and pour it gently into a shamrock. Repeat for each shamrock, or crack the eggs straight into the shamrocks.
Drop a couple tablespoons of water into the pan and cover immediately to trap in the steam. If you have a glass cover, watch for the eggs to firm up, or just lift the cover and peek after about 3-5 minutes. This will create the perfect sunny-side up eggs. (Thanks to Jan the Pepper Jam Lady in Yorba Linda for that tip!) Cook longer for more firmly set yolks.
That’s it! Serve with Screaming Baby Biscuits and a pint of Irish ale. Oh, wait…breakfast. Never mind the ale.
If you love green peppers, you’ll like these eggs. If you don’t like green peppers, these will make you gag. I’m nothing if not honest…to a fault. Speaking of being honest, I don’t drink Irish ale for breakfast…or at all.
*My cooking oil of choice is coconut oil for its health benefits. When I don’t want the coconut flavor, I opt for expeller-pressed ultra clean, which has no noticeable flavor.
Here’s the short and sweet printable version.
St. Patrick’s Day Breakfast: Shamrock Eggs
Recipe Type: Breakfast
Prep time: 10 mins
Cook time: 5 mins
Total time: 15 mins
Serves: 2-6
A charming and healthy shamrock shaped egg dish with only a few ingredients.
Ingredients
1 green bell pepper
4-6 eggs
oil or butter
water
salt and pepper to taste
Instructions
Slice peppers into 4-6 rings. Remove seeds and core.
Heat oil or butter in a pan on medium-low heat.
Toss the pepper rings into the pan.
Crack the eggs into the pepper rings.
Splash a couple tablespoons of water into the pan and immediately cover.
Cook for 3-5 minutes for soft eggs, longer for a firmer set.
2.2.1
What is your go-to St. Patrick’s Day breakfast re.cipe?
I love a good, juicy ham on Easter and Christmas (and any day in between). Too often the hams we’ve had are dry, expensive and sickeningly sweet, even when we bought the high-priced, big name hams from the ham store. It’s enough to make a person sit down and cry into her taters. Therefore, we took it upon ourselves to find the cheapest, tastiest method of preparing ham that we could…just for you. You’re welcome.
optional ingredients for an optional sauce – ours only requires brown sugar and a sauce pan
Which ham should I buy?
The most convenient ham is, naturally, the spiral-sliced. Our experience with spiral cut, however, is that they dry out very easily. Because they are already cut, the heat has more surface area from which to draw moisture. Nothing can prevent moisture loss to some extent, not even the reams of aluminum foil we use to try and prevent its drying out.
For that reason, we buy unsliced ham, which, to our delight, is cheaper. I like the shank, because it is often the cheapest of all and not too difficult to slice. You can also grab yourself a nice butt which will work just as well for the same price or just a few pennies a pound more, depending on your store. According to our old butcher, the shank and butt are essentially the whole ham (which is the leg) chopped in half to form the separate cuts. With such little difference, I go for whichever is cheaper. (Here’s more than you ever wanted to know about ham cuts.)
Watch for a sale around the major holidays and you’ll really score big with your ol’ pigskin.
How do I cook the ham?
Preheat your oven to 350.
Put the ham in a pretty (okay, so it doesn’t have to be pretty) roasting pan with the bone side down, fat side up.
Add one cup of water to the pan. (Some experts say not to do this, but I do it…so there, experts!)
Cover it completely with aluminum foil. But aluminum foil will kill you! I know, but this ham is so juicy, you’ll die happy.
Cook to the proper temperature as explained below, and immediately remove it from the oven.
Let the ham rest covered for 20 minutes or so before slicing, so the juices redistribute throughout the ham.
How long do I cook the ham?
If the ham is pre-cooked, heat it to an internal temperature of 110-140 (Fahrenheit) and pull it from the oven, depending on how warm you want your ham. (If it’s fully cooked, you can theoretically eat it cold.)
If the ham is not pre-cooked or only partially cooked, heat it to 150-155 (Fahrenheit) and pull immediately. I know the meat police say 160, but it will continue cooking 5-10 degrees after you pull it. I pull at 150. If you wait for 160, you may have a dry ham. You’ve been warned.
Use a meat thermometer! Insert it well into the meat, but not touching the bone. if you don’t have a meat thermometer and you cook meat, buy one. If you don’t want to buy one, you’ll be cooking roughly 20-30 minutes per pound, but I won’t guarantee that your stove doesn’t run hot and that you won’t be eating a football. In that case, I wash my hands of your ham.
I won’t even go there! Okay, maybe just a little. There are as many ham glaze recipes out there as there are cooks to prepare them. Personally, I don’t like to be knocked out by an overwhelming shot of sugar, bourbon, cloves, or pineapple when all I really want is a nice big mouthful of meat. I want to taste the ham! Is that so wrong?!
Are you with me? It’s okay if you’re not, because you can do a quick search on any recipe site for half a gazillion glazes. Here are 68 glaze recipes from my favorite recipe site, AllRecipes.com. Read the reviews and pick your favorite…but might I recommend you keep it simple?
Because my husband likes the option of a subtle sweetness with his ham, and others in my family like the option of eating ham without going into a diabetic coma, this is the method he whipped up:
The Simple Homemaker’s Husband’s Simple Ham Sauce
Pour the pan drippings into a saucepan.
Add 1/4 cup or so of brown sugar or honey (depending on how sweet you want it and how much juice you have).
Heat it on the stove stirring to dissolve the sugar or honey, and testing for the sweetness level you’re looking for.
Adjust with water if it’s too salty or thick, and sugar or honey if you want a sweeter juice. Taste as you go and adjust gradually.
Serve it on the side as an optional au jus.
It is simple and delicious, but doesn’t coat the ham with sugar, which many people in my family can’t (or won’t) eat.
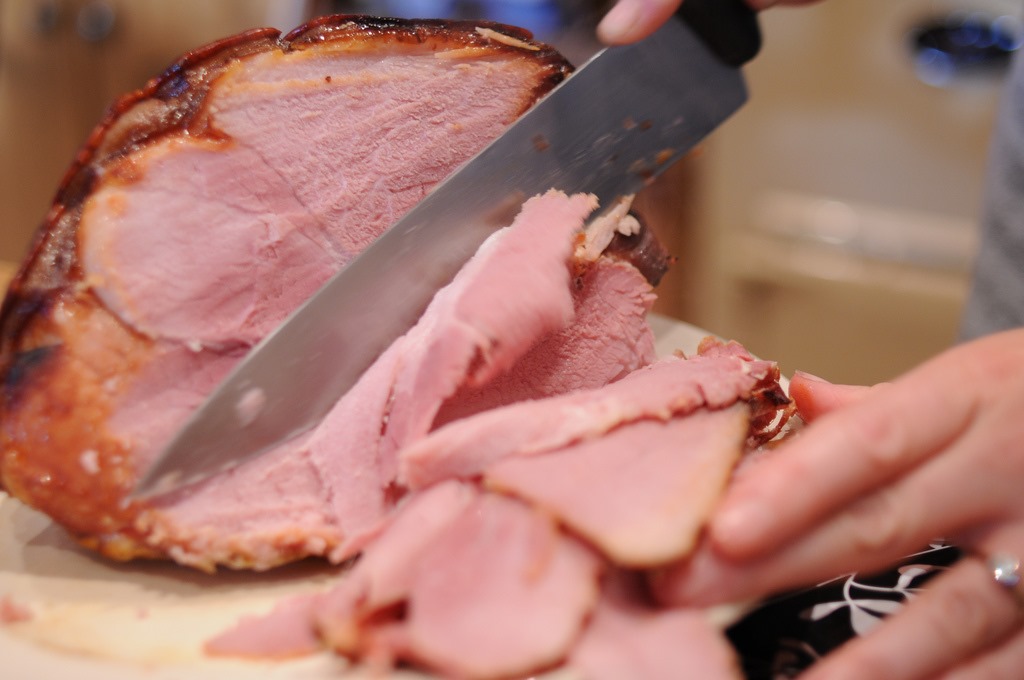
Insert your knife parallel to the bone and cut entirely around it. (Remember, the two L’s in the word “parallel” are parallel to each other, if you forgot your basic math.)
Slice perpendicular to the bone to make nice slices that should fall away from the bone. (You will be cutting into the length of the bone, not the end…obviously.) Do this on either side of the bone.
There will be quite a bit of meat left on the bone, just as with the store-bought spiral cuts. I like to gnaw on this when nobody’s looking remove this meat later with a small knife and use it for any number of recipes needing diced ham, including scrambled eggs, bean or potato soups, fried rice, quiche, breakfast potatoes, salad.
Save the bone and toss it into a soup, crock of beans, or pot of jambalaya.
Here’s the boring printable version of how to bake a ham:
How To Bake a Simple Ham
Author: Christy, The Simple Homemaker
Prep time:
Total time:
A simple, juicy, affordable ham that will not put you into a diabetic coma…at least, I hope it won’t.
Ingredients
a ham
pan
one cup water (optional)
aluminum foil
meat thermometer
oven
optional ingredients for an optional sauce – ours only requires brown sugar and a sauce pan
Instructions
Preheat your oven to 350.
Put the ham in a pretty (okay, so it doesn’t have to be pretty) roasting pan with the bone side down, fat side up.
Add one cup of water to the pan. (Some experts say not to do this, but I do it…so there, experts!)
Cover it completely with aluminum foil. But aluminum foil will kill you! I know, but this ham is so juicy, you’ll die happy.
Cook to 150 using a meat thermometer if your ham is uncooked or partially cooked. If it’s fully cooked, warm it to your desired temperature, but no warmer than 140 or you may dry it out. Blech.
Immediately remove it from the oven.
Let the ham rest covered for 20 minutes or so before slicing, so the juices redistribute throughout the ham.
Remove the drippings to a saucepan over low heat. Stir in 1/4 cup brown sugar or honey, taste, and add more if desired to sweeten the juices to your desired sweetness. Serve on the side so everybody is happy!
3.1.09
I hope your ham turns out as juicy and delicious (and affordable) as ours! Good luck!
Let me know what you think, including your best pointers on how to bake a ham…a simple ham.
But if you talk about scoring the outside in cross hatches, stuffing cloves all over, dousing it in bourbon, and then adding pineapple and maraschino cherries, I’ll know you didn’t really read this post and don’t embrace my “simple” philosophy. (Wink.)
I’m embarrassed to admit that I have no pictures of our own hams. Years of ham baking and experimentation, and nothing to show for it but full tummies. Special thanks to all the photographers credited above…but our hams look juicier. A-hem.
In honor of National Grilled Cheese Sandwich Day (April 12), I created this amazing jalapeño popper grilled cheese sandwich after seeing this juiced-up version on Pinterest. The original uses goat’s cheese and requires me to roast jalapenos. I’m sure it’s totally fantastic, but goat’s cheese is not a part of my current reality. Also, I travel the country in a travel trailer with my hubby and eight kids; I’m not roasting jalapenos.
My version is simpler, requires fewer ingredients, and is much faster, all making it perfect for The Simple Home. Plus, all my testers loved it…and some of them asked for seconds. After all votes were counted and recounted, it was unanimously announced a keeper!
Directions for making a jalapeño popper grilled cheese sandwich:
1. Cut the bacon into 1-inch pieces and toss it into a frying pan. I use my Cutco kitchen shears and cut it directly into the pan, but, as my teenaged daughter reminded me when I was making this sandwich, my way is not the only way, so do whatever you want, people, but you can’t have my car keys! Fry until done. Remove from pan, but leave at least a tablespoon or so of grease in the pan. (Or fry first, cool, and crumble.)
2. Mince the jalapeño. Common precautionary practices for dealing with jalapeños involve wearing gloves. I don’t wear the gloves because I’m smart enough not to touch my face after dealing with a jalapeño…at least I used to be smart enough…until today. Next time I’ll be wearing gloves.
3. Toss the jalapeño into the frying pan with the bacon grease for about 10 seconds, long enough to warm it through. The longer you heat the jalapeño, the more it releases the heat, so keep that in mind.
4. Spread one ounce of cream cheese on each slice of bread. Add a little love.
5. Divide the bacon and jalapeño between four slices of bread. Cover each with another piece of bread…to make a sandwich, ya know.
6. Spread butter on the outside of the sandwiches. This is optional. Okay, it’s butter–it’s not optional.
7. Grill for about four minutes per side. (Times will vary. Don’t leave your masterpiece unattended!) On the road I pop them into a George Foreman indoor grill or “grill” them in the pan where I fried the bacon–its a good way to go. In my old life I used a griddle. You can also use a panini maker, frying pan, outdoor grill, or open fire. You could even “grill” them in the oven!
Adjust everything to your liking and feel free to play with ingredients, but don’t bother trying to go low-fat. Or at least, if you do, don’t tell me about it.
Jalapeño Popper Grilled Cheese Sandwiches go great with homemade tomato basil soup. Don’t they make a cute couple?
Here’s the boring printable version:
Jalapeno Popper Grilled Cheese Sandwiches
Recipe Type: Sandwich
Author: Christy, The Simple Homemaker
Prep time: 12 mins
Cook time: 8 mins
Total time: 20 mins
Serves: 4
Hot, creamy, delicious! This sandwich is everything you could want in a grilled cheese. You can even pretend the jalapeno will fulfill your daily veggie requirements.
Ingredients
eight slices sourdough bread
1 8-ounce package cream cheese
1 12-ounce package bacon
1 jalapeno
4 tablespoons butter
Instructions
Cut the bacon and toss it into a frying pan. Fry until done. Remove from pan, but leave the grease in the pan.
Mince the jalapeno.
Toss the jalapeno into the frying pan with the bacon grease for about 10 seconds to warm it through.
Spread one ounce of cream cheese on each slice of bread.
Spread the bacon and jalapeno over four pieces of bread and make a sandwich using the other piece of bread.
Spread butter on the outside of the sandwiches.
Grill for about four minutes per side. (Times will vary.)
2.2.6
Could you, maybe, make one for me?
What’s your favorite way to do grilled cheese sandwiches?
Did you know that pinning this not only helps you figure out what to make for dinner, but it helps my blog? True story! Thanks for sharing!
Disclosure: I’m pretty sure just about every link on this page is an affiliate link, meaning if you purchase an ebook or Kindle book through one of my links, I receive a portion of the proceeds at no cost to you. It’s a neat way for readers to support their favorite blogs. Crazy awesome, isn’t it?
I am a recovering cookbook junkie. I love all things cookbook. My cookbook cupboard used to groan with overburdened shelves. And then I purged…the cookbooks, that is. One of the cookbooks I purged was my highly rated, but highly disappointing crockpot cookbook. It was filled with canned soups and powdered mixes, and the recipes rarely turned out well.
I was bummed, because I really wanted to love my crockpot, and I really wanted a cookbook to help make that happen.
Enter Crock On by Stacy Myers of Stacy Makes Cents!
Stacy’s beautiful cookbook belongs on a coffee table. I love perusing it, reading Stacy’s entertaining writing, and admiring the beautiful photography. It’s my new favorite e-cookbook. In fact, I like it so much, I bought a print copy.
Oh, I almost forgot. I love cooking out of it, as well.
And so will you.
Here’s why.
First, the recipes are delicious. Let’s face it. That’s the top priority for the husband and the kids. If it isn’t good, it…well…isn’t good.
Second, the subtitle of Crock On is A Semi-Whole Foods Slow Cooker Cookbook. I like the Whole Foods aspect of the book, because every recipe uses real, healthy, wholesome ingredients, unlike most crockpot cookbooks that call for powdered mixes and canned soups. I like the Semi portion of that title, because it indicates that the recipes aren’t over-the-top. In other words, every recipe contains ingredients that are readily available (and easily pronounced). It’s wholesome, yet doable.
Well played, Stacy. Well played.
Check out some of these recipes:
Mexican Chicken Chowder
Hominy Taco Chili (I ate this three days in a row.)
Broccoli Soup
Cheeseburger Sloppy Joes
Carolina Barbecue Chicken Sandwiches
Chicken Tetrazzini
Maple Sesame Chicken
Swiss Steak
Sloppy Chicken
Beef and Broccoli (This was a hit.)
Cream Cheese Chicken
Broccoli Casserole
Pizza Potatoes (Major yum!)
Macaroni and Cheese
Garlic Smashed Potatoes (This was on our Thanksgiving table.)
Want to try a recipe? Here’s a page pulled right out of the cookbook (with permission, naturally, so don’t tattle on me). Click on the image to see the full version or to print it.
Looks good, doesn’t it?
Stacy’s beautiful cookbook is only $5 as an ebook or on Kindle. It is worth much more, but Stacy’s goal is to help her readers save money, so she set the price low. She’s neat like that. I personally think the print version would make a great gift. (Ask her for an autographed copy–it makes her blush.)
Today I’m participating in the Ultimate blog Swap. You’ll find me posting over at Weird, Unsocialized Homeschoolers about how we roadschool (that’s Simple Homemaker lingo for homeschooling on the road), and I’m excited to welcome Amanda from Coping with Frugality at the Simple Homemaker.
Pouch Cooking: Baking Fish in Foil
I love all types of cooking–grilling, baking, fresh food. There is one cooking method that is fast, nutritious, delicious, low-mess, infinitely adaptable, and darn tasty. What is it? Pouch cooking!
Cooking in a pouch is a remarkably simple method capable of producing remarkably complex aromas and flavors. How does it work? Well, if you apply enough heat to food, the moisture inside will be released as steam, right? The steam usually just drifts away, taking a lot of heat with it. But placing food in a pouch is, well, kind of like getting in a small tent on a warm day, okay? Instead of evaporating, that moisture and the heat is trapped right up against the food, cooking it very, very quickly. And since the aromas, the flavors, the essence of the food is captured, fish tastes more like fish, chicken tastes more like chicken, and I suppose, given enough time, I would even taste more like me.
Here is my basic strategy for pouch cooking. I usually pick a meat, this time grouper. Then I build upon that with vegetables. There are a lot of vegetables that would work well with this recipe for baking fish in foil, but this time I picked dried mushrooms, zucchini, and jalapenos. Next is the starch. I love using ramen-style noodles. They are inexpensive, super easy, and taste great in this recipe! Moving on to the aromatics, I never go more than two. This time I kept it simple with lime rind (using lime juice in the sauce as well). Seasonings? Anything goes, but I like to keep things simple. We’ll go with salt and black pepper.
(TSHM Note: Rewritten to avoid plagiarism. Many people aren’t aware that you can copy another person’s ingredient list if you give proper credit, but you must rewrite the instructions. My apologies for not checking this guest piece prior to publishing. It’s all better now.)
Preheat your oven to a whopping 400 degrees Fahrenheit. (You don’t store anything in your oven, do you? Check!)
Crunch up those noodles. Get someone small to help you. Divide them among the foil pieces. Then place on top the following: fish, mushrooms, zucchini, jalapeños, lime zest, salt and pepper.
Wrapping time! Pull up the corners and side of the aluminum foil to all food is safely encased inside. Leave a “chimney” for pouring in the wet ingredients.
Mix together the liquids: vegetable broth, mirin (what is that anyway?) or cider vinegar, soy sauce, lime juice, and sesame oil. Pour an equal amount down each chimney, sealing it off afterward, with the exception of a small steam vent. Pop it all on a baking sheet to contain and overflow. Bake those babies for 15 minutes and serve ’em up good and hot!
Ingredients for Baking Fish in Foil
2 packages Ramen noodles
1 cup dried mushrooms, chopped
4 – 4 oz grouper filets
1 cup chopped zucchini
1/2 teaspoon kosher salt
1/4 teaspoon black pepper
1 quart vegetable broth
1/2 cup mirin or cider vinegar
1/4 cup soy sauce
4 teaspoons sesame oil
Zest and juice from 2 limes
Print the pouch cooking instructions for baking fish in foil here:
Pouch Cooking: Baking Fish in Foil
Author: Amanda of Coping With Frugality
Prep time:
Cook time:
Total time:
Serves: 4
A quick, healthy meal with little clean-up, and open to countless variations to suit any taste. Does it get any better?!
Ingredients
2 packages Ramen noodles
1 cup dried mushrooms, chopped
4 – 4 oz grouper filets
1 cup chopped zucchini
1/2 teaspoon kosher salt
1/4 teaspoon black pepper
1 quart vegetable broth
1/2 cup mirin or cider vinegar
1/4 cup soy sauce
4 teaspoons sesame oil
Zest and juice from 2 limes
Instructions
Preheat your oven to a whopping 400 degrees Fahrenheit. (You don’t store anything in your oven, do you? Check!)
Crunch up those noodles. Get someone small to help you. Divide them among the foil pieces. Then place on top the following: fish, mushrooms, zucchini, jalapeños, lime zest, salt and pepper.Wrapping time! Pull up the corners and side of the aluminum foil to all food is safely encased inside. Leave a “chimney” for pouring in the wet ingredients.
Mix together the liquids: vegetable broth, mirin (what is that anyway?) or cider vinegar, soy sauce, lime juice, and sesame oil.
Pour an equal amount down each chimney, sealing it off afterward, with the exception of a small steam vent.
Pop it all on a baking sheet to contain and overflow.
Bake those babies for 15 minutes and serve ’em up good and hot!
3.2.2885
Did you try this recipe for baking fish in foil? Please share your experience and variations on pouch cooking in the comments below, and rate the recipe!
Visit Life Your Way to see all of the Ultimate blog Swap participants.
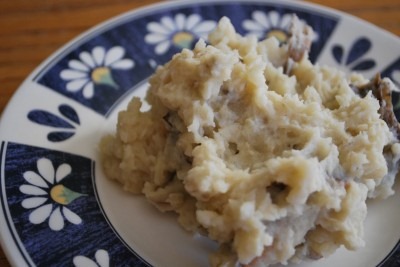
White rice is a staple in many cultures. At our house full of part-Filipinos, it is an essential accompaniment to this version of our favorite Filipino dish, crockpot chicken adobo, which is featured today at Stacy Makes Cents Fix and Forget Friday.
Learning how to cook white rice is so simple, you’ll never buy instant rice again!
Crockpot Chicken Adobo over White Rice
How to Cook White Rice
Ingredients
1 1/2 cups white rice
2 cups water or stock
Directions
Combine water and rice in a medium stockpot.
Bring the rice to a rolling boil.
Give it a quick stir, cover, and turn down to low.
Cook, covered, for 15 minutes without peeking! Do. Not. Peek.
After 15 minutes, shut the stove off. Don’t peek! Leave the rice covered for another 10 minutes—no peekie!
Your rice is done. Fluff it, scoop it, or shape it with a measuring cup.
You may notice that some rice brands and methods of cooking result in a stickier rice. Cultures that use fingers or chopsticks to eat their rice want the nice stick-togetherness that this recipe will provide.
No-measure tip: My Filipino grandfather-in-law always had a pot of rice on the stove, and let me tell you, Filipinos know how to cook white rice. Instead of measuring, he combined the rice and water in the pot, adding enough water so that when he touched the top of the rice with his finger, the water reached the nearest knuckle.
For a true Filipino experience, top your white rice with my family’s Crockpot Chicken Adobo, our version of a popular Filipino dish, which is featured over at Stacy Makes Cents. Your rice will thank you.
Here’s the printable recipe for how to cook white rice:
How to Cook White Rice
Recipe Type: Side dish
Author: Christy, The Simple Homemaker
Prep time: 5 mins
Cook time: 25 mins
Total time: 30 mins
Cooking white rice is so simple, you’ll never resort to instant rice again.
Ingredients
1 1/2 cups white rice
2 cups water or stock
Instructions
Combine water and rice in a medium stockpot.
Bring the rice to a rolling boil.
Give it a quick stir, cover, and turn down to low.
Cook, covered, for 15 minutes without peeking! Do. Not. Peek.
After 15 minutes, shut the stove off. Do not peek! Leave the rice covered for another 10 minutes—no peekie!
Your rice is done. Fluff it, scoop it, or shape it with a measuring cup.
Notes
No-measure tip: My Filipino grandfather-in-law always had a pot of rice on the stove. Instead of measuring, he combined the rice and water in the pot, adding enough water so that when he touched the top of the rice with his finger, the water reached the nearest knuckle.
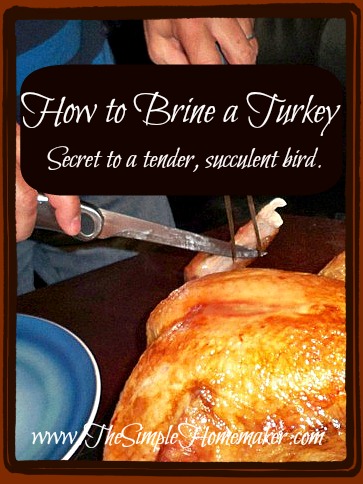
My husband Steve makes an amazing turkey. Juicy, flavorful, beautiful, and with drippings that make the perfect gravy.
The secret is in the brine.
brine [noun]: water saturated or strongly impregnated with salt
Brining turkey can be as simple or complex as you wish it to be. When we first began brining turkey, we used a somewhat involved recipe from Alton Brown’s Good Eats. Over time, we realized that our results are just as wonderful with a far simpler version. Sorry, Mr. Brown–you’re smart, I’m simple, so I win. Somehow that made sense before I typed it.
5-gallon bucket or other large container with a lid (available at Wal-Mart for $3)
turkey
1 gallon vegetable stock (optional)*
water to cover
ice
1 cup coarse kosher salt
1/2 cup brown sugar (optional)
At the very least, you need ice water, salt, a container, and a bird.
Directions for brining turkey
Combine the salt and sugar in the veggie stock and heat on the stove until everything is dissolved. Cool and chill.
Place the turkey in the turkey tub…the bucket.
Add the stock and then if necessary, add cold water until it covers the turkey. Place the lid on the turkey tub.
If you do not have a snow bank to keep the tub in, make room in the refrigerator. We never have that much room in the frig, so we add ice throughout the day and keep it in the coolest place possible.
Brine for a minimum of six hours. We like to brine for two days. Whatever amount of time you can devote to brining will help your turkey “retain water” and make it juicier.
Remove the turkey from the brine, rinse, and roast as usual.
* To make your own veggie stock for brining, bring a stockpot of water and veggies to a boil. Use either ends and leftovers you’ve frozen over time, or fresh veggies. I like carrots, celery, and onion, but use whatever you have on hand. Simmer for several hours (or as much time as you have). Strain. Lately, I’ve been making my stocks in my Instant Pot (affiliate link) in half the time. Give me a woo and a hoo!
A note on veggie stock:
If you have guests with food issues, such as allergies, sensitivities, Celiac, or Crohn’s, please don’t use store-bought veggie stock. Many of them have ingredients in them that will make the turkey unsafe for your guest. Just use ice water or go through the ridiculously simple process of making your own stock.
A note on making gravy from the drippings:
I recently read that you may not want to brine your bird, because, while it will make the turkey more flavorful and juicy, you will have to pay attention to how much salt you put in the gravy or it may be too salty. Ahem. DUH!
If you brine your turkey and make gravy from the pan drippings, do not add salt to your gravy without first tasting it. Rinsing the bird before roasting helps reduce the salt in the drippings.
A note on other birds:
I use a simple brine on my roasted chickens as well, containing only water and salt. My family can always tell when I skip that step.