This post goes out to Facebook fan Jessica. Good luck and have fun with your first major Thanksgiving cooking!
I love to prep as much of my major cooking ahead of time as possible, especially for Thanksgiving, Christmas, and Easter. (I’ve even fed the family breakfast before bed to get a jumpstart on the next day. Note to self: bad idea.) Sometimes my prep backfires, like when my pre-peeled potatoes turn brown.
If I were to ask my husband about that phenomenon, he would draw on his pre-med training and say something all science-y, like the browning is caused when the polyphenol oxidase enzyme is released from the potato’s cells upon cutting. The enzyme immediately begins reacting with the oxygen in the air to turn the phenol compounds within the tuber brown in a process called oxidation.
Oxidation, shmoxishmation. I just call it ugly. They’re still perfectly edible, mind you, but they aren’t perfectly pretty. I like my taters to be pretty before I mash them into an unrecognizable pulp.
Here’s how you can get a jump start on your potatoes without the ugly.
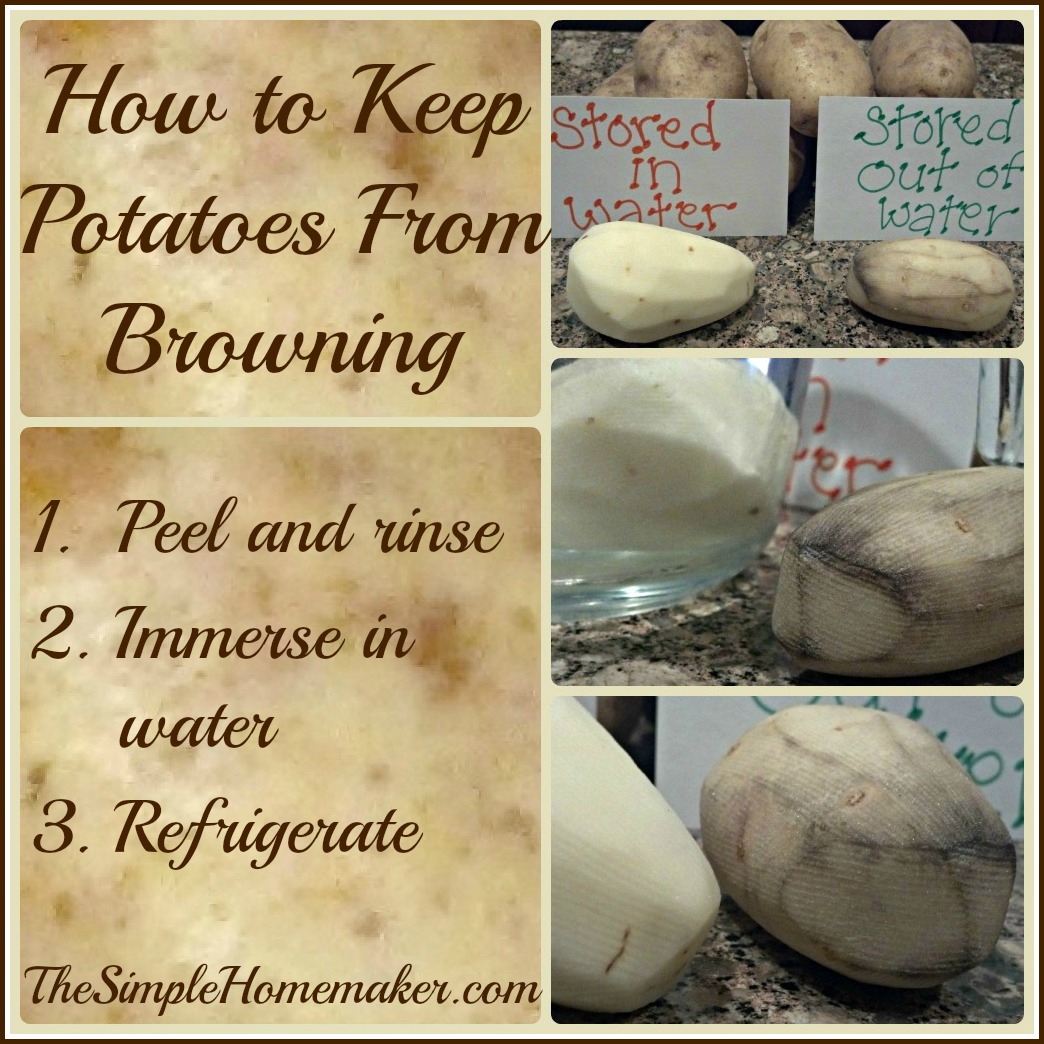
How to Keep Potatoes from Turning Brown
Peel and rinse the potatoes. (So far so simple.)
Place them (whole, sliced, or diced) in a bowl, pot, bucket, trough, whatever, and cover them completely with water. Completely! Taters in, air out.
Store the bowl in the refrigerator. (I cheat on this step if I don’t have room in the frig. Shhh.)
That’s it! Told ya it was simple. Simpler than that whole polyphenol oxidase thingie.
Notes:
I only do this overnight. Some people claim you can do this up to three days in advance as long as you replace the water and rinse the potatoes daily. Some people might be right about that. (See the comment section for other opinions.)
Others add a splash of lemon juice to keep potatoes from turning brown. This is a good practice for something that might be sitting in open air. Scientifically, however, the browning occurs when the potatoes come in contact with the oxygen in the air, which is an impossibility when the tubers are immersed in water whose oxygen is firmly bonded to hydrogen and won’t be oxidizing any taters. I save my lemons for lemon pie. Mmmm…pie.
I know you’re all itching to know why potatoes don’t turn brown after they’re cooked. Well, if I were to bother my pretty little head about such things, I would tell you that heat denatures the enzyme, rendering it inert, so it no longer reacts with the oxygen to transform the phenol compounds. (Heat kills enzymes.) But all that science just gives me a rash.
Another alternative: crockpot mashed potatoes
My dear blog friend Stacy from Stacy Makes Cents has a recipe for crockpot garlic mashed potatoes in her e-cookbook, Crock On. Crocking your taters would entirely free you up from even having to think about them. It would almost be like having a personal chef make the potatoes for you, and all you had to do was eat them. Crockpots are neat like that.
Read my review about Crock Onhere, or, if you want the recipe for crockpot mashed potatoes for Thanksgiving and don’t want to bother with any ol’ reviews in case it talks about phenols and denaturing enzymes (which it doesn’t),buy it now for $5, or get it on Kindle. That’s how I’m making our mashed potatoes this year.
One more Thanksgiving tip:
Brine your turkey! It’s simple and makes all the difference for a juicy bird. Here’s how.
Jessica, I hope this tip for keeping potatoes from turning brown helps you out! Happy Thanksgiving! (Have a question? Submit it in the contact me section.)
I love a good, juicy ham on Easter and Christmas (and any day in between). Too often the hams we’ve had are dry, expensive and sickeningly sweet, even when we bought the high-priced, big name hams from the ham store. It’s enough to make a person sit down and cry into her taters. Therefore, we took it upon ourselves to find the cheapest, tastiest method of preparing ham that we could…just for you. You’re welcome.
optional ingredients for an optional sauce – ours only requires brown sugar and a sauce pan
Which ham should I buy?
The most convenient ham is, naturally, the spiral-sliced. Our experience with spiral cut, however, is that they dry out very easily. Because they are already cut, the heat has more surface area from which to draw moisture. Nothing can prevent moisture loss to some extent, not even the reams of aluminum foil we use to try and prevent its drying out.
For that reason, we buy unsliced ham, which, to our delight, is cheaper. I like the shank, because it is often the cheapest of all and not too difficult to slice. You can also grab yourself a nice butt which will work just as well for the same price or just a few pennies a pound more, depending on your store. According to our old butcher, the shank and butt are essentially the whole ham (which is the leg) chopped in half to form the separate cuts. With such little difference, I go for whichever is cheaper. (Here’s more than you ever wanted to know about ham cuts.)
Watch for a sale around the major holidays and you’ll really score big with your ol’ pigskin.
How do I cook the ham?
Preheat your oven to 350.
Put the ham in a pretty (okay, so it doesn’t have to be pretty) roasting pan with the bone side down, fat side up.
Add one cup of water to the pan. (Some experts say not to do this, but I do it…so there, experts!)
Cover it completely with aluminum foil. But aluminum foil will kill you! I know, but this ham is so juicy, you’ll die happy.
Cook to the proper temperature as explained below, and immediately remove it from the oven.
Let the ham rest covered for 20 minutes or so before slicing, so the juices redistribute throughout the ham.
How long do I cook the ham?
If the ham is pre-cooked, heat it to an internal temperature of 110-140 (Fahrenheit) and pull it from the oven, depending on how warm you want your ham. (If it’s fully cooked, you can theoretically eat it cold.)
If the ham is not pre-cooked or only partially cooked, heat it to 150-155 (Fahrenheit) and pull immediately. I know the meat police say 160, but it will continue cooking 5-10 degrees after you pull it. I pull at 150. If you wait for 160, you may have a dry ham. You’ve been warned.
Use a meat thermometer! Insert it well into the meat, but not touching the bone. if you don’t have a meat thermometer and you cook meat, buy one. If you don’t want to buy one, you’ll be cooking roughly 20-30 minutes per pound, but I won’t guarantee that your stove doesn’t run hot and that you won’t be eating a football. In that case, I wash my hands of your ham.
I won’t even go there! Okay, maybe just a little. There are as many ham glaze recipes out there as there are cooks to prepare them. Personally, I don’t like to be knocked out by an overwhelming shot of sugar, bourbon, cloves, or pineapple when all I really want is a nice big mouthful of meat. I want to taste the ham! Is that so wrong?!
Are you with me? It’s okay if you’re not, because you can do a quick search on any recipe site for half a gazillion glazes. Here are 68 glaze recipes from my favorite recipe site, AllRecipes.com. Read the reviews and pick your favorite…but might I recommend you keep it simple?
Because my husband likes the option of a subtle sweetness with his ham, and others in my family like the option of eating ham without going into a diabetic coma, this is the method he whipped up:
The Simple Homemaker’s Husband’s Simple Ham Sauce
Pour the pan drippings into a saucepan.
Add 1/4 cup or so of brown sugar or honey (depending on how sweet you want it and how much juice you have).
Heat it on the stove stirring to dissolve the sugar or honey, and testing for the sweetness level you’re looking for.
Adjust with water if it’s too salty or thick, and sugar or honey if you want a sweeter juice. Taste as you go and adjust gradually.
Serve it on the side as an optional au jus.
It is simple and delicious, but doesn’t coat the ham with sugar, which many people in my family can’t (or won’t) eat.
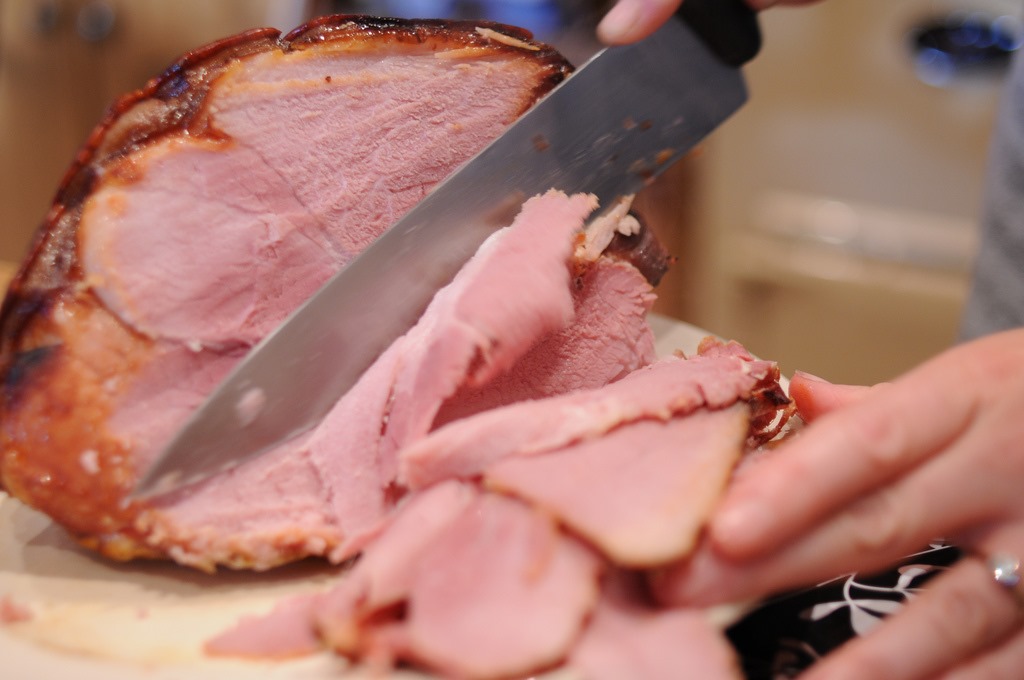
Insert your knife parallel to the bone and cut entirely around it. (Remember, the two L’s in the word “parallel” are parallel to each other, if you forgot your basic math.)
Slice perpendicular to the bone to make nice slices that should fall away from the bone. (You will be cutting into the length of the bone, not the end…obviously.) Do this on either side of the bone.
There will be quite a bit of meat left on the bone, just as with the store-bought spiral cuts. I like to gnaw on this when nobody’s looking remove this meat later with a small knife and use it for any number of recipes needing diced ham, including scrambled eggs, bean or potato soups, fried rice, quiche, breakfast potatoes, salad.
Save the bone and toss it into a soup, crock of beans, or pot of jambalaya.
Here’s the boring printable version of how to bake a ham:
How To Bake a Simple Ham
Author: Christy, The Simple Homemaker
Prep time:
Total time:
A simple, juicy, affordable ham that will not put you into a diabetic coma…at least, I hope it won’t.
Ingredients
a ham
pan
one cup water (optional)
aluminum foil
meat thermometer
oven
optional ingredients for an optional sauce – ours only requires brown sugar and a sauce pan
Instructions
Preheat your oven to 350.
Put the ham in a pretty (okay, so it doesn’t have to be pretty) roasting pan with the bone side down, fat side up.
Add one cup of water to the pan. (Some experts say not to do this, but I do it…so there, experts!)
Cover it completely with aluminum foil. But aluminum foil will kill you! I know, but this ham is so juicy, you’ll die happy.
Cook to 150 using a meat thermometer if your ham is uncooked or partially cooked. If it’s fully cooked, warm it to your desired temperature, but no warmer than 140 or you may dry it out. Blech.
Immediately remove it from the oven.
Let the ham rest covered for 20 minutes or so before slicing, so the juices redistribute throughout the ham.
Remove the drippings to a saucepan over low heat. Stir in 1/4 cup brown sugar or honey, taste, and add more if desired to sweeten the juices to your desired sweetness. Serve on the side so everybody is happy!
3.1.09
I hope your ham turns out as juicy and delicious (and affordable) as ours! Good luck!
Let me know what you think, including your best pointers on how to bake a ham…a simple ham.
But if you talk about scoring the outside in cross hatches, stuffing cloves all over, dousing it in bourbon, and then adding pineapple and maraschino cherries, I’ll know you didn’t really read this post and don’t embrace my “simple” philosophy. (Wink.)
I’m embarrassed to admit that I have no pictures of our own hams. Years of ham baking and experimentation, and nothing to show for it but full tummies. Special thanks to all the photographers credited above…but our hams look juicier. A-hem.
I love decorating for special occasions, but I don’t like spending money on it. I don’t want to spend hundreds of dollars on holiday décor that I will forever worry that my children will mess up. Can I have an Amen? Little louder next time, please.
AMEN!
Thank you.
In my opinion, humble though it is, Thanksgiving is one of the easiest holidays to decorate for, if–and that’s a great big imposing if like this:
IF
–if you keep it simple.
Here are some simple ideas for decorating for Thanksgiving:
Decorate with produce.
Set apples, pears, and pomegranates in a large glass or ceramic bowl, in a trifle dish, or on a raised cake platter. Fill a glass bowl with cranberries and set a candle in a slimmer glass container inside. After the event, eat them. Eat them all! Or make pie. Mmmm…pie. There is no finer food.
Here’s an old photo (forgive the quality) of a centerpiece we threw together a few years ago. We hollowed out some of the apples to use as candle holders. (Don’t eat those.) We added some pine cones, a pillar candle, and fake leaves and berries (you could use real leaves and cranberries). It was quite charming and made entirely from what we had on hand. (I see a pecan pie in the background. Mmmm…pie.)
Decorate with nature.
We live in the desert, and bringing in a cactus or two isn’t very festive this time of year. Leaves, on the other hand, are beautiful. If you have fall leaves, bring them in, press them under a book, preserve them with modge podge, spray veneer, or laminate. Pinecones are also lovely. Fill a basket with pine cones and maybe some wooden beads. (Pinterest will hook you up, if you need ideas. Run a Pinterest search for leaf or pinecone crafts.)
Nature is beautiful. You really can’t do better, so why not bring it indoors. God didn’t copyright his work, so go ahead and use it; just remember to give credit where credit is due.
Let the kids work their magic.
There is a certain charm in a home decorated with handprint turkeys, a child-personalized napkin ring set, thumbprint place cards, a paper table cloth the kids decorate as they’re waiting for the turkey, and other works of art! Save them (not the table cloth) and set them out year after year to see how the littles have grown into middles and biggles. You may want to skip that last part if the reminder of the rapid passing of years makes you cry into the pie. (Mmmm…pie.)
Add something handmade each year.
Try a simple (I said SIMPLE) project, like this one that took my four-year-old 15 minutes and which used materials we had in the house.
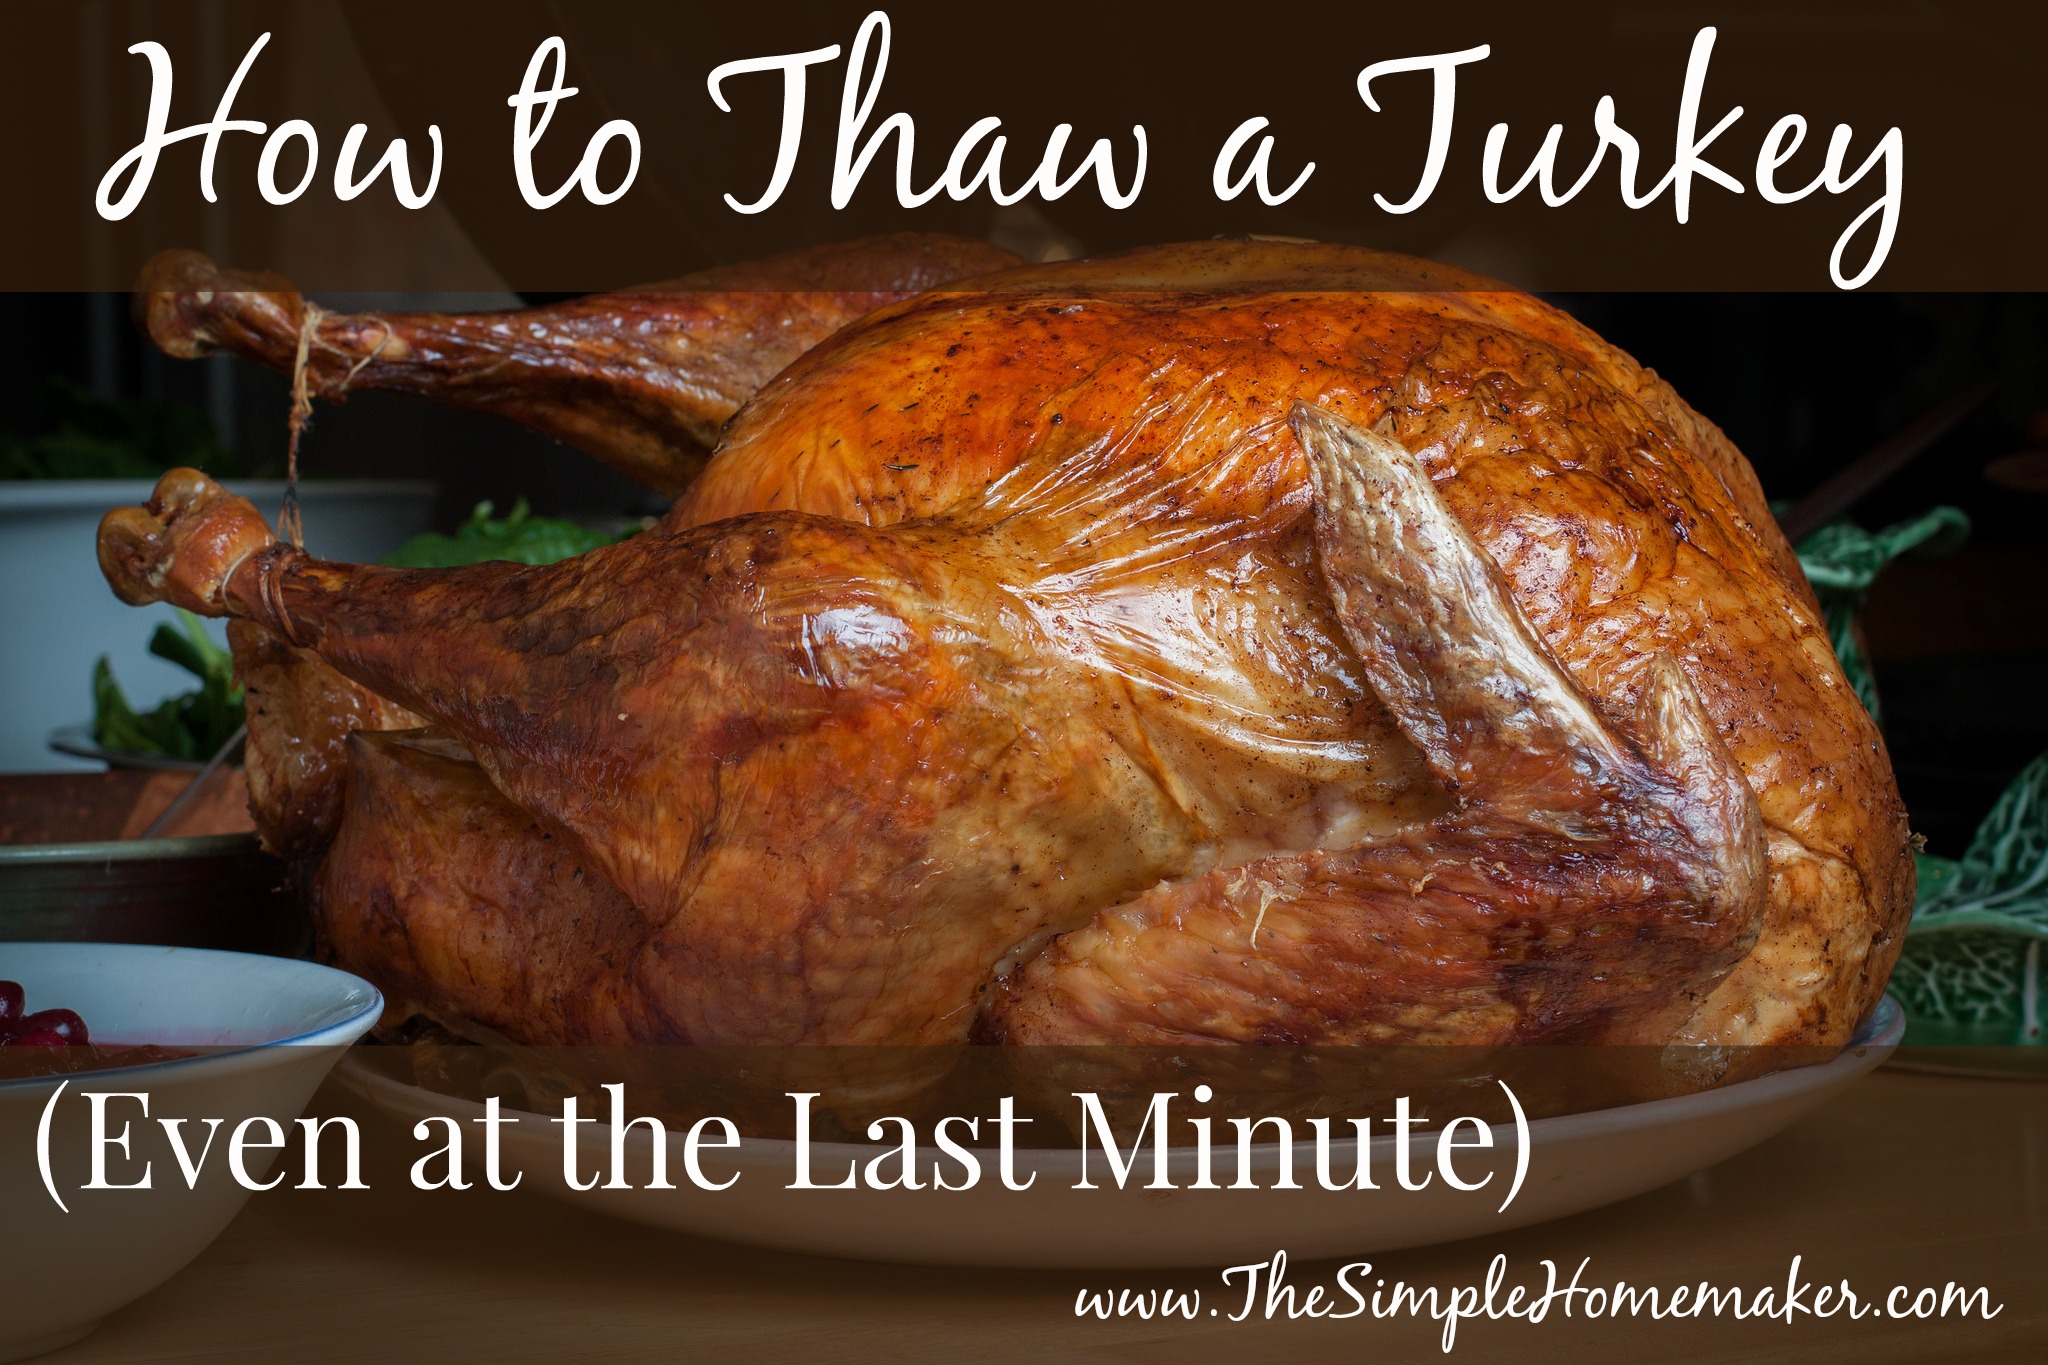
When it comes to thawing turkey, we’ve got your back with these guidelines garnered from Butterball and Cook’s Country:
How to Thaw a Turkey
If you have 3-5 days, follow this guide:
Move the turkey from the freezer to the refrigerator.
Leave it in the wrapping it came in.
For some reason which I don’t know, Butterball says to thaw it breast side up.
To keep it from leaking all over everything else in your fridge, place it in a large baking pan or tray.
Allot a day for every four pounds of turkey. That means a twelve-pounder will take three days, a twenty-pounder will take five days, and, if you’re roasting Big Bird, you should probably start thawing in July.
How to Thaw a Turkey at the Last Minute
If you pulled the major oops and forgot about your turkey until the day before you need your bird (or the day of), follow this guide:
Leave the bird in the wrapping.
Plop the frozen bird in water. Make sure it is completely covered. You can use a cooler, a five-gallon bucket, the sink, or, hey, your bathtub. Changing the water frequently will speed up the process.
This method requires an hour for two pounds, so, again, 12 pounds is 6 hours, 20 pounds is 10 hours, Big Bird is–you know, this roasted Big Bird talk is morbid and disgusting.
When your bird is thawed, you have two to four days to get it from thawed to cooked, so don’t get too distracted and forget about your bird.
Just so you know, the term “last minute” is figurative. If you literally forgot to thaw the turkey until the minute it was supposed to go in the oven, turn on the game, order pizza, and invite everyone back tomorrow. It will make a great story to tell your daughter-in-law when she forgets to thaw her turkey.
If you’re interested in a super juicy bird, don’t forget to brine your turkey.
Okay, this is your time to “shine.” What’s your best “forgot to thaw the bird” story?
My story: I’ve never forgotten to thaw a bird, but I did set one inside the garage door when I came home from the grocery store and forgot it there…for days. Why didn’t I notice it? Apparently, I rarely used that door, and also it was a buy-one-get-one-free sale, so the other turkey was getting all the pre-Thanksgiving TLC. We smelled found it eventually.
My favorite holiday is so close I can almost smell it–creamy mashed potatoes with oodles of butter, my mom’s fresh potato rolls with oodles of butter, my daughter’s homemade stuffing with oodles of butter. Except this year, I can’t eat butter. Our baby has an allergy–we can’t figure out the culprit, but for now Mama is on an elimination diet which means Thanksgiving dinner is going to look more like turkey and green beans–no butter.
And that’s okay. I’m still super excited for Thanksgiving.
Why? Because it’s not about the food. It’s not even about the pie if you can believe I’m saying that. It’s about the thanks.
Which brings us to Thanksgiving pet peeve number one:
Random Citizen: “I’m thankful for this and that and that and this.”
Great, but who gets your thanks, Random Citizen? The air? The fates? The universe? They don’t want your thanks and they certainly don’t deserve it. God does.
You knew there’d be a Thanksgiving pet peeve number two:
Even though I am running 26 Days of Thanksgiving in Photos on my Facebook page, I don’t like those “gimmicks.”
Why not? They’re great! You’re such a humbug. That’s why you named your son Ebenezer.
Chill–good grief. I don’t like them because they end. We focus on Thanksgiving for a day, perhaps a month, and then it bluntly ends like this sentence. Done. Bam. No more.
It’s time to reconcile both of those pet peeves.
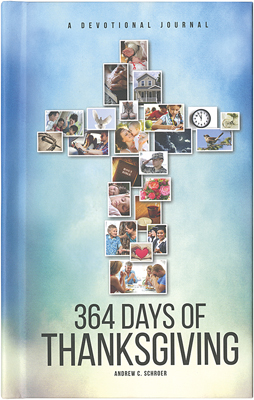
Pastor Andrew Schroer who shepherds a friendly bilingual Christian church out in a li’l ol’ western town in Texas wrote a devotional journal called 364 Days of Thanksgiving. In it, Andy encourages us to:
Be thankful every day.
Address our thanks to God.
I love it when something single-handedly (or single-pagedly) decimates my pet peeves, don’t you? Of course you do. It gets better.
364 Days of Thanksgiving is also a journal, providing space for you to write down one thing to be thankful for each day–even I can handle that. The trick is it has to be something different, so you can’t do this:
Day 1–cookies
Day 2–cookies
Day 3–cookies
Day 4–cookies
Day 5–cookies
Day 6–cookies
I’m not sure if you can do this:
Day 1–chocolate chip cookies without nuts
Day 2–chocolate chip cookies with nuts
Day 3–cookies after church
Day 4–Great Grandma’s molasses cookies
Day 5–getting the last cookie in the jar before Steve does
Day 6–secretly enjoying the cookie I hid in my sock drawer after everyone else went to bed
Probably not.
What about day 365? Dickens said we Americans had it backward (he actually said backwards with an S, being British) when we gripe all year and thank one day. He says we should thank 364 days and gripe one day. Andy one-ups good ol’ Dickens: on day 365 you sit down with the last cookie from your sock drawer and read over the entire journal showing how God (not the universe) has blessed you.
Do you see what’s happening here? By focusing on gratitude for an entire year, you become more grateful and more aware of your blessings. Instead of griping over the lack of oodles of butter, you rejoice over the potatoes. Gratitude becomes a habit, and you become a grateful dry potato eater instead of a disgruntled butter lover. It’s a beautiful transformation!
Andy with his stunning bride, Clariza
While I might possibly still have your attention, know this: 364 Days of Thanksgiving is not filled with blank pages awaiting your thanks. Andy fills it with encouragement and the great stories (parables, really) that his parishioners expect to hear when he steps up to the pulpit.
Now, if you’re following along on our Twelve Weeks of a Simple Christmas missions, you could finish a huge chunk of your Christmas list with just this book. No lie…because I don’t lie…except that one time which is none of your business but which really makes me grateful for Jesus and forgiveness.
I don’t normally post crafts on TSHM. It is too easy to become mired under a pile of wanna-do’s and feelings of inadequacy, and I don’t want to increase that by making you feel like you should do more…more…more. But…crafts are fun, and as long as you commit to not overdoing it, I will post the occasional simple, affordable, totally doable project. Cross your heart? Okay.
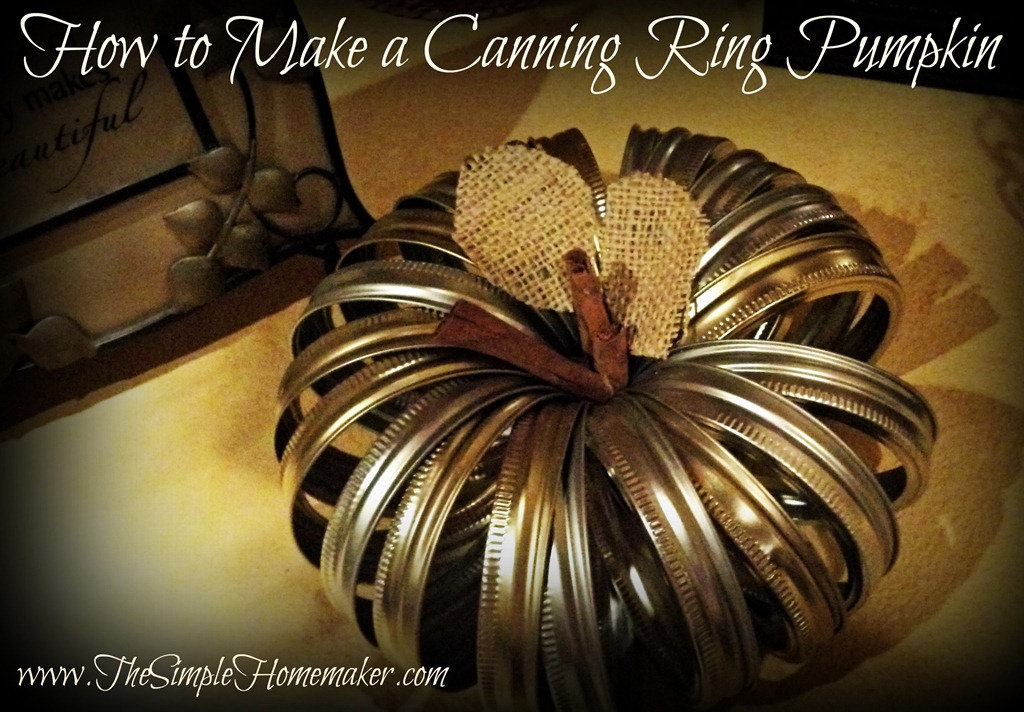
I saw this simple and charming mason jar ring pumpkin on Pinterest.
We have loads of mason jar rings just screaming to be a part of our Thanksgiving décor. I can respect that, so I popped through to the original post at Simply Klassic, where I learned two things: 1) Kristin, the original crafter is a terrific photographer and wonderfully creative, and 2) this craft is indeed simple, free, and quick.
My four-year-old ballerina and I threw this charming pumpkin together in 15 minutes Kristin did it in five), and everyone who has seen it has said, “Wow, where did you get that?”
My ballerina did most of the work while I made dinner, but because I tied the string, she refuses to let me say that she made it alone. She keeps a body honest.
How to Make a Canning Ring Pumpkin
Supplies:
20-ish mason jar rings (I would go about 24. Ours could use 2-4 more)
small piece of string—a foot or so
cinnamon sticks or real sticks
burlap or other material or real leaves
one enthusiastic four-year-old ballerina, the cuter the better
Directions
String the rings on the string (it worked better when we put them all on in the same direction).
Tie the string tightly and cut away the excess.
Stick sticks (cinnamon or otherwise) in the center.
Cut out leaves and plop ‘em on top. (I drew them on the burlap for Rebecca.)
I called it complete at this point. If you want, however, Kristin says you can spraypaint the rings orange or white. I think it would be quaint to give them a weathered look with brown paint that you’ve either watered down or rubbed off immediately after painting it on. I need to use our rings to make yogurt in our Excalibur dehydrator, so we left them plain. (Plus paint equals more time and mess and less simplicity, and my ballerina was not interested in replacing her tutu with a paint shirt.)
That’s it!
Bask in the magnificence of it all. Name your pumpkin (Becca named ours Olivia Faith). Take pictures. Pin them, post them, send them to your mom (don’t forget to tell her you love her, and say “hi” from me).
If you make the canning ring pumpkin, send me a picture on Facebook!
Special thanks to Kristin at Simply Klassic for sharing this craft with us, and letting me share it with you. Go check out her end result using older, tarnished rings—very charming.
As mid-November rolls around, the fever hits. It begins with a little tickle, almost an itch, and in no time at all it is an all-consuming full body rash. It’s Holiday Fever! Do you feel the tickle?
There’s nothing wrong with Holiday Fever that is kept in check, but when it isn’t caught early, it can take down a full-grown mama and her family, too, as collateral damage.
Holiday Fever usually begins with a single thought: “This year’s going to be different…better.” Some well-intentioned folks even say, “This year, I’m keeping it all in perspective.” But then idle hands flip through a Better Homes and Gardens magazine in a waiting room, or wayward feet head to the Christmas section in the store, or eyes head to Pinterest to “just take a peek.” Before you know it, that once dormant holiday virus strikes full force, and the victim is once again over-planning, over-scheduling, over-committing to the perfect holiday…which never is.
It’s time to redefine perfect.
Perfect is not running around frazzled. It’s not whiny hungry kids wanting cookies, but needing wholesome family meals and some mama time. It’s not a mountain of stuff surpassed only by a mountain of debt. It’s not the insane lists of “what you have to do this Christmas” I’ve seen floating around the world of cyber-insanity. Let’s redefine the perfect holiday, shall we? Okay, I will, and you can just sit there licking a peppermint stick.
The Perfect Holiday Redefined
The Dreaded…I Mean Perfect Family Photo: Instead of a picture perfect, expensive, and all-too-torturous Christmas photo experience, TPHR (that’s my super-cool code for The Perfect Holiday Redefined) photos show a laughing, joyful, real family…maybe with messy hair, maybe with mismatched outfits, maybe in PJs, maybe with the hot cocoa bribe evidence still on their faces. The point is, the experience wasn’t torturous…except for the innate fact that any family photo borders slightly on the inhumane…at least in a family of nine.
Hey, (almost) everyone is looking in the right direction and 7/9 of the family is represented. “A” for effort, good enough, let’s have cocoa!
The Perfect (Or the Existing) Christmas Card: As much as I love getting Christmas cards (giddy like a kid in a candy shop with non-sugar-phobic non-budget-oriented parents), I’m going to say this and mean it. You do not need to send out Christmas cards. Really! You don’t! If you want to do something, how about a TPHR email, or a card in, say, July. I love getting my grandparent’s Christmas letter around February. It’s cold outside, winter’s gotten long, the kids are restless, and BAM! A TPHR card and letter in the mail. What fun!
The Perfect Wrapping: Seriously? Do we need to go there? It will be torn into little unrecognizable shreds and thrown in the fire where it will be burned into ash. One year I meticulously wrapped all the presents I sent across the country, imagining them sitting for days under perfectly decorated trees, accenting the holiday décor. There were blizzards, the mail was late, they got left at the end of the driveway in a pile of snow, and they were left in the box so long that when they were finally set out, they were mushed…in terms of perfection, it was a mess. Most years, my children have a blast wrapping presents themselves…and single-handedly keeping the Scotch brand in business for another season (the tape, not the booze). TPHR wrapping may not look perfect, but the family has fun doing it together…and that’s “perfecter,” like my grammar, which is the perfectest.
The perfectest.
The Perfect Decorating: Charlie Brown’s tree is cute, isn’t it? And it was affordable. ‘Nuf said. Okay, I’ll say this, too. If you’re distracting your kids with coloring pages and television so you can spend hours and dollars creating holiday décor perfection that you don’t want said offspring touching, or if you tell your children they can’t help because they won’t decorate “right,” then you have a problem…emphasis on “you”…and on “problem”…and on “have a.” It’s okay to have a don’t-touch tree and don’t-touch nativities, and it’s okay to keep them safe from anybody who might throw Baby Jesus across the room and shatter him. But don’t let that dominate your décor if you have children. When I was growing up, my little brother made a Christmas robot man out of toilet paper rolls and hung it on the tree…every year. My mom never once made any of us think it wasn’t good enough. In fact, I think she still hangs that baby on the tree, and my brother is in his 30s. (I secretly think he’s still making them, too, but I have no hard evidence.)
The Perfect Gift: If it’s going to add clutter to someone’s life, is it really that perfect? Think about it. I know the “experience gift” is popular, so why not go that route? Perhaps a giftcard for your grandson to go with you to see Star Wars VII in 2015…or something a little sooner. Perhaps a repurposed basket filled with food for a date night. The basket can be used or regifted and the food can be eaten. Think outside of the stocking…so to speak. Or make a deal with your extended family that their presence is your present, and vice versa. My favorite gift for people that don’t really need anything is a donation in that person’s name. Compassion International and World Vision are two of our favorites, but there are many others. Of course, a Stephen Bautista CD is always an ideal gift that nobody would consider clutter! (Yes, that was a blatant, shameless plug for my husband’s music. What can I say? I’m a fan.)
World Vision gift recipient, drawn by my 13-year-old daughter Marissa.
The Perfect Meal: Are you left alone in the kitchen slaving over a hot stove (don’t you just love that expression—it makes me feel like I’m wearing three skirts working in the sweltering old servants’ kitchen at Mt. Vernon sweating into President Washington’s fish muddle and hoe cakes) to prepare elaborate Thanksgiving and Christmas meals for your family and guests? Why not draw them in by giving everybody something to do? You’ll have company and help, and, although it may not turn out exactly as you envisioned it, you’ll be making memories together. (Just don’t be the bossy perfectionist. You know the one!) Other options are appetizer buffets and potlucks. Mmmmm…food.
The Perfect Cookie: Don’t stress over outdoing everyone else or about filling a cookie platter. Do you have a cookie reputation to live up to? It’s time for a reputation overhaul if that one is stressing you out. TPHR cookie perfection is simple: if it’s got butter in it, it’s perfect! Seriously, if it’s fun for you or your children, great. If not, arrivederci. (Uh, that’s Italian for adios! ciao! you’re outta there!) Now, about the ideally decorated cookie, let the kids decorate the cookies! They’ll learn how, they’ll have fun, and so what if they don’t look like the one you saw on Pinterest. So what?! So! WHAT!!! So what so what SO WHAT!!! The cookie is going to be eaten and turned into…something that’s not a cookie. So… SO WHAT!!!
Cookies and candies made by my children.
The Perfect Extras: In my life in my head, my family sits around the tree (lit by real candles, naturally) enjoying Advent readings nightly, sipping homemade cocoa with no sugar (because the family in my head doesn’t need sugar), enjoying the ambience of the handmade ornaments and wreathes and tree skirt, all, of course, wearing our handknit sweaters…and nobody ever whines. The family on the outside of my head is a little whinier, and there are a few other differences, too…like all of them. If the crafts and the “moments” and the Advent readings and such are important to you, that’s great, but make it doable, and make it enjoyable. Advent readings are important to me, but they don’t pan out on a nightly basis for everyone, so we opt for Sundays and Christmas Eve. The last time I lit a candle in my house, I started a small fire. The crafts are hit and miss. We may get one accomplished in a season. And the handknit sweaters? Ha ha ha ha haaaaaaa! Keep it realistic and you’ll keep it fun.
The Perfect Schedule: Instead of slating out your family’s schedule and possibly over-committing people to things they really don’t want to do, call a family meeting. Ask everyone what they want to do as part of TPHR. Do they want to watch The Grinch? Schedule it. Do they want to drink hot cocoa while looking at Christmas lights? Schedule it. Do you want to read Luke 2 on Christmas Eve? Schedule it. Do they want to watch football on Thanksgiving? Schedule it. Which of the half dozen Christmas invitations does the majority WANT to accept? Schedule them. Advent readings? Crafts? Christmas cards? Cookies? Schedule them. But don’t overschedule! Keep it simple. Keep it fun. Keep it TPHR-friendly.
Keepin’ it fun!
Are you catching a theme here? Put people above perfection. Stop striving for the unattainable. Your kids won’t remember or much care that you were in the kitchen creating cookie perfection. They will remember that they were in the kitchen with you, laughing and making a big ol’ mess. That, my friends—the laughter and, yes, the big ol’ mess—that is the perfect holiday redefined. Now go make a big laughing mess…and maybe clean it up when you’re done…together…while laughing…because that really is the perfectest!
To help you redefine the perfect holiday, my husband and I are teaming up on an ebook, available soon. Sign up as a subscriber to get all the details when it’s available.
How do you keep it all in perspective?
Helpful links:
Truth in the Tinsel is a hands-on journey through Advent for children. This year Amanda, the author, is offering printable ornaments to make it even easier for parents to implement the program. That makes it ideal for a simple Advent project. Last year’s participants gave it rave reviews. Check it out here.
This post contains affiliate links. They don’t bite, but I thought I should tell you about them anyway.


)


)
 My dear blog friend Stacy from Stacy Makes Cents has a recipe for crockpot garlic mashed potatoes in her e-cookbook, Crock On. Crocking your taters would entirely free you up from even having to think about them. It would almost be like having a personal chef make the potatoes for you, and all you had to do was eat them. Crockpots are neat like that.


)


 Be thankful every day.


")


