How to Fry an Egg

This post contains affiliate links and an egg-frying technique. Beware. 

Embarrassing Confession: Until last month I couldn’t fry a decent egg to save my family. Life wasn’t always so grim. I used to fry eggs just fine. I didn’t really know what I was doing, but that didn’t seem to matter. I had a pretty good egg-frying track record. I temporarily thought I was endowed with a little extra magic in the kitchen or maybe a bit of beginner’s luck. Then somehow, I lost my egg-frying abilities. It was a sad day fifteen years. I now know it wasn’t beginner’s luck or talent that landed the rare identifiable egg on my hubby’s plate–it was just God offering my hungry husband a little mercy.

Now, however, I can fry an egg like a pro because I learned from the pros. You may think this is no big deal and a ridiculous post, but I can guarantee you there is a Frustrated Someone out there searching “How to fry a stinkin’ egg already!” I get you, Frustrated Someone. I totally get you.

I learned how to fry a stinkin’ egg (and do other amazing-to-me things in the kitchen) from the book my hungry husband gave me for Christmas, entitled The America’s Test Kitchen Cooking School Cookbook: Everything You Need to Know to Become a Great Cook. It’s a big title and an even bigger book.

In case you think my husband’s a big fat meanie, I requested the book after one too many broken eggs and dry roasts.

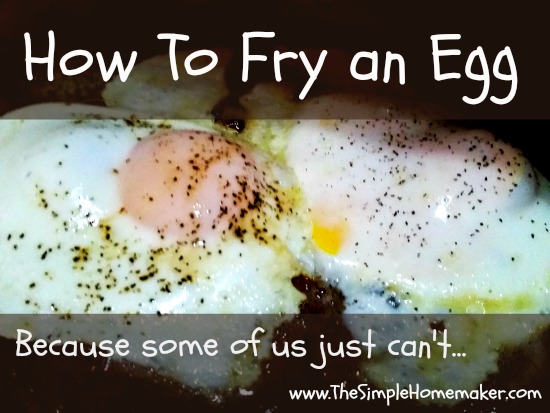
Anyway, this really isn’t about the book. It’s about how to fry a stinkin’ egg already! (This is a bad picture of my stinkin’ eggs, but when you live in a trailer and shoot with a cell phone, it’s how egg pictures look. Trust me that the rest of my eggs looked much better than the eggs in this picture, but we were so excited that I was making consistently (instead of randomly and rarely) awesome eggs that we ate the stinkin’ things with no pictures.)

How to Fry an Egg ... because some of us just can't.

How to Fry a Stinkin’ Egg

(According to America’s Test Kitchen, with some additions from l’il ol’ me)

What You Need:

  • non-stick pan–8 or 9 inches for 2 eggs, 10 inches for 4 (I just use what I have)
  • butter–about 1.5 teaspoons per 2-4 eggs (3 teaspoons is a tablespoon–memorize it)
  • stinkin’ eggs–2 per person is reasonable, eh?
  • spatula (turner)
  • timer

What You Do:

  1. Heat the pan over medium-high heat for five minutes. Set your timer.
  2. Meanwhile, crack the eggs on a flat surface, not on the edge of the bowl or pan. Why not? Because minuscule egg shell fragments may be forced into the egg, and you won’t see them and then you’re swallowing little shell shards and making your intestines cry. Nobody wants weepy intestines.
  3. Put the eggs in a cute little bowl, two eggs to a bowl. If you’re making four eggs, use two bowls. That way the eggs all go in at the same time and get done at the same time. Eggs like everything to be fair.
  4. After the pan has been heating for five minutes, toss the butter into the pan. When I say toss, you know I mean place gently, right?
  5. Tip the pan to melt the butter and coat the pan. The butter should melt in under a minute. If it takes longer than a minute, your pan is not hot enough–heat it longer. If your butter burns during that minute, your pan is too hot–start over, and, uh, it’s okay to cry a little, too. I mean, it’s butter!
  6. Gently tip the cute little egg-bearing bowls and gently deposit the eggs into the properly heated pan. Don’t plop them in from the heavens. Get down in there.
  7. Hurry scurry like a little bunny and salt and pepper those babies, unless your preschooler is eating them and doesn’t like pepper. Test Kitchen Guru says 4 parts salt to one part pepper. I just shake-a shake-a, but remember, my husband is a hungry man.
  8. Quickly cover the pan to maintain the temperature. If your pan doesn’t have a cover, do what my brother does and plop a cookie sheet on top. If your cover has a little steam vent, don’t do what younger and dumber me did and plug the vent with your finger. Moving on.
  9. Cook for 2 minutes, and then do a quick peek to check the eggs to see if they are to your liking. “Done” means the membrane over the yolk is white. If you like the yolk hard, cook it longer. I’m more of a 3.25-minute egg girl myself. I also like peanut butter on my eggs, so you shouldn’t go by my likes.
  10. At this point you have some options. My mom adds a splash of water to the pan to steam the eggs and cook the tops better. I flip some of my eggs when they’re nearly done and firmly set, because the people I feed like the yolks better that way. Test Kitchen Guru leaves them alone. You, Frustrated Someone, can choose.

That’s it. It’s really simple. Still, I’m going to talk on. These next points are embarrassingly obvious, but if you’re reading this to learn how to fry an egg, Frustrated Someone, you and I need people to point out the obvious. There’s no shame in that. No shame.

  • Please don’t overcook your eggs. You can always cook them a little longer, but you can’t uncook them, unless you call giving them to your dog and starting over uncooking.
  • Toast your bread while you’re waiting.
  • Have softened butter available to spread on your hot toast. Well-buttered toast helps ease the pain in case your egg fry fails. I like to pop my toast in the pan after I pull the eggs out.
  • Use a really good skillet. While I’m all about taking accountability for your actions, you really can blame this failure on the tools.
  • Don’t get distracted by a four-year-old and the word “eggs” and go off and read Green Eggs and Ham and forget that you’re frying eggs. That’s what timers are for! Also, seriously, never leave the stove unattended and scamper off on an outdoor adventure and have to call the house from the back 40 to ask someone to take your stinkin’ eggs off the stinkin’ burner and feed them to the stinkin’ dog who will be very sad you’re finally learning how to cook in a way that people will eat it.

In summary:

  1. Preheat pan for five minutes.
  2. Add butter.
  3. Gently add eggs.
  4. Season.
  5. Cover.
  6. Cook.
  7. Check.
  8. Serve.

Go for it, Frustrated Someone! Go fry an egg!

Now, I know you must have a cooking challenge of your own. If you share it in the comments, I would be happy to look it up in my cool fun new Cooking School book and write about it.  So happy!

Guest Post: Make 2016 Your Healthiest Year Yet

Today’s guest writer is Leanne. I first met Leanne at a church in Florida where she was vacationing with her family. We then re-met in Wisconsin at her home church. To understand why she is posting here, you have to know that Leanne is fit and gorgeous. When she casually mentioned that she was 40, I said, Give me your business card!” She did better than that. She shared her story for all of you.

Here is Leanne’s story:

LEANNE_SELLE_LOGO2

Make 2016 Your Healthiest Year Yet!

Happy 2016 to all of you! At the start of a new year most people have New Year’s Resolutions. I’ve never been a person to have resolutions…I like to think of them more as intentions and goals. As a health and wellness coach, it warms my heart when I hear people say they want to eat healthier, exercise more, lose weight, quit smoking, etc.

My resolution (intention/goal) for 2016 is to help all of you make 2016 your healthiest year yet! Let me share a little bit about what I did to change my health just over two years ago.

For the past 14 years our family has tried to eat more organic/natural foods. By all means we are not perfect, but we certainly try our best. I still enjoy a night out for pizza, birthday cake to celebrate another year, and a dish of ice cream just because. For the first 12 of these 14 years I would typically put on around 10 or so pounds each summer, indulging in the “not so healthy choices” while watching my boys play ball. When school would start in the fall, I went into weight loss mode to lose those unwanted pounds before our Spring Break vacation in March. It would take me about 6 months of literally starving myself (even with healthy food choices) to lose that weight.

Fast forward to September 1, 2013…the day my health changed forever! My dear friend Kim introduced me to some amazing nutrition products that have changed my health in so many ways, and this was the day I started! Because our family stays away from foods with artificial sweeteners, soy protein, stimulants, MSG, just to name a few, I do my research on what I allow into our home. I did my homework on these products, and knew I needed to jump in with both feet!

Besides wanting to lose about 10 pounds, I also had a lot of digestion issues going on. I was beginning to think I had a gluten or dairy allergy. I also felt tired all the time and really didn’t have a lot of energy. Several times a week I would wake up in the middle of the night and not be able to fall back asleep for a couple hours. I was not the happy, healthy, energetic wife and mom that I needed to be for my family. Exercise–I wasn’t doing much of that either because I didn’t have the energy to do it! I was looking for a convenient and cost effective way to feel better.

Nutritional Cleansing is what has allowed me to release 16 pounds of fat in those first months without exercising, gain more energy than I could have ever imagined, sleep like a rock EVERY night, get rid of the digestion issues I once had (no gluten or dairy allergies for me), and feel so much healthier at 38 than I did back in my 20’s. Over the past two years I started exercising and have put on about 8 pounds of lean muscle. I’ll be 41 in a couple weeks, and I am in better shape now than when I was 20!

You might be wondering what nutritional cleansing is….and NO it isn’t a colon cleanse! Nutritional cleansing is a cellular cleanse (whole body) by putting the perfect nutrition into our bodies. Unfortunately, most of the foods we eat (even organic) are nutrient deficient. Our bodies need 90 nutrients (building blocks) on a daily basis, with 60 of them being minerals. Most people are deficient in many of these nutrients…mostly minerals. One of the reasons we are deficient in minerals is because of the introduction of pesticides in our soils. The pesticides not only kill the bad bugs on the plants, but also the ecosystem in the soils that the plants are grown in. If the ecosystem is killed off in the soil, then the minerals are no longer in the soils for the plants to uptake. If the plants are not able to uptake the minerals, then we aren’t getting the minerals when we eat the plants.

Back in 1997 UCLA did a study on women who reported being anemic, yet ate a salad each day primarily from spinach. We all know that spinach is high in iron, and therefore these women should not have been anemic. UCLA compared a sample of spinach they had from 1953 to a sample from 1997. The findings were astounding! A whopping 43 bowls of spinach in 1997 = 1 bowl of spinach in 1953. That 43:1 ratio is the same for ALL the other 59 minerals we need on a daily basis. And…when you don’t have your minerals, even your vitamins can’t be used by the body! All this information made me realize that I wasn’t getting all the nutrients I needed on a daily basis.

The other part to this perfect nutrition is that it helps rid the body of the junk that builds up in our cells. Our bodies are exposed to so many toxins on a daily basis…from the air we breathe, personal care products we use, and so much more. These toxins build up in our cells and basically junk up our body. Our bodies actually put on fat to protect us from the toxins we are exposed to. When we get rid of the impurities in our cells, our body no longer has a need for the fat.

The amazing benefits to nutritional cleansing--it's not a diet, but you'll look great!

Other “side effects” of nutritional cleansing (getting rid of the junk) besides weight loss are:

  • Lose Nasty Cravings
  • Improved Sleep
  • Increased Lean Muscle
  • Healthy Aging
  • Improved Digestion
  • Better Athletic Performance
  • And so much more!

By incorporating nutritional cleansing into my lifestyle, my body is now getting all 90 nutrients it needs on a daily basis. This also goes for the rest of the family because these products are great for them also! Our family also has saved so much money on our overall grocery bill!

Was I skeptical in the beginning? Absolutely I was skeptical, but these products come with a 30-day money back guarantee. I had nothing to lose but those unwanted pounds and my intense carbohydrate cravings! Of course I didn’t need to use that money back offer, because I truly felt amazing after my first 30 days and will never be without these products in my home!

If you are ready to feel the best you have ever felt, now is the perfect time to get started. The company is offering free shipping up to $25 for new customers (on qualifying orders) through January 17, and it would be my honor to coach you to better health! I’m here to help you succeed and reach your health goals with recipes, a private Facebook support group, accountability, and much more! Take a peek at this 6 minute Video called “Are You Toxic?” Find me on Facebook at Leanne Selle; private message me, and I can add you to our private Facebook group for you to do some more homework for yourself! We have 2 different 30-day health challenges starting this month. The first one started January 4 and the second one starts January 18. Join me for both of them! Let’s make 2016 our healthiest year together!

God’s blessings on your 2016!

LEANNE_SELLE_LOGO2

Leanne Selle
Health & Wellness Coach
(920)470-4814
leaneselle@gmail.com

Let’s Set Some Mostly Measurable, Manageable Goals for January

This post contains affiliate links and goals. Thought you ought to know.

I don’t like New Year’s resolutions, because, for example, let’s say you resolve to fit into that size smaller jeans and find out two weeks later that you’re pregnant–celebratory fail! Let’s say it’s super important to you to quit watching television, but then your grandfather invites you to spend every Saturday, Sunday, Monday and sometimes Thursday of football season watching games with him. Are you really going to say no? And why are there so many game days anyway? You just don’t know what the day is going to bring, much less the year.

I’ve tried resolutions. I’ve tried no resolutions. At the end of the year, there’s no difference. This year, I’m trying a new tactic. I’m setting mostly measurable, manageable monthly goals. Care to join me?

Since year-long resolutions to work for me (or most mere mortals), I'm setting mostly measurable, manageable monthly goals. Join me!

Here are the ridiculously obvious rules for my mostly measurable, manageable monthly goals:

  1. They should be mostly measurable, so “smile more” really doesn’t follow this rule…although I’m putting it on there anyway. Walk three times a week is measurable. See? Make more pie–not measurable; make a pie–totally measurable…and edible…hopefully.
  2. It’s manageable. No stressing…which would be a goal in and of itself if it were more measurable.
  3. It’s a monthly goal.

Don’t freak out when you see the length of this list. Most of the items are small things that I need to be more consistent about. Others are general areas of my life that need a little refocusing now that we’re heading back out on the road. Some are bigger tasks. None are radical. They are all written down or else, bam, I forget.

Here are my mostly measurable manageable monthly goals for January:

Family Habits

  • Breakfast Bible: finish reading Matthew aloud and begin Mark.
  • Monthly family manner: eye contact. There’s a post coming about this.
  • Monthly family home care habit: keeping our trailer entry clear–that means shoes must be put away and the hot spot on the coffee bar constantly extinguished or preferably never ignited.
  • Monthly character trait: practice finding the positives–something we began last year casually, but it needs to be a front-and-center practice. I’ll post on it, so ya get it, ‘kay?
  • Aim for two days a week that Hannah can eat every meal we eat with no changes. (Hannah has Crohn’s and is on a doctor-assisted healing diet. She loves days when she doesn’t have to cook a single meal for herself.)
  • Bedtime: Reinstate my beloved brush, Bible, books, blessings, and bed routine.
  • Continue annoying the world by starting everything in a list with the same letter–personally, this is my favorite goal. In fact, I almost made these mostly measurable manageable monthly milestones instead of goals, but I thought that was annoying the universe instead of just the world, so I backed off.
  • Prayer: somehow while stationary we got out of the habit of praying before meals, bed, and trips.

Family Fun

  • Have two game nights focused on the older group.
  • Have one game night focused on the younger group.
  • Have a party on my Grandpa’s birthday, January 29. Grandpa and I always celebrated our birthdays together. I loved having him for a birthday buddy. (Miss you, Grandpa!)
  • Take Judah’s five-month picture before he’s five months and 30 days old. Ahem.
  • Bake a lemon meringue pie. What?! Don’t judge.

Homeschooling

  • Learn 15 Spanish verbs. What?! Only 15? Yes, but learning means using, and by using 15 extra verbs regularly over the next month, we’ll be quite fluent…in 15 verbs.
  • Learn 15 new signs.
  • Write two letters each…including mama!
  • Read aloud The Prince and the Pauper by Mark Twain.
  • Teach two core cooking techniques. Blue checkmark
  • Begin one embroidery project with all interested double-digit kiddos–finish in February.
  • Work on one sewing project with Rebecca.
  • Reinstate weekly goal sessions and reviews with Hannah (19)–I love these one-on-one sessions and watching her grow as a writer in her writing business!
  • Find a testing center for Marissa’s CLEP on the road–I think we’ll be in Kansas when she’s ready for her next test. She’s aiming to have her bachelor’s shortly after turning 19; she is currently 17 and has 15 credits. More on that later.
  • Start new math levels with Elisabeth (15), Emily (12), and Elijah (10). (Like, hand them the new book–no biggie here.)
  • Focus daily on math for five minutes with Rebecca (7).
  • Select a fun course from SchoolhouseTeachers.com to enjoy with my four middles–Elisabeth, Emily, Elijah, and Rebecca. (See my review.)
  • Focus twice weekly on Schoolhouse Teacher’s Charlotte Mason preschool with Eliana (4)…just so I remember to focus on her.
  • Begin Slow and Steady, Get Me Ready with Judah (5 months) twice weekly…again, so I remember to focus on him.

Music Mission

  • Write January 2016 newsletter.
  • Finish 2015 thank you notes.
  • Hit the open road again on January 7–we were partially stationary to have our babyBlue checkmark
  • Update subscriber list.

Health

  • Walk dog and self 15-20 minutes 3 days per week–not enough, you say? Better than nothing, I reply!
  • Start doing push-ups again as a family–I do them against the van instead of the ground to protect my sensitive joints, but hey, it’s better than nothing! I will do between one and three after walking. I know that’s not much, but I have joint issues and need my wrists to carry an 18-pound five-month old tub o’ love.
  • Reinstate the two-a-week treat limit in churches–church people love to spoil my kids, but they aren’t aware that the next church and the next and the next will do the same thing. Sometimes we hit four or five churches/special events a week, and it’s literally “spoiling” my kids’ and my hubby’s health and waistlines. Not mine, however, because I don’t eat them, thanks to being perpetually pregnant or nursing sensitive babies–ha ha! Blue checkmark
  • Add seven foods back into my diet. I’m on a total elimination diet for my nursing baby, and I’m currently up to five foods I can eat.
  • Find a supplement that works for my baby.
  • Make two family dessert night treats that Hannah can eat. (No dairy, grains, sugar, processed anything.) Blue checkmark
  • Continue food/symptom journal–ugh. Blue checkmark

Writing

  • Write four non-sponsored, non-review posts here…for you lovely people! This counts as one. Hooray!
  • Write three posts at The Travel Bags since our temporary stint as The Stationary Bags ends this week.
  • Find interview sources and rough out my article assignment for Pregnancy & Newborn magazine.
  • Send one pitch–to really rock the writing world I need to send out about one or two a day…but I’m good with one this month. Oh, look. I already sent it. Check!
  • Edit one chapter in my book–this is the biggie, since I have to delete a lot, and I’m not good at deleting…thus the length of this list. Wink wink.

Personal

  • Read Proverbs again.
  • Journal weekly. It’s a good start–nothing epic…just the little things.
  • Smile more. Totally measurable, right?
  • Practice finding the positives. (More about this later.)
  • Master three core cooking techniques from America’s Test Kitchen Cooking School Cookbook.
  • Scrap social media as often as possible. (I know, that’s blogger suicide, but it’s better for my family, thumb, brain, and eyes.)
  • Listen to The Life-Changing Magic of Tidying Up and see if she’s got anything on the Flylady, who rocks, by the way! Blue checkmark
  • Read Silas Marner by George Eliot. It’s one of my mom’s favorites, and, even though I was an English major back in the day, I’ve never read it.
  • Keep my computer and phone off from 9 to 9, unless it’s for school or people are sleeping or studying…or my sister-in-law or mom text me–hey, I’m human, and those gals are fun-to-me!
  • Check email daily, delete all new “unimportant” emails (after reading), and unsubscribe from all no-longer-valuable-to-me subscriptions that come in that day.
  • Take fewer pictures. Yup, fewer. This is, unfortunately, measurable, and I do have an accountability partner on this one. Hi, Honey! Nice dimples!

What are some of your goals for January?

SchoolhouseTeachers.com Yearly Membership Review — A Lightweight Heavy Hitter

Read this SchoolhouseTeachers.com review from a roadschooling family of 10 and get 50% off!

This post contains affiliate links and opinions. Both are harmless.

One of the biggest aspects of my life is homeschooling my eight kids. I am always on the lookout for ways to simplify that process, especially on the road. With that in mind, my children and I have been testing the Yearly Membership of SchoolhouseTeachers.com, an online curricula resource, for a few weeks now. I’m going to yammer on about it for a bit, but first, some background:

As you know, we live in a travel trailer towed by a Chevy Express van. We (we as in my hubby, Steve) tow “home” up mountains and down, around hairpin turns, over harrowing heights. Have you ever seen The Long, Long Trailer with the inimitable Lucille Ball and Dezi Arnaz? Remember the scene where they’re teetering on a mountain top on the brink of disaster because Lovable Lucy overloaded the trailer with rocks?

That’s me–Lovable Lucy. Except instead of a Cuban-American husband, it’s a Filipino-American husband. And instead of rocks, it’s books. And instead of ending up with a box office hit and a big fat check, we ended up with a dead transmission and a big fat bill.

Roadschoolers, ironically, have very little weight allowance for books, which makes schooling a little more challenging. I know–whaaaaa! That’s why we have to get a tad creative with everything from where to store the toilet paper to how to educate eight kids in 240 square feet of space with no weight allowance for los libros, which is Spanish for “the books,” which I had to teach los niños without using los librosNow do I have your sympathy? I didn’t think so.

Enter SchoolhouseTeachers.com!

SchoolhouseTeachers.com is an online curricula resource which offers its members nearly 200 courses plus other perks, and it’s growing like my stomach at a Christmas cookie buffet. The courses are available online through classes, videos, or printable downloads. I’m not going to list every subject you’ll find there because 1) I’m too lazy, and 2) okay, so there is no number 2. Go to the SchoolhouseTeachers.com course list and see for yourself, or see what’s available grade by grade.

Wow, right?! A family could use SchoolhouseTeachers.com as a supplement to their studies or as an entire curriculum. That saves a ton of space and trailer weight, people.

How have we been using SchoolhouseTeachers.com?

I’m so glad you asked, because I’ve been itching to tell you about the Tinkers Club, partly because I love saying “tinkers.” Tinkers tinkers tinkers! (If you say it real fast it sounds like stinkers.) My son (who just turned 10 last week) is loving the Tinkers Club. It’s all about inventing, so he’s gettin’ down and dirty with tools and junque we scrounge up at thrift stores (because, as you know, The Simple Homemaker tries not to keep junk on hand, so, ironically, now we have to hunt for other people’s junk). He is so into it that he was thrilled to receive safety goggles for Christmas–safety goggles, people! And I wasted money on Legos.

We are also just beginning the Charlotte Mason preschool study written by homeschool mom Brittney Jordan. As you know we are not into an intense preschool program, nor am I interested in spending money to teach my child to count. But being child number 7 in a roadschooling family means that someday the you-specific activities and the nature study get pushed to the background in favor of group activities and an 8-mile hike. This ideal program ensures that little Ellie and I (and our many tag-alongs) are doing something in nature together, in books together, and in handicrafts together each week…key word: together. Love it!

This week’s topic is snow, which offers and interesting approach to nature study. I think I still have snow stuck down the back of my neck–family snowball fight not pictured.

Charlotte Mason Preschool Fun Through SchoolhouseTeacher.com. Read this review from a roadschooling family of 10 and get a 50% off discount!

I’m also setting my older children on the task of translating the Spanish Bible stories for Spanish-speaking preschoolers. Why? Because I can, and because they don’t speak Swahili or Latvian, but if yours do, then by all means check out the Latvian and other foreign languages! They don’t have enough Spanish for my liking, but there is Latvian!

Here’s my favorite aspect of SchoolhouseTeachers.com:

My first baby girl was born, like, yesterday, and last week she turned 19. That’s years! Time flies…fast…like a fast flying thingie. We did some pretty fun stuff in school (apparently not enough vocab study if this writer is saying “thingie” and “stuff”), but if I could do it over again, I would have had more lessons that she really wanted to study and fewer that I felt we had to know to appease the social service workers that never showed up at our door.

With SchoolhouseTeachers.com, I feel comfortable am totally excited about letting my children pick a couple of courses at a time that they want to study (after Bible and math are finished). I’m confident that they will be learning something. It may not be the same things I learned in school and promptly forgot as soon as the test was over because I never used it in real life and wasn’t interested in it in the first place, but that’s totally okay! That said, I might “make” my 19-year-old take this for her writing business:

I don’t love everything about SchoolhouseTeachers.com.

For example, I absolutely do not like their cute little drawing of the ark for the preschool flood study. The flood was not cute, and the ark was not cutesie. For the love of all things truth, draw the ark its actual size in proportion to an elephant, so kids could see that a lot of elephants could fit on that behemoth. Kids would have an easier time supporting their beliefs when (not if) they are attacked if they had the truth in their heads. Thousands of people drowning–so not cutesie.

I also don’t like the amount of clicking required to get to the course, but they’re in the process of fixing that, so forget I said anything. In fact, I’m crossing this off right now.

And there will be things you don’t like, which is why it’s totally great that there are nearly 200 courses–pick what you like and leave the rest…like how you pick the M&Ms out of the trail mix and leave the raisins. ‘Fess up. You know you do it.

Technical details for my fellow roadschoolers:

For us travelers, internet connection and data limits are issues. While some of these courses are videos that will consume data, others are made of printable or downloadable lesson plans that can be downloaded at the library or RV park and stored on your computer to be pulled up whenever you want and wherever you are–even boondocking.

The studies do not require that you buy books, but access to a library does help for some additional recommended resources. Obviously, that part is not ideal for the traveler, but, well, read the paragraph about The Long, Long Trailer and you’ll agree with me that not having access to all the books a person would like to have is better than plunging off a mountain peak with your entire rig, family, and collection of rocks books.

Interested? You can get the Yearly Membership to SchoolhouseTeachers.com for 50% off if you use the code CREWFOLLOWER by January 31, 2016.

SchoolhouseTeachers.com
That’s what I think. Click this banner to find out what other homeschoolers think. Click click click. (If you say that real fast, it sounds like “lick.” I need a vacation.)

SchoolhouseTeachers Review 2016
 

Crew Disclaimer

Homemade Hot Cocoa Recipe

I don’t drink cocoa, because it gives me gas. I’m glad we cleared the air on that sensitive topic.

Snicker.

Moving on.

The thing I love about homemade hot cocoa is that it’s simple to put in the dairy or non-dairy products and sweeteners that you wish to meet everybody’s needs and preferences. Blah blah blah. What I really like is that it tastes so stinkin’ awesome!

Simply Delicious Hot Cocoa Recipes with Dairy-Free Alternatives

I’m giving you a basic recipe which is great as it is, because I’m all about simple, or it can be spruced up or adjusted. It’s your job to alter it to your needs and liking.

Homemade Hot Cocoa

Ingredients:

  • 1/3 cup cocoa powder
  • 1/3 to 3/4 cup sugar (to your liking) (I tend toward 1/2 cup, but most will choose more. My daughter uses honey.)
  • 1 pinch salt (optional–I use it because I look cool tossing a pinch of salt into a beverage)
  • 1/3 cup water
  • 3 cups milk (any kind–we use whole, coconut, or almond)
  • 1 cup cream or half-n-half (or an extra cup of milk)
  • 1 teaspoon vanilla (optional)

Optional add-ins:

  • whipped cream
  • chocolate chips of any variety
  • cinnamon or cinnamon sticks
  • marshmallows
  • peppermint sticks or candy canes
  • coffee or espresso
  • peanut butter

Directions:

  1. Mix all dry ingredients together.
  2. Boil the water in a heavy saucepan.
  3. Dissolve the dry ingredients in the boiling water by whisking over medium heat for about two minutes–keep it to a simmer.
  4. Add the milk and heat it until it’s hot, whisking continually. Do not boil. Pay close attention, because milk burns faster than I lose my train of thought.
  5. Remove the deliciousness from the heat.
  6. Add the cream or half-n-half and the vanilla.
  7. Divide the sweet deliciousness between four mugs, unless your cocoa drinkers are little, in which case it might stretch into six or eight, especially if you fill half a mug with marshmallows.
  8. Add more cream to cool if needed…or just wait.

I know you’re asking “Why water? Can’t I just boil the milk? Can’t I just stir the powders into the milk? Can’t I just use the packets from Swiss Miss?”

Because a very hot liquid will dissolve the sugar. No, because it might curdle or burn. Yes, but it might be a little gritty. If you like Swiss Miss, drink Swiss Miss–it’s certainly easier, and you just can’t argue with tiny little marshmallows with their tiny marshmallow cuteness.

Related Recipes:

  • This Tres Leche Cocoa looks fantabulous! Oh, yummity yum yum yum!
  • Allergic to dairy? How about this oh-so-scrumptious Almond Hot Cocoa!
  • If you’re allergic to dairy and nuts, here’s a recipe for Coconut Milk Hot Chocolate. It is sweetened with honey, but you can use the sweetener of your choice, because America is great like that.
  • If you’re not allergic to anything or you’re allergic to everything and you want to die in complete bliss, you have to try this Whipped Hot Chocolate recipe.

Homeschool Helps:

For your science studies, answer the ever-fascinating question, “Where does chocolate come from?

For your home economics class, learn this relevant skill which I hope you don’t need today: How to remove burned milk from a saucepan.

Here’s the boring printable version.

Homemade Hot Cocoa Recipe
Recipe Type: Beverage
Author: Christy, The Simple Homemaker
Prep time:
Total time:
Serves: 4 cups
This basic recipe can be adjusted to fit anybody’s needs or preferences. Don’t be afraid to experiment..a lot.
Ingredients
  • Main ingredients:
  • 1/3 cup cocoa powder
  • 1/3 to 3/4 cup sugar or other sweetener (to your liking)
  • 1 pinch salt (optional)
  • 1/3 cup water
  • 3 cups milk (any kind–we use whole, coconut, or almond)
  • 1 cup cream or half-n-half (or an extra cup of milk)
  • 1 teaspoon vanilla (optional)
  • Optional add-ins:
  • whipped cream
  • chocolate chips of any variety
  • cinnamon or cinnamon sticks
  • marshmallows
  • peppermint sticks or candy canes
  • coffee or espresso
  • peanut butter
Instructions
  1. Mix all dry ingredients together.
  2. Boil the water in a heavy saucepan.
  3. Dissolve the dry ingredients in the boiling water by whisking over medium heat for about two minutes–keep it to a simmer.
  4. Add the milk and heat it until it’s hot, whisking continually. Do not boil. Pay close attention, because milk burns faster than I lose my train of thought.
  5. Remove the deliciousness from the heat.
  6. Add the cream or half-n-half and the vanilla.
  7. Divide the sweet deliciousness between four mugs, unless your cocoa drinkers are little, in which case it might stretch into six or eight, especially if you fill half a mug with marshmallows.
  8. Add more cream to cool if needed…or just wait.


How to Thaw a Turkey (Even at the Last Minute)

How To Thaw a Turkey (Even at the Last Minute)

When it comes to thawing turkey, we’ve got your back with these guidelines garnered from Butterball and Cook’s Country:

How to Thaw a Turkey

If you have 3-5 days, follow this guide:

  1. Move the turkey from the freezer to the refrigerator.
  2. Leave it in the wrapping it came in.
  3. For some reason which I don’t know, Butterball says to thaw it breast side up.
  4. To keep it from leaking all over everything else in your fridge, place it in a large baking pan or tray.
  5. Allot a day for every four pounds of turkey. That means a twelve-pounder will take three days, a twenty-pounder will take five days, and, if you’re roasting Big Bird, you should probably start thawing in July.

How to Thaw a Turkey at the Last Minute

If you pulled the major oops and forgot about your turkey until the day before you need your bird (or the day of), follow this guide:

  1. Leave the bird in the wrapping.
  2. Plop the frozen bird in water. Make sure it is completely covered. You can use a cooler, a five-gallon bucket, the sink, or, hey, your bathtub. Changing the water frequently will speed up the process.
  3. This method requires an hour for two pounds, so, again, 12 pounds is 6 hours, 20 pounds is 10 hours, Big Bird is–you know, this roasted Big Bird talk is morbid and disgusting.

When your bird is thawed, you have two to four days to get it from thawed to cooked, so don’t get too distracted and forget about your bird.

Just so you know, the term “last minute” is figurative. If you literally forgot to thaw the turkey until the minute it was supposed to go in the oven, turn on the game, order pizza, and invite everyone back tomorrow. It will make a great story to tell your daughter-in-law when she forgets to thaw her turkey.

If you’re interested in a super juicy bird, don’t forget to brine your turkey.

Okay, this is your time to “shine.” What’s your best “forgot to thaw the bird” story? 

My story: I’ve never forgotten to thaw a bird, but I did set one inside the garage door when I came home from the grocery store and forgot it there…for days. Why didn’t I notice it? Apparently, I rarely used that door, and also it was a buy-one-get-one-free sale, so the other turkey was getting all the pre-Thanksgiving TLC. We smelled found it eventually.

Photo thanks: Tim Sackton (changes mine)


364 Days to Overwhelming Gratitude

My favorite holiday is so close I can almost smell it–creamy mashed potatoes with oodles of butter, my mom’s fresh potato rolls with oodles of butter, my daughter’s homemade stuffing with oodles of butter. Except this year, I can’t eat butter. Our baby has an allergy–we can’t figure out the culprit, but for now Mama is on an elimination diet which means Thanksgiving dinner is going to look more like turkey and green beans–no butter.

And that’s okay. I’m still super excited for Thanksgiving.

Why? Because it’s not about the food. It’s not even about the pie if you can believe I’m saying that. It’s about the thanks.

364 Days to Overwhelming Gratitude


Which brings us to Thanksgiving pet peeve number one:

Random Citizen: “I’m thankful for this and that and that and this.”

Great, but who gets your thanks, Random Citizen? The air? The fates? The universe? They don’t want your thanks and they certainly don’t deserve it. God does.

You knew there’d be a Thanksgiving pet peeve number two:

Even though I am running 26 Days of Thanksgiving in Photos on my Facebook page, I don’t like those “gimmicks.”

Why not? They’re great! You’re such a humbug. That’s why you named your son Ebenezer.

Chill–good grief. I don’t like them because they end. We focus on Thanksgiving for a day, perhaps a month, and then it bluntly ends like this sentence. Done. Bam. No more.

It’s time to reconcile both of those pet peeves.

Pastor Andrew Schroer who shepherds a friendly bilingual Christian church out in a li’l ol’ western town in Texas wrote a devotional journal called 364 Days of Thanksgiving. In it, Andy encourages us to:

  1. 364 Days of ThanksgivingBe thankful every day.
  2. Address our thanks to God.

I love it when something single-handedly (or single-pagedly) decimates my pet peeves, don’t you? Of course you do. It gets better.

364 Days of Thanksgiving is also a journal, providing space for you to write down one thing to be thankful for each day–even I can handle that. The trick is it has to be something different, so you can’t do this:

  • Day 1–cookies
  • Day 2–cookies
  • Day 3–cookies
  • Day 4–cookies
  • Day 5–cookies
  • Day 6–cookies

I’m not sure if you can do this:

  • Day 1–chocolate chip cookies without nuts
  • Day 2–chocolate chip cookies with nuts
  • Day 3–cookies after church
  • Day 4–Great Grandma’s molasses cookies
  • Day 5–getting the last cookie in the jar before Steve does
  • Day 6–secretly enjoying the cookie I hid in my sock drawer after everyone else went to bed

Probably not.

What about day 365? Dickens said we Americans had it backward (he actually said backwards with an S, being British) when we gripe all year and thank one day. He says we should thank 364 days and gripe one day. Andy one-ups good ol’ Dickens: on day 365 you sit down with the last cookie from your sock drawer and read over the entire journal showing how God (not the universe) has blessed you.

Do you see what’s happening here? By focusing on gratitude for an entire year, you become more grateful and more aware of your blessings. Instead of griping over the lack of oodles of butter, you rejoice over the potatoes. Gratitude becomes a habit, and you become a grateful dry potato eater instead of a disgruntled butter lover. It’s a beautiful transformation!

Andrew Schroer and his Beautiful Bride
Andy with his stunning bride, Clariza

While I might possibly still have your attention, know this: 364 Days of Thanksgiving is not filled with blank pages awaiting your thanks. Andy fills it with encouragement and the great stories (parables, really) that his parishioners expect to hear when he steps up to the pulpit.

Now, if you’re following along on our Twelve Weeks of a Simple Christmas missions, you could finish a huge chunk of your Christmas list with just this book. No lie…because I don’t lie…except that one time which is none of your business but which really makes me grateful for Jesus and forgiveness.

Buy 364 Days of Thanksgiving for your Kindle or in hold-it-in-your-hand-and-smell-the-pages format at Amazon (affiliate link) or as an ebook or hardcover book here. You can also find a related Bible study for groups and a sermon series for pastor’s here in both CD and downloadable formats.

You won’t be sorry; in fact, 364 days from now you’ll be overwhelmingly grateful.