A Special Offer, Real Food Baby Steps, and our Cookbook Winner

Cookies from Healthy Pregnancy Super Foods

A Special Offer

Our cookbook giveaway has come to a close. My family and I thoroughly enjoyed testing the recipes and reviewing the books.  (We’re still testing recipes!)  We also had a great time reading all your comments.  Thank you to all who participated.

If you did not win (sorry!) and would like a book, you are in luck. Kate at Modern Alternative Mama has offered The Simple Homemaker readers 25% off any or all of her books through November 15. Simply use the code SIMPLE25 at checkout to receive your discount. This makes each book very affordable.  (Think Christmas!)

To buy the books, click here. 

Real Food Baby Steps

If you are further interested in babystepping your way to better health through real foods, check out this list of baby steps from Erin at The Humbled Homemaker, guest-posting at Modern Alternative Mama.  It is a list very much in line with The Simple Homemaker’s Simple Health Philosophy.

Click here to read the baby steps list.

Cookbook Winner

Now, the moment you’ve all been waiting for!

Wait, did I ever tell you about the time…oh, sorry.

Drum roll please…

Congratulations, Sarah P.! You won all four e-cookbooks with your Facebook share comment.  I hope you and your family enjoy your adventure in eating!

(The winner was chosen through Random.org.  You may verify it through this link.  I am neither tech-savvy or motivated enough to try to rig the system, so all was fair.)

Remember, my dear readers, you have through November 15 to use the code SIMPLE25 to get 25% off any of the books at Modern Alternative Mama.

Click here to buy the books. 

Disclosure: This is my affiliate link. I receive a small percentage of each sale. You do not need to use my affiliate link to purchase…but I sure think it’s swell when you do!

Review of Four Real Food Cookbooks and A Cheesy Potato Goodness Recipe

For the past three weeks almost every meal we have eaten has come from the recipes in four “real food” e-cookbooks by Kate at Modern Alternative Mama.

Why?

Because we are giving the entire bundle away to one of you, and we wanted to make sure they were worthy of you wonderful people.

Guess what.

They are!

Let me tell you about them.

Review: Four Real Food E-cookbooks

In The Kitchen: Real Food Basics

Read Food BasicsI wish I had this simple guide to real food when we started our real food journey.  Much more than a cookbook, Real Food Basics is a thorough overview of the importance and how-to of switching to real food.  It is far more succinct than the volumes of literature I have read on the topic.  (Think of all that time spent reading when I could have been eating!)  Despite the easy-to-comprehend nature of this book, people first venturing out from the processed world to the real food world might still get overwhelmed.  That is why Kate’s page of baby steps is invaluable.  With one step a day, a week, a month, you will be improving the quality of the food you put on your family’s table with little effort.  The recipes are a simple and tasty means of applying your new wealth of knowledge.

Against the Grain: Delicious Recipes for the Whole Food and Grain-Free Diet

Against the GrainIf you have been following the GAPS or gluten-free movement, you know the dangers of consuming too much grain, especially the quality of grains available to today’s average consumer.  Against the Grain offers recipes to painlessly reduce the quantity of grains you feed your family.  I know, so do a lot of other cookbooks.  The difference is that you will not need a pantry full of weird ingredients that neither resemble nor taste like food, and you will not be feeding your family foods you can’t even pronounce.  Because the book offers recipes for making favorite dishes grain-free, many of the foods may already be on your regular menu.  Of course, you will eventually want some ingredients that are probably not in your pantry now, but there are not many, and they are neither hard to find nor hard to pronounce. If you are missing anything, you can substitute what you have on hand until you are ready to babystep your way to the healthier ingredients.

Healthy Pregnancy Super Foods

Pregnancy Super FoodsKate takes the “mystery” out of eating for two and simplifies it…a lot!  If you’ve been overwhelmed by the pregnancy nutrition gurus’ dietary requirements that resemble an equation from a masters’ level advanced mathematics class, you’re going to want this book.  Also, if your idea of eating healthy while pregnant is fortified cereal, a folic acid supplement, and low-fat ice cream, you need this book. Kate presents the basics of eating healthy for conception, pregnancy, and nursing, and provides a list of super foods for feeding your body and your baby. (Love that list!)  She then fills the book with great recipes that incorporate these super foods.  Despite the word “pregnancy” in the title, these foods are appropriate for anybody, and I happily fed them to my little ones, teens, and hubby.  My favorite part—because I’m a bit geeky—is that each recipe denotes how many superfoods you are consuming with each meal.  Seeing the super food count makes me feel like I could leap tall laundry mountains in a single bound, even nine months pregnant!

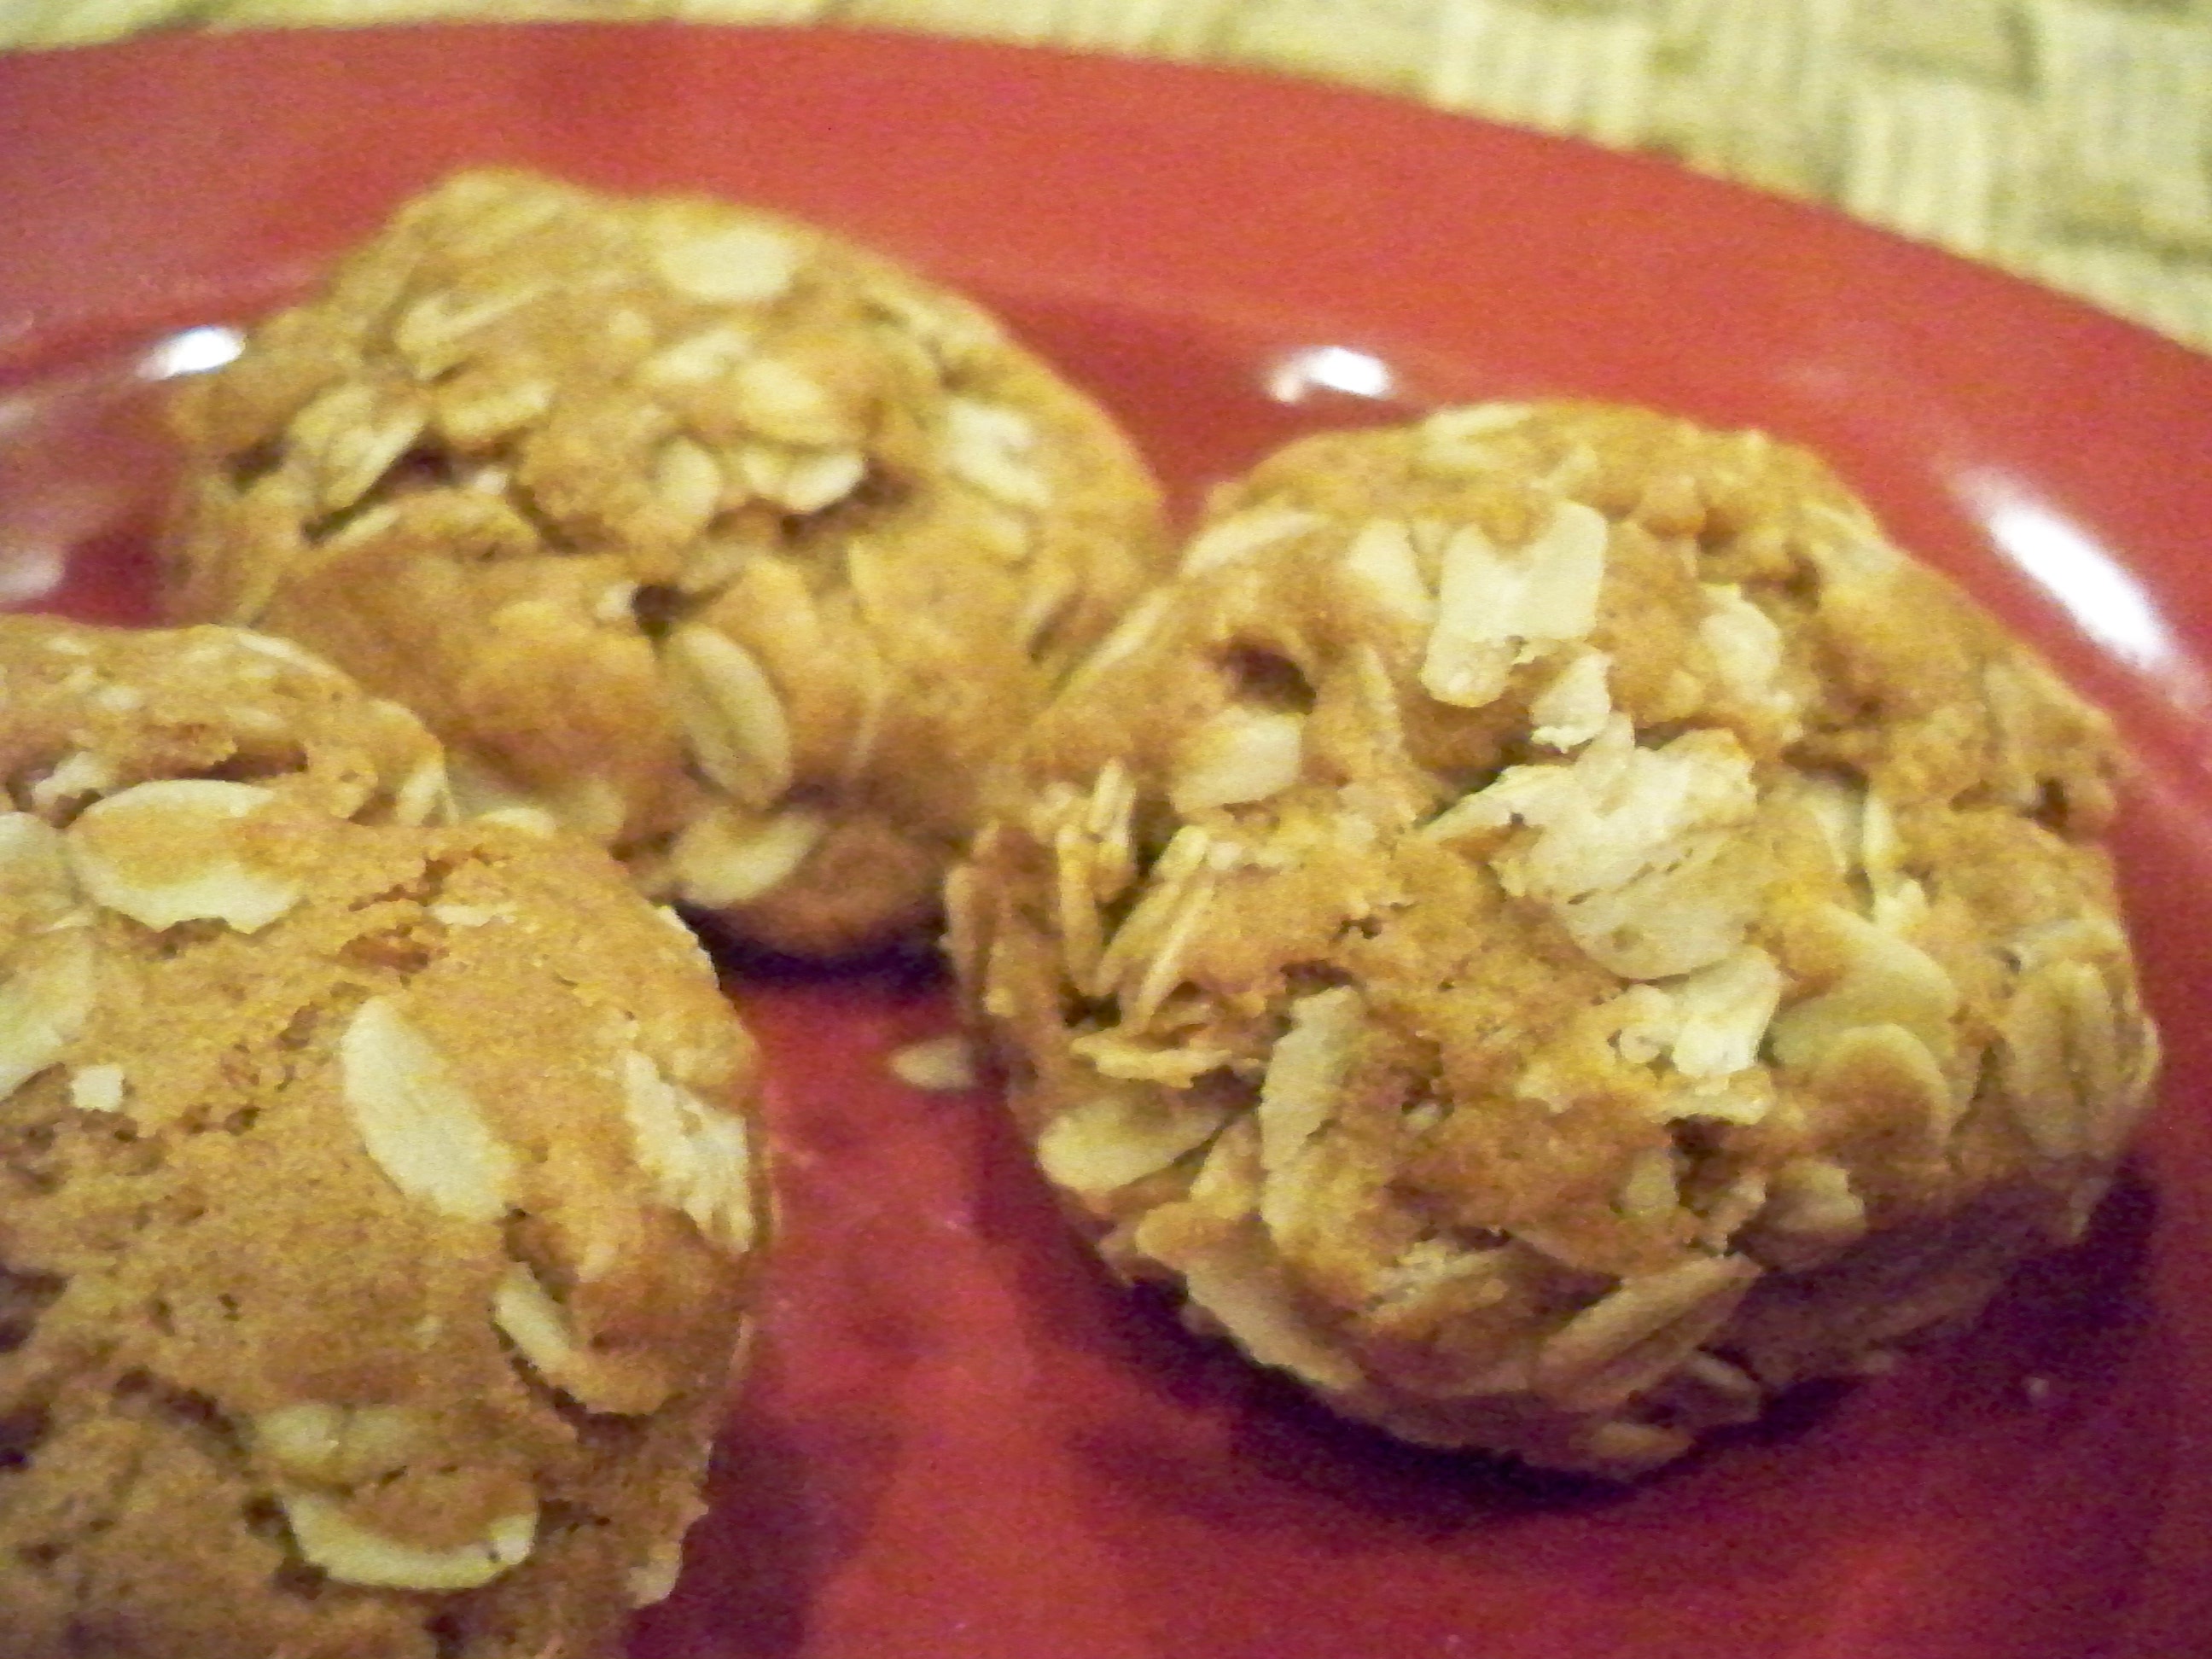
Treat Yourself: Real Food Desserts

Treat YourselfWhen you first venture toward eating healthy, you may cringe at the thought of never again tasting ice cream, never indulging in another handful of cookies, or never savoring a slice of birthday cake…ever! Pick yourself up off the floor!  Healthy eating is not about deprivation.  In Kate’s newest book, she shares information and recipes that not only take the unhealthy out of treats, but add some nutritional value besides.  Learn about healthy alternatives to sugar and white flour, and how to work around allergy issues while still treating your family.  This book has options for dairy-free, GAPS, and gluten-free eaters.  And, yes, you will be eating ice cream, cookies, and cake.  (Big grin!)

Our Overall Opinion:

We had a great time testing the recipes in these four books, and will continue to do so over the next few weeks.  We found them simple to make, even with the added challenge of being without a stovetop for three weeks.  That means that we had to adjust the recipes for use in a crockpot, in the oven, on the grill, or a combo.  These recipes are flexible.

I particularly love that you can make these recipes from foods you have on hand.  If you do not have some of the ingredients yet (almond flour, for example) you can effortlessly replace it with something you do have until you are at a place in life to start using the missing ingredient.  This is truly a flexible approach to improving your diet.

Because I have been cooking mostly from scratch for as long as I have been cooking, I already have my own versions of some of these recipes that my family loves.  Nevertheless, some of Kate’s recipes have found their way into our family cookbook with our longstanding family favorites.  The words “awesome,” “great,” and “this is a keeper” come to mind.  (My husband can’t stop talking about the chili we ate two weeks ago, and I’m seriously thinking of whipping up some more maple whipped cream and eating it straight out of the bowl…by myself…hiding in the closet.  Seriously!)

Has my family enjoyed eating from Kate’s cookbooks?  Definitely!  Did my family love every recipe?  No, not every family member loved every recipe, but most of the time the group response was really great, much better than our experiences with our other real food and grain-free cookbooks!  Will we continue to use the recipes we tried and test new ones?  Absolutely!

There is very little overlap between the four books.  While a couple recipe titles appear in more than one book, the recipes themselves vary. If you are just starting out with real foods, you will have more than enough recipes to begin rotating into your menu, even with just one of the books! If you are an old-timer in the real food or grain-free world, you’ll be able to greatly expand your family’s menu with these recipes, and can easily adapt the recipes to your family’s preferences.

If I were to change the books at all, I would merely add a recipe index to the two books that did not have one (in my review versions) and indicate how many servings each recipe made, which is absent from some of the recipes.

 [Update: my husband just installed a stovetop and my daughters and I have made three more of Kate’s recipes. The meals are even easier to prepare when you have a a stovetop (duh!), and all three made it into the family cookbook–they were that good!]

Want to try a recipe for yourself?  Here’s a recipe we loved from Pregnancy Superfoods.

Broccoli-Cheese Potatoes Recipe

(Its household name here is Cheesy Potato Goodness.)

Ingredients

  • 3 – 4 medium potatoes—slice ‘em thin
  • 2 slices bacon, cooked and crumbled (optional, but, seriously, it’s bacon! Why leave it out?!)
  • 4 tbsp. butter (mmmm…butter!)
  • ½ c. onion, minced
  • 2 tbsp. arrowroot powder (if your pantry isn’t stocked with arrowroot, use your thickener of choice—corn starch, flour, whatever you use)
  • 2 c. whole milk
  • ½ tsp. sea salt
  • ¼ tsp. black pepper
  • ½ c. cheddar cheese, shredded
  • ¼ c. Romano cheese, shredded (try parmesan if romano isn’t in the frig or the budget)
  • 1 c. broccoli, chopped

(We have a child that cannot eat bacon, onions, or broccoli (that’s a new one, eh?), so we left all three out.  We cooked broccoli on the side and some of us mixed it in.)

Directions

  1. Preheat your oven to 350.
  2. Lay the sliced taters fairly evenly in a 9X13 baking pan.
  3. Combine the bacon, onion, and butter in a sauce pan and cook until the onion is translucent—you know, see-through.
  4. Stir in your thickener until it is completely smooth—no dumplings.  We used arrowroot powder.
  5. Add the milk slowly, stirring constantly as you add to eliminate lumps.  Thicken by cooking over medium heat, stirring almost constantly…or enlisting your tallest child for this task.
  6. Add your seasonings and cheeses.  If you wish, save a little cheddar to add to the top of the taters.  I saved a little, but somebody small ate it.
  7. Stir in the broccoli.  (See my “no broccoli” note above.)
  8. Pour the whole shebang over the taters and top it with the cheese that my small child ate.  (Remember, we’re cooking without a stove, so we did all the stove work in the baking pan using our oven, and mixed the potatoes into the rest of the mixture rather than the other way around.)
  9. Bake for 30-45 minutes or until the potatoes are the texture you like.  Because doubled the recipe, we used a larger pan and cooked it much longer.

That’s a super food count of 4!  Don’t you feel super just looking at that number?

This dish was delicious, and, as you can see, Kate’s recipes are easily adapted to fit the needs of your family, whether those be dietary, equipment, time, or available ingredients.

This makes 4-6 servings.  Because there are 8-9 of us, we doubled it and still had nothing left over.  We served it, by Kate’s suggestion, with her baked salmon with garlic-herb butter from the same book and also with our homemade sourdough bread dipped in her olive oil herb dip (same book).  Mmmmmmm!  I’m still smiling!  Someone wipe this goofy grin off my face!

So…are you interested in the giveaway?  You know you are!

Click here to go to the cookbook giveaway page.

If you want to skip the giveaway but still want a book or four, you can buy the books at a savings.  Kate has made them even more affordable by offering a 25% discount to The Simple Homemaker’s readers.  Simply use the discount code SIMPLE25 at checkout to save 25% off any or all of the Modern Alternative Mama ebooks through November 15, 2011. What a gal!


Not-Your-Everyday Egg in a Basket Recipe

This breakfast recipe is a fun twist on your typical Egg in a Basket recipe.  I call it Good Morning Sunshine! in an obnoxiously loud morning person voice.  (My kids love that about me.)  My daughters (who recently finished studying ancient Greek history) call them Cyclops Eyeballs.

Egg in a Basket Recipe
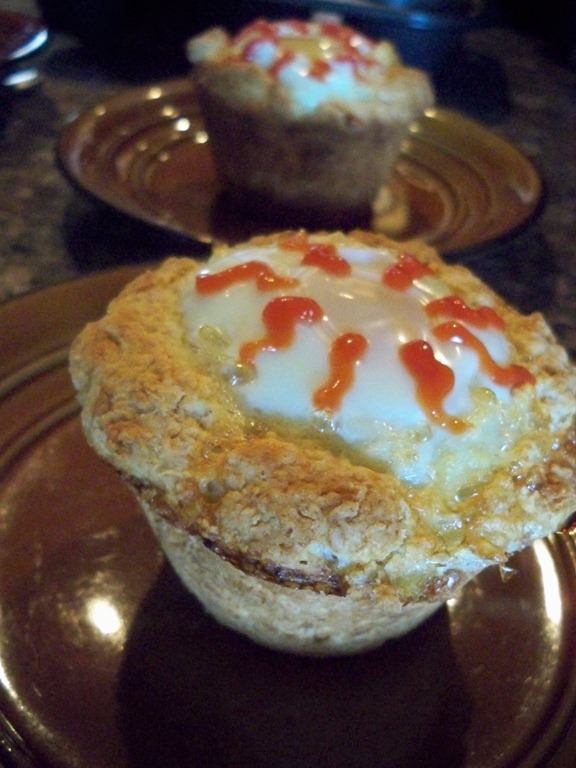
To make this Egg in a Basket recipe, you will need your favorite biscuit recipe and one egg for each person.  You will also need either a ramekin or similar oven-safe container.  We use Texas (also known as jumbo) muffin tins.

Print Recipe

Egg in a Basket Recipe

  1. Divide the biscuit dough into the number of baskets you need for your family.
  2. Place a piece of biscuit dough in each container.
  3. Make an indentation for the egg, making sure the bottom and sides of the container are covered with dough.
  4. Crack the egg and drop it lightly into each indentation.
  5. Bake at 375 for about 15 or 20 minutes or until the egg is done to your liking.  (If using ramekins, you may wish to put them on a baking sheet in case of spills.)

Wow, was that ever simple!

You may decorate your egg in a basket after it is cooked if you wish.  My daughter used ketchup to draw sun rays (or Cyclops’ bloodshot veins) coming from each egg.  Put the ketchup in a baggie, cut the corner off, and squeeze.  This would also work with jam or sliced red peppers or tomatoes.  Serve with butter, honey, jam, a smile, and a delightfully cheerful “Good morning, Sunshine!”

Very cute!  And this egg in a basket recipe is a nice change from “just eggs…again.”

If you’re not into baking yet, you may use prepared biscuit dough from the store.  Biscuits, however, are quite simple to manage, and are a great way to segue into making your own baked goods.

We switch off between two simple biscuit recipes, both found at The Simple Homemaker site, of course!  The first we titled Sleeping Baby Biscuits, because they take a little longer to make than our other version, so you need to work on them when the baby is asleep.  The quick version is known as Screaming Baby Biscuits.  Get those recipes here.

Enjoy this fun Egg in a Basket recipe!  Do you have a fun breakfast recipe to share?

My daughter was inspired to make this recipe by a picture she saw in a Pillsbury grocery aisle magazine display.

This post is linked up to Five Flu-Fighting Foods and Teach Me Tuesday.


Simple Biscuit Recipes – Sleeping Baby Biscuits and Screaming Baby Biscuits

If you’re new to baking, biscuits are a great place to start.  They’re really hard to mess up.  We have two simple biscuit recipes and alternate between them depending on what life is throwing at us at the time.


The first biscuit recipe below is more involved than the second and requires two hands, so we dubbed it Sleeping Baby Biscuits.  Wait until the baby’s asleep before trying this biscuit recipe.  The second is easy to whip up with one hand in a matter of minutes.  You can mix these up while holding a screaming baby in one hand, so this simple biscuit recipe is aptly named Screaming Baby Biscuits.

When the baby is asleep, give this biscuit recipe a try:

Simple Biscuit Recipes – Sleeping Baby Biscuits

Author: Christy
Prep time:
Cook time:
Total time:
Serves: 6
Sleeping Baby Biscuits are biscuit perfection! Serve with butter and jam, or use for breakfast sandwiches, biscuits and gravy, or Egg in a Basket!
Ingredients
  • 2 cups flour (of your choice)
  • 3-4 teaspoons baking powder
  • 1/2 teaspoon salt
  • 1/2 teaspoon cream of tartar (if you don’t have it, skip it! It adds a little fluff to the biscuits, but so does the baking powder, so don’t worry about it.)
  • 1 tablespoon honey
  • 1/2 cup butter
  • 2/3 cup water or milk
Instructions
  1. Preheat oven to 450.
  2. Mix dry ingredients in one bowl.
  3. Cut in butter. (Cold butter cut into the flour using a pastry cutter or a back and forth motion with two table knives will lend a flaky texture to these biscuits. Seeing as we live in the real world, I often soften the butter and stir it in with a GASP wooden spoon.)
  4. Mix milk/water and honey in another bowl. (Okay, fine, I just dump them both in the flour/butter mixture…and I don’t actually measure my honey.) Add to dry ingredients.
  5. Mix until it holds together. Then dump it onto a lightly floured surface and knead about a dozen times.
  6. Flatten the dough gently and cut with a biscuit cutter or the top of a cup or glass into about 12 biscuits.
  7. If you like crusty edges, place the biscuits on a baking sheet about two inches apart. If you like softer edges from a “pull-apart” biscuit, put them close together in a pan. You may brush the tops with melted butter or milk, but again, real world!
  8. I like to let them rest for about twenty minutes before baking, but, seriously, my babies don’t sleep that long, so I usually just throw them in the oven. Bake at 450 for 10 minutes or until they are done to your liking.

If the baby is not cooperating, opt for this very simple biscuit recipe:

Simple Biscuit Recipes – Screaming Baby Biscuits

Author: Christy
Prep time:
Cook time:
Total time:
Serves: 6
This is an old family recipe from my mother that everyone makes differently, so play with it until you find what you like…but not if the baby’s screaming.
Ingredients
  • 2 cups flour (of your choice)
  • 1 teaspoon salt
  • 4 teaspoons baking powder
  • 1/3 cup oil (sometimes I use butter)
  • 2/3 cup milk or water
Instructions
  1. Preheat oven to 425.
  2. Mix dry ingredients in a bowl.
  3. Mix wet ingredients in another bowl. (I use a glass measuring cup to save on dishes.)
  4. Combine with your hands, a spoon, your child’s hands, whatever.
  5. Grab by handfuls and drop on a baking sheet. It makes around 12, depending on the size you like.
  6. Bake for 12-15 minutes.
  7. For a more pastry-like texture, use a 50/50 ratio of oil/butter to milk/water. Screaming Baby Biscuits are great left out over night uncovered for morning grazing. Serve with honey and butter.

The original version of the Sleeping Baby Biscuits recipe comes from a really old, tattered, yellowed Better Homes and Gardens cookbook my husband and I bought for a quarter at a garage sale nearly two decades ago.  The Screaming Baby Biscuits recipe is from my mom, who is not old, tattered, or yellowed, but who makes great biscuits.

Enjoy these simple biscuit recipes!


How To Make Ketchup

A reader recently asked how to make ketchup.  Great question!

Despite the fact that my two youngest like to dip pickles in ketchup, we don’t generally use a lot of it here.  Nevertheless, I was on a recent meatloaf and hamburger kick, so we went through quite a bit of the red gooey goodness.  In fact, we ran out often, and there was no way I was dragging myself to the store just for ketchup, so I made some.  It takes less time and effort for me to make ketchup than to go to the store and buy it.


There is another reason to make your own ketchup.
  If you read the back of a ketchup bottle, you will notice corn syrup in almost every brand.  Brands that do not have corn syrup have quite a bit of sugar.  And some have both!  We only buy ketchup without corn syrup, but that doesn’t negate the quantity of sugar.  I like to control the amount of sugar my family consumes…although I don’t think they necessarily like that aspect of me.

Here is how to make ketchup with our quick(ish) and simple homemade ketchup recipe, adapted from an overly sweet Allrecipes.com find.  Linda, this one’s for you!

How To Make Ketchup
Recipe Type: Condiment
Author: Christy, The Simple Homemaker
Prep time: 10 mins
Cook time: 1 hour
Total time: 1 hour 10 mins
This homemade ketchup recipe is an easy and healthier alternative to store-bought ketchup.
Ingredients
  • 6 ounces tomato paste
  • 1 tablespoon brown sugar (or rapidura, muscovado, or your sweetener of choice—I use a little less than 1 tablespoon)
  • 2 tablespoons white or apple cider vinegar (I’m an apple girl)
  • 1 teaspoon garlic powder
  • 1 teaspoon onion powder
  • 1/8 teaspoon allspice
  • 1 teaspoon salt
  • 2 teaspoons molasses (I sometimes use more—hey, it contains iron)
  • 1 cup water
Instructions
  1. Mix all the ingredients together in a small saucepan and simmer on the stove for up to an hour or until it reaches your desired thickness. Cool, and adjust seasonings and sweeteners to your taste. Makes about a cup of ketchup, depending on how thick you want it.

The issue I have with simmering for an hour is that I usually notice at the very last minute that there is no ketchup, you know, when I reach in the frig to grab and use the ketchup.  That means I don’t have time to simmer…so I sometimes don’t.  If I’m not going to simmer, I only add enough water to get it as thick as I want it.  Nevertheless, as much as I hate to admit it, it’s best to simmer so the flavors can mesh.

I double this recipe and store it in a pint-sized mason jar, but you could put it in an empty ketchup bottle.  (I say “I,” but my girls usually make this cool condiment.)

Lacto-Fermented Ketchup Recipe

A better approach is to plan ahead and make a healthier ketchup.  Gnowfglins, a fantastic site for painless education in wholesome food prep, has an excellent recipe for lacto-fermented ketchup.  This is a very simple method of adding healthy probiotics to your homemade condiment selection.  Once Upon A Plate has a slight variation of this same simple fermented ketchup recipe, and a bit of an explanation for extracting whey from yogurt.

These lacto-fermented ketchup recipes are my first choice for a healthy ketchup recipe.  Fermented ketchup is not difficult to make, and you don’t need special equipment, so don’t be intimidated by the term “lacto-fermented” or the two-day fermentation period.

One More Ketchup Recipe


If you have a hearty tomato harvest and want to go completely from scratch
, you can either make your own paste or try this ketchup recipe from Allrecipes.com.  Read the reviews first.  This is not a simple recipe, and has some strong flavors you may wish to adjust or leave out entirely according to your family’s preferences.

So there you go, Linda and friends!  Now you know how simple it is to make ketchup.  Thank you for sharing your questions.  Please submit any other questions you may have, and I’ll answer them as quickly as possible.

If you try this ketchup recipe, let us know how it goes! Come back and leave a comment and rate this recipe.

This post is linked up to:

Teach Me Tuesdays, Raising Homemakers’ Homemaking Link-up, Works For Me Wednesday, Real Food Wednesday, What’s Cooking Wednesday, Gluten-Free Wednesdays, Full Plate ThursdaySimple Lives ThursdayTurning The Table ThursdayPennywise PlatterThings I Love Thursday,  It’s a Keeper Thursday,  Frugal Food ThursdayFrugal FridayFood Trip Friday, Weekend Whatever

Simple Philosophy for Better Health

Everyone is at a different point in the journey toward better health.  Some have barely begun or have no intention of beginning, while others have pursued healthy living so vigorously, that all that is left for them is to de-stress about the whole thing.

Similarly, people have different ideas about what healthy living is.  You have your vegans, your vegetarians, your low-carbers, your calorie counters…you name it, there’s a group for it.  There’s even the “I’m not listening!” group.  See?

Simple Philosophy to Better Health - I'm Not Listening

Personally, we are most closely associated with what has become known as real foodies, although we are by no means extreme…by no means!  We eat food that is, simply put, real.  It has not been morphed into an unhealthy version of its previous self.  (Real foodies can be vegans, vegetarians, low-carbers, and calorie counters, too, by the way, although we are none of those.)  So, we eat homemade bread, but not store-bought.  We’ll have eggs for breakfast, but not Cheerios.  Butter, yes, margarine, no way on God’s green earth can you force that stuff down the throat of this born-and-raised-on-a-Wisconsin-cattle-farm girl…I mean, no thank you!  Essentially, I’m an apple girl, not a fruit snacks girl.  (Of course, that doesn’t mean we won’t eat it and love it at YOUR house…we just don’t eat it here.)

For years we had fortified cereal and whole grain crackers in the house, along with other seemingly innocuous food choices that we were led to believe were healthy for our children—granola bars, whole grain breads, soy milk, flavored yogurt.  I would keep a few frozen pizzas in the freezer for “those nights,” and we loved to feast on Manwich from a can…mmmmmmm.  (Uh, we took it out of the can and prepared it as directed, just so you know.)

Today we don’t eat any of that, unless we have made it ourselves.  That means we make our own bread, snacks, yogurt, sometimes ketchup and pasta…you name it, we probably make it.  (Although I’ve yet to find a mayonnaise recipe they will eat.)  The ingredients are simple and real.

That doesn’t sound like a simple philosophy for better health!

You’re right; it doesn’t.  (You don’t have to yell.  Just keep reading.)

If we had made the transition from our fairly decent diets to eating mostly real foods overnight, or even over-month or over-year, it would definitely not have been simple…at all!  In fact, ironically, the stress would probably have killed me, or at least launched me head first into a bag of Doritos!  (Mmmmm…chips.)

But we did not work on improving our health overnight or even over-year.  We did it over years.

Here’s the simple part of the simple philosophy for better health:

Wherever you are in your journey toward improving your health, take one step forward.  Only one!

If you drink soda every day five times a day, cut back to four.  If you smoke eight cigarettes a day, cut back to seven.  If you eat only packaged, processed foods, even those that claim to be healthy, try to make one meal a week from scratch.  If you live for sugar, gradually (gradually) cut back and replace it with something better.

If you are further along on your health journey, your steps will look different.  Perhaps you could take one item from your pantry and read the ingredients.  It should read like a children’s book, not like a science journal.  If you can’t read it in a Dr. Seuss sing-song voice, you don’t want to eat it and you certainly don’t want to feed it to your children!  Replace that one item…just that one! (Don’t even bother reading any other labels right now.)  Eventually, you won’t even remember that you used to make pancakes from a box or that you used store-bought salad dressing and soup or that you had cold cereal 15 times a week—that’s a lot of cereal.  You and corn syrup and hydrolyzed soybean oil won’t even be on speaking terms, and you won’t remember when the relationship first started to disintegrate.

Some ideas: replace your bad oil with a healthier oil (we use coconut and olive), find one salad dressing recipe to try (we can help you there), learn to do one new thing in the kitchen, such as making your own pancakes, stock, or bread.  (If you’re really new, pancakes are a snap.)  Just pick one!

Perhaps your journey toward improving your health requires something beyond food, such as exercise or de-stressing.  Focus your one step in that direction, getting a pedometer and slowly increasing your walking goal, or taking time on the occasional evening to unwind with a warm bath and an uplifting devotional.  But don’t stress about it!  If the babies are having an I-don’t-know-why-I’m-sad-so-can-you-peeeaaasse-hold-me night or your hubby is feeling chatty or amorous, enjoy the blessings of the moment rather than stressing over your lack of de-stress time.  (We humans are ironic that way.)

If you’re really far on your journey toward improving your health, then I’m probably learning from you!  Nevertheless, there is one thing I’ve noticed that many health-focused people really need to do…and that’s enjoy life! Don’t stress because your child ate the Dumdum they gave him at the bank when he and your hubby were running errands together.  Don’t become judgmental because your mother-in-law served GASP instant mashed potatoes with gravy from a package for Thanksgiving.  Don’t fill everyone’s ear with all the things within arm’s reach that will kill them—that kinda makes you a downer.  (I know, cuz sometimes that’s me.)  Unless there is a critical health issue involved, relax, live, love, laugh, and let it go.

Pick just one thing…and do it! Got it?

Part two of the simple philosophy for better health:

Aaaaaahhhhh!  There’s more?!

You bet your bippy.  (I thought you were going to stop yelling.)

When you mess up–and you will–don’t worry!  Don’t stress!  Don’t give up on the whole simple philosophy for better health.  In fact, plan some mess-ups. 

Simple Philosophy to Better HealthWe like making chips and they are delicious with a capital -licious!  But…sometimes I buy chips.  Yup…buy them.  Not the less-bad-for-you organic variety either.  And then we eat them…all at once.  And we smile.  Not just a polite little smile, but a great big giddy smile, like this:

That great big giddy smile is good for you.  Try it.

What small step is in your simple philosophy for better health?

Linked up to Healthy 2Day Wednesday.