Crock On Semi-Whole Foods Slow Cooker Cookbook Review

Disclosure: I’m pretty sure just about every link on this page is an affiliate link, meaning if you purchase an ebook or Kindle book through one of my links, I receive a portion of the proceeds at no cost to you. It’s a neat way for readers to support their favorite blogs. Crazy awesome, isn’t it? 

If you want to skip my review and go check out the Crock On ebook or print version or read the comments about the Kindle version, I’ll totally understand. I’m all about streamlining.

I am a recovering cookbook junkie. I love all things cookbook. My cookbook cupboard used to groan with overburdened shelves. And then I purged…the cookbooks, that is. One of the cookbooks I purged was my highly rated, but highly disappointing crockpot cookbook. It was filled with canned soups and powdered mixes, and the recipes rarely turned out well.

I was bummed, because I really wanted to love my crockpot, and I really wanted a cookbook to help make that happen.

Enter Crock On by Stacy Myers of Stacy Makes Cents!

Stacy’s beautiful cookbook belongs on a coffee table. I love perusing it, reading Stacy’s entertaining writing, and admiring the beautiful photography. It’s my new favorite e-cookbook. In fact, I like it so much, I bought a print copy.

Broccoli Soup

Oh, I almost forgot. I love cooking out of it, as well.

And so will you.

Here’s why.

First, the recipes are delicious. Let’s face it. That’s the top priority for the husband and the kids. If it isn’t good, it…well…isn’t good.

Second, the subtitle of Crock On is A Semi-Whole Foods Slow Cooker Cookbook. I like the Whole Foods aspect of the book, because every recipe uses real, healthy, wholesome ingredients, unlike most crockpot cookbooks that call for powdered mixes and canned soups. I like the Semi portion of that title, because it indicates that the recipes aren’t over-the-top. In other words, every recipe contains ingredients that are readily available (and easily pronounced). It’s wholesome, yet doable.

Well played, Stacy. Well played.

Garlic Smashed Potatoes

Check out some of these recipes:

  • Mexican Chicken Chowder
  • Hominy Taco Chili (I ate this three days in a row.)
  • Broccoli Soup
  • Cheeseburger Sloppy Joes
  • Carolina Barbecue Chicken Sandwiches
  • Chicken Tetrazzini
  • Maple Sesame Chicken
  • Swiss Steak
  • Sloppy Chicken
  • Beef and Broccoli (This was a hit.)
  • Cream Cheese Chicken
  • Broccoli Casserole
  • Pizza Potatoes (Major yum!)
  • Macaroni and Cheese
  • Garlic Smashed Potatoes (This was on our Thanksgiving table.)
  • Creamy, Cheesy Corn
  • Coconut Sweet Potatoes
  • Upside Down Apple Pie
  • Honey Baked Apples and Pears
  • Granola Apples
  • Double Chocolate Peanut Butter Lava Cake
  • And plenty more

Want to try a recipe? Here’s a page pulled right out of the cookbook (with permission, naturally, so don’t tattle on me). Click on the image to see the full version or to print it.

Cheesy Sausage Potatoes

Looks good, doesn’t it?

Stacy’s beautiful cookbook is only $5 as an ebook or on Kindle. It is worth much more, but Stacy’s goal is to help her readers save money, so she set the price low. She’s neat like that. I personally think the print version would make a great gift. (Ask her for an autographed copy–it makes her blush.)

Buy Crock On here as an ebook or in print.

Buy Crock On for Kindle here.

Crock On


Simple Bread Recipe

Update: I posted this simple and delicious bread recipe a year ago, and since then many happy people have written to tell me that it really is simple and delicious. I am reposting it for all my new followers…and for all of those who didn’t believe me the first time around when I said it was simple and delicious. You know who you are! 

Many of you have asked me for a simple bread recipe that doesn’t “take all day.” Ask and you shall receive!


A Very Simple Bread Recipe from The Simple Homemaker


We don’t buy bread.  Ever.

We make it all by hand.  We make sourdough bread for its health benefits, or grind wheat for a hearty whole grain loaf.  We make rolls, pitas, tortillas, flat breads, and hamburger buns.  One of the hands down favorite breads we make is, fortunately, also one of the simplest.  (While it is not the healthiest bread we make, it far surpasses most grocery store breads for its simple lack of “stuff.”) In fact, this simple bread recipe is the first yeast bread recipe my children follow to make bread by themselves.

Simple Bread Recipe

Ingredients

  • 2 cups warm water, not hot or you will kill your yeasty friends
  • 2 teaspoons yeast—a packet contains 2.25 teaspoons–close enough.
  • 2 teaspoons salt
  • 5-ish cups flour, all-purpose is fine unless you wish to alter it for health reasons

Instructions

  1. Mix the yeast into the water.
  2. Combine the salt with two or three cups of flour.
  3. Add the flour/salt duo to the water, stirring…or enlisting younger arms to stir for you.
  4. Add more flour and continue to stir until the dough holds together and is not wet.
  5. Dump the dough onto a clean, floured surface and knead. (If you don’t know how to knead bread dough, just fake it. This is very forgiving bread.) Add more flour as needed, but don’t overdo it. A little sticky is fine—too dry is not so fine.
  6. Knead until it is as smooth as a baby’s bottom. If you have no baby’s bottom at hand to compare it to, give it the stretch test. Hold the dough up to the light and stretch a portion of it. If you can see light through it before it breaks, congrats! You’re finished. If not, give it a little more tender lovin’ care. We knead this dough about ten minutes. (Sometimes we cheat and knead less. We’ve yet to be ostracized for our occasional laissez-faire kneading attitude.)
  7. Shape the bread into two or three Italian-shaped loaves or several mini-loaves. Do this by pressing the dough flat and folding it into thirds, or by rolling it up. Put the ugly seamed side down and tuck under the ends. Place the loaves on a lightly greased pan. Optionally, shape two shorter loaves and place them in greased loaf pans for “bread-shaped bread.” Grease the top (I like butter), and cover with plastic wrap or a flour sack towel. Set in a warm place to rise—the oven is too warm for rising and will kill your yeast, but the top of the refrigerator is just fine.
  8. Let those babies rise until about doubled in size, or until you get tired of waiting, whichever comes first. We wait anywhere from 30 minutes on a hungry, summer’s day to an hour and a half on an oops-did-we-forget-about-the-bread day. Normally, 45 minutes should do it.
  9. Preheat the oven to 450 degrees Fahrenheit. (My girls bake at 450 degrees, and I bake at 425 because I like the little time cushion for when (not if) I get distracted and wander somewhere that I can’t hear the oven timer. I won’t tell you whose bread my husband likes better.) Preheat for 20 minutes if you have baking stones in your oven.
  10. Slash the top of the loaves several times diagonally for that authentic, fresh-from-a-French-bakery look. Put the dough in the oven. (If you want to use baking stones, slide the loaves off the pans and onto the stones.) Spritz the interior of the oven with water. (This is optional, but gives the out-of-the-pan loaf a more tender crust. Some people have had trouble with stones and a few oven doors cracking from spritzing a very hot oven with cold water, so you may opt for a heavy duty pan with a couple cups of water set on another rack in the oven. Or skip it. Honestly, I skip it. We’re going for simple here. Some of my girls spritz the loaf and the sides of the oven.) Set the timer for roughly 12 to 15 minutes, although it may take up to 20 minutes or more, depending on the size of your loaves and whether or not they are in pans.
  11. Because all ovens, pans, doughs, and bakers are different, use this reliable test to see if your bread is done. Traditionally, cooks tap the bread; if it sounds hollow, it’s done. It always sounds hollow to me when I’m hungry and smelling fresh bread. Therefore, I take an instant read thermometer and insert it into the ugliest part of the bread where nobody will notice a hole. If the temp reads 190 to 210, it’s done.
  12. Remove, cool briefly, slice, eat. Personally, I believe bread is a means of transporting butter to the mouth, so I say load on the butter!

Wasn’t that simple?  And it didn’t take all day.

Printable Version

Tips and Trouble Shooting

If you have a stand mixer or a hand-held mixer with dough hooks, feel free to knead your bread with the dough hook instead of by hand.  Give it from four to seven minutes, usually on speed two, although you should check your manufacturer’s guidelines.  Seriously, you need to check.  Don’t ask me why I know.

If you are a stickler, you may let this dough rise twice.  We do that sometimes, shaping it after the first rise.  Honestly, though, we follow this simple bread recipe when we want a fast and simple butter transporter.  If we wanted to putz around with exact kneading and double rises and the like, we’d make something healthier.

Some people like to brush the top of the loaves with egg whites, water, or another “browner” before baking.  I prefer to brush mine with butter as soon as it comes out of the oven.  (I know—the butter thing is a little out of control.)

If your bread turns out flat, you may have let it rise too long. Punch it down, reshape and do over…but this time pay attention.

If your dough is not rising, your yeast may be old. Also, your dough may not be warm enough, a common problem in the winter. If this is a repeated problem, switch to fast acting yeast.

Simple Italian Bread RecipeYou may feel like you are adding a lot of flour. We usually end up using six cups per loaf. You can always add more, but you can’t take it out, so don’t dump it all in at once.

This simple bread is perfect spread thickly with garlic butter (a recipe for another day) alongside a big ol’ sloppy slab of lasagna.  (We’ll save the healthy eating posts for another day, as well.)

One last thing: if you are afraid of making bread, relax.  My eight-year-old has been making bread independently (not including the baking) for about a year, and she uses this simple bread recipe.

Here’s the boring printable version.

Simple Bread Recipe

Author: Christy, The Simple Homemaker
Prep time:
Cook time:
Total time:
Serves: 8
Simple, easy, and delicious basic French bread.
Ingredients
  • 2 cups warm water, not hot or you will kill your yeasty friends
  • 2 teaspoons yeast—a packet contains 2.25 teaspoons–close enough.
  • 2 teaspoons salt
  • 5-7 cups flour, all-purpose is fine unless you wish to alter it for health reasons
Instructions
  1. Mix the yeast into the water.
  2. Combine the salt with three cups of flour.
  3. Add the flour/salt duo to the water, stirring.
  4. Add more flour and continue to stir until the dough holds together and is not wet.
  5. Dump the dough onto a clean, floured surface and knead. Add more flour as needed.
  6. Knead until smooth, about ten minutes by hand or four minutes by stand mixer.
  7. Shape the bread into two or three Italian-shaped loaves or several mini-loaves. Do this by pressing the dough flat and folding it into thirds, or by rolling it up. Put the ugly seamed side down and tuck under the ends. Place the loaves on a lightly greased pan. Optionally, shape two shorter loaves and place them in greased loaf pans for “bread-shaped bread.” Grease the top (I like butter), and cover with plastic wrap or a flour sack towel. Set in a warm place to rise.
  8. Let rise until about doubled in size, 30-60 mintues, depending on the temperature of the room.
  9. Preheat the oven to 450 degrees Fahrenheit. Preheat for 20 minutes if you have baking stones in your oven.
  10. Slash the top of the loaves several times diagonally for that authentic, fresh-from-a-French-bakery look. Put the dough in the oven. (If you want to use baking stones, slide the loaves off the pans and onto the stones.) Spritz the interior of the oven with water. (This is optional, but gives the out-of-the-pan loaf a more tender crust.) Set the timer for roughly 12 to 15 minutes, although it may take up to 20 minutes or more, depending on the size of your loaves and whether or not they are in pans.
  11. Because all ovens, pans, doughs, and bakers are different, use this reliable test to see if your bread is done. Traditionally, cooks tap the bread; if it sounds hollow, it’s done. A more reliable method is to insert an instant read thermometer into the bread. If the temp reads 190 to 210, it’s done.
  12. Remove, cool briefly, slice, eat. Personally, I believe bread is a means of transporting butter to the mouth, so I say load on the butter!


Bread was invented as a means of transporting butter to the mouth.

~The Simple Homemaker, raised on a farm in The Dairy State

This seems like an ideal time to share this link about the health benefits of butter.

So…go make bread, and let us know right here how this simple bread recipe turned out!

Pouch Cooking: Baking Fish in Foil

Today I’m participating in the Ultimate blog Swap. You’ll find me posting over at Weird, Unsocialized Homeschoolers about how we roadschool (that’s Simple Homemaker lingo for homeschooling on the road), and I’m excited to welcome Amanda from Coping with Frugality at the Simple Homemaker.

Pouch Cooking: Baking Fish in Foil

I love all types of cooking–grilling, baking, fresh food. There is one cooking method that is fast, nutritious, delicious, low-mess, infinitely adaptable, and darn tasty. What is it? Pouch cooking!

Cooking in a pouch is a remarkably simple method capable of producing remarkably complex aromas and flavors. How does it work? Well, if you apply enough heat to food, the moisture inside will be released as steam, right? The steam usually just drifts away, taking a lot of heat with it. But placing food in a pouch is, well, kind of like getting in a small tent on a warm day, okay? Instead of evaporating, that moisture and the heat is trapped right up against the food, cooking it very, very quickly. And since the aromas, the flavors, the essence of the food is captured, fish tastes more like fish, chicken tastes more like chicken, and I suppose, given enough time, I would even taste more like me.

Here is my basic strategy for pouch cooking. I usually pick a meat, this time grouper. Then I build upon that with vegetables. There are a lot of vegetables that would work well with this recipe for baking fish in foil, but this time I picked dried mushrooms, zucchini, and jalapenos. Next is the starch. I love using ramen-style noodles. They are inexpensive, super easy, and taste great in this recipe! Moving on to the aromatics, I never go more than two. This time I kept it simple with lime rind (using lime juice in the sauce as well). Seasonings? Anything goes, but I like to keep things simple. We’ll go with salt and black pepper.

(TSHM Note: Rewritten to avoid plagiarism. Many people aren’t aware that you can copy another person’s ingredient list if you give proper credit, but you must rewrite the instructions. My apologies for not checking this guest piece prior to publishing. It’s all better now.)

Preheat your oven to a whopping 400 degrees Fahrenheit. (You don’t store anything in your oven, do you? Check!)

Crunch up those noodles. Get someone small to help you. Divide them among the foil pieces. Then place on top the following: fish, mushrooms, zucchini, jalapeños, lime zest, salt and pepper.

Pouch Cooking: Baking Fish in Foil

Wrapping time! Pull up the corners and side of the aluminum foil to all food is safely encased inside. Leave a “chimney” for pouring in the wet ingredients.

Pouch Cooking: Baking Fish in Foil

Mix together the liquids: vegetable broth, mirin (what is that anyway?) or cider vinegar, soy sauce, lime juice, and sesame oil. Pour an equal amount down each chimney, sealing it off afterward, with the exception of a small steam vent. Pop it all on a baking sheet to contain and overflow. Bake those babies for 15 minutes and serve ’em up good and hot!

Pouch Cooking: Baking Fish in Foil

Ingredients for Baking Fish in Foil

2 packages Ramen noodles
1 cup dried mushrooms, chopped
4 – 4 oz grouper filets
1 cup chopped zucchini
1/2 teaspoon kosher salt
1/4 teaspoon black pepper
1 quart vegetable broth
1/2 cup mirin or cider vinegar
1/4 cup soy sauce
4 teaspoons sesame oil
Zest and juice from 2 limes

Print the pouch cooking instructions for baking fish in foil here:

Pouch Cooking: Baking Fish in Foil
Author: Amanda of Coping With Frugality
Prep time:
Cook time:
Total time:
Serves: 4
A quick, healthy meal with little clean-up, and open to countless variations to suit any taste. Does it get any better?!
Ingredients
  • 2 packages Ramen noodles
  • 1 cup dried mushrooms, chopped
  • 4 – 4 oz grouper filets
  • 1 cup chopped zucchini
  • 1/2 teaspoon kosher salt
  • 1/4 teaspoon black pepper
  • 1 quart vegetable broth
  • 1/2 cup mirin or cider vinegar
  • 1/4 cup soy sauce
  • 4 teaspoons sesame oil
  • Zest and juice from 2 limes
Instructions
  1. Preheat your oven to a whopping 400 degrees Fahrenheit. (You don’t store anything in your oven, do you? Check!)
  2. Crunch up those noodles. Get someone small to help you. Divide them among the foil pieces. Then place on top the following: fish, mushrooms, zucchini, jalapeños, lime zest, salt and pepper.Wrapping time! Pull up the corners and side of the aluminum foil to all food is safely encased inside. Leave a “chimney” for pouring in the wet ingredients.
  3. Mix together the liquids: vegetable broth, mirin (what is that anyway?) or cider vinegar, soy sauce, lime juice, and sesame oil.
  4. Pour an equal amount down each chimney, sealing it off afterward, with the exception of a small steam vent.
  5. Pop it all on a baking sheet to contain and overflow.
  6. Bake those babies for 15 minutes and serve ’em up good and hot!

Did you try this recipe for baking fish in foil? Please share your experience and variations on pouch cooking in the comments below, and rate the recipe!

Visit Life Your Way to see all of the Ultimate blog Swap participants.

A Realistic Perspective on Real Food in a Very Real World

Grace. We all need it in every aspect of life. One area that generally lacks grace is the mainstream Real Food Movement. If you are feeling overwhelmed, discouraged, or anxiety-ridden by the heavy-handedness among many (not all) real foodies, you have come to the right place. I am honored to be joining three terrific ladies offering you grace through these four posts on The Real Truth About Real Food:

Real food

My husband is a traveling Christian musician. (Hold on. This does have to do with real food.) Because we are a family that does everything together, we go with him. That, my friends, means 9 people and a 130-pound dog in a super-sized van towing a trailer all over the country meeting people from all walks of life. All walks of life.

Many of the churches we visit feed us in one way or another. We have been blessed with elaborate spreads and honored with humble meals eaten among new friends. We’ve met people who eat their food straight from the earth and those who eat their food straight off the shelves. We’ve encountered people who could afford to eat whatever they like and those who are barely scraping by, living off the church’s food bank until they can get back on their feet. All walks of life, I tell you.

Real Food

One of our tours took us through many poor churches whose members generously shared their meals with us. That experience made me rethink my fairly dogmatic view of what was truly important about food. I felt almost…embarrassed by some of the real food aspirations I held. I also grew downright indignant (to put it nicely) toward the type of real foodies who shout “You’ll be sorry!” at those whose lives necessitate veering from real food perfection. Where’s the grace in that?

Our lives necessitate not merely veering from perfection, but taking some serious detours along the way.

There are two approaches we can take as a family in our current circumstances where eating the ideal real food diet is, simply put, impossible. We could riddle first our minds and then our bodies with disease and infirmity by stressing over the potential health hazards of not attaining real food idealism. This would, naturally, involve struggling to meet what amounts to unrealistic goals for this season in life, wreaking havoc on our budget, and bearing the burden of guilt for our failures. (Sounds like fun, doesn’t it? It’s not. I tried it.) Or we could do the best that we can, ditch the unhealthy stress and guilt, and enjoy the blessings of fellowship and food on the road, however imperfect it may be. Did you catch the irony? In case you missed it, let me rephrase:

Stressing over health is one of the unhealthiest things a person can do.

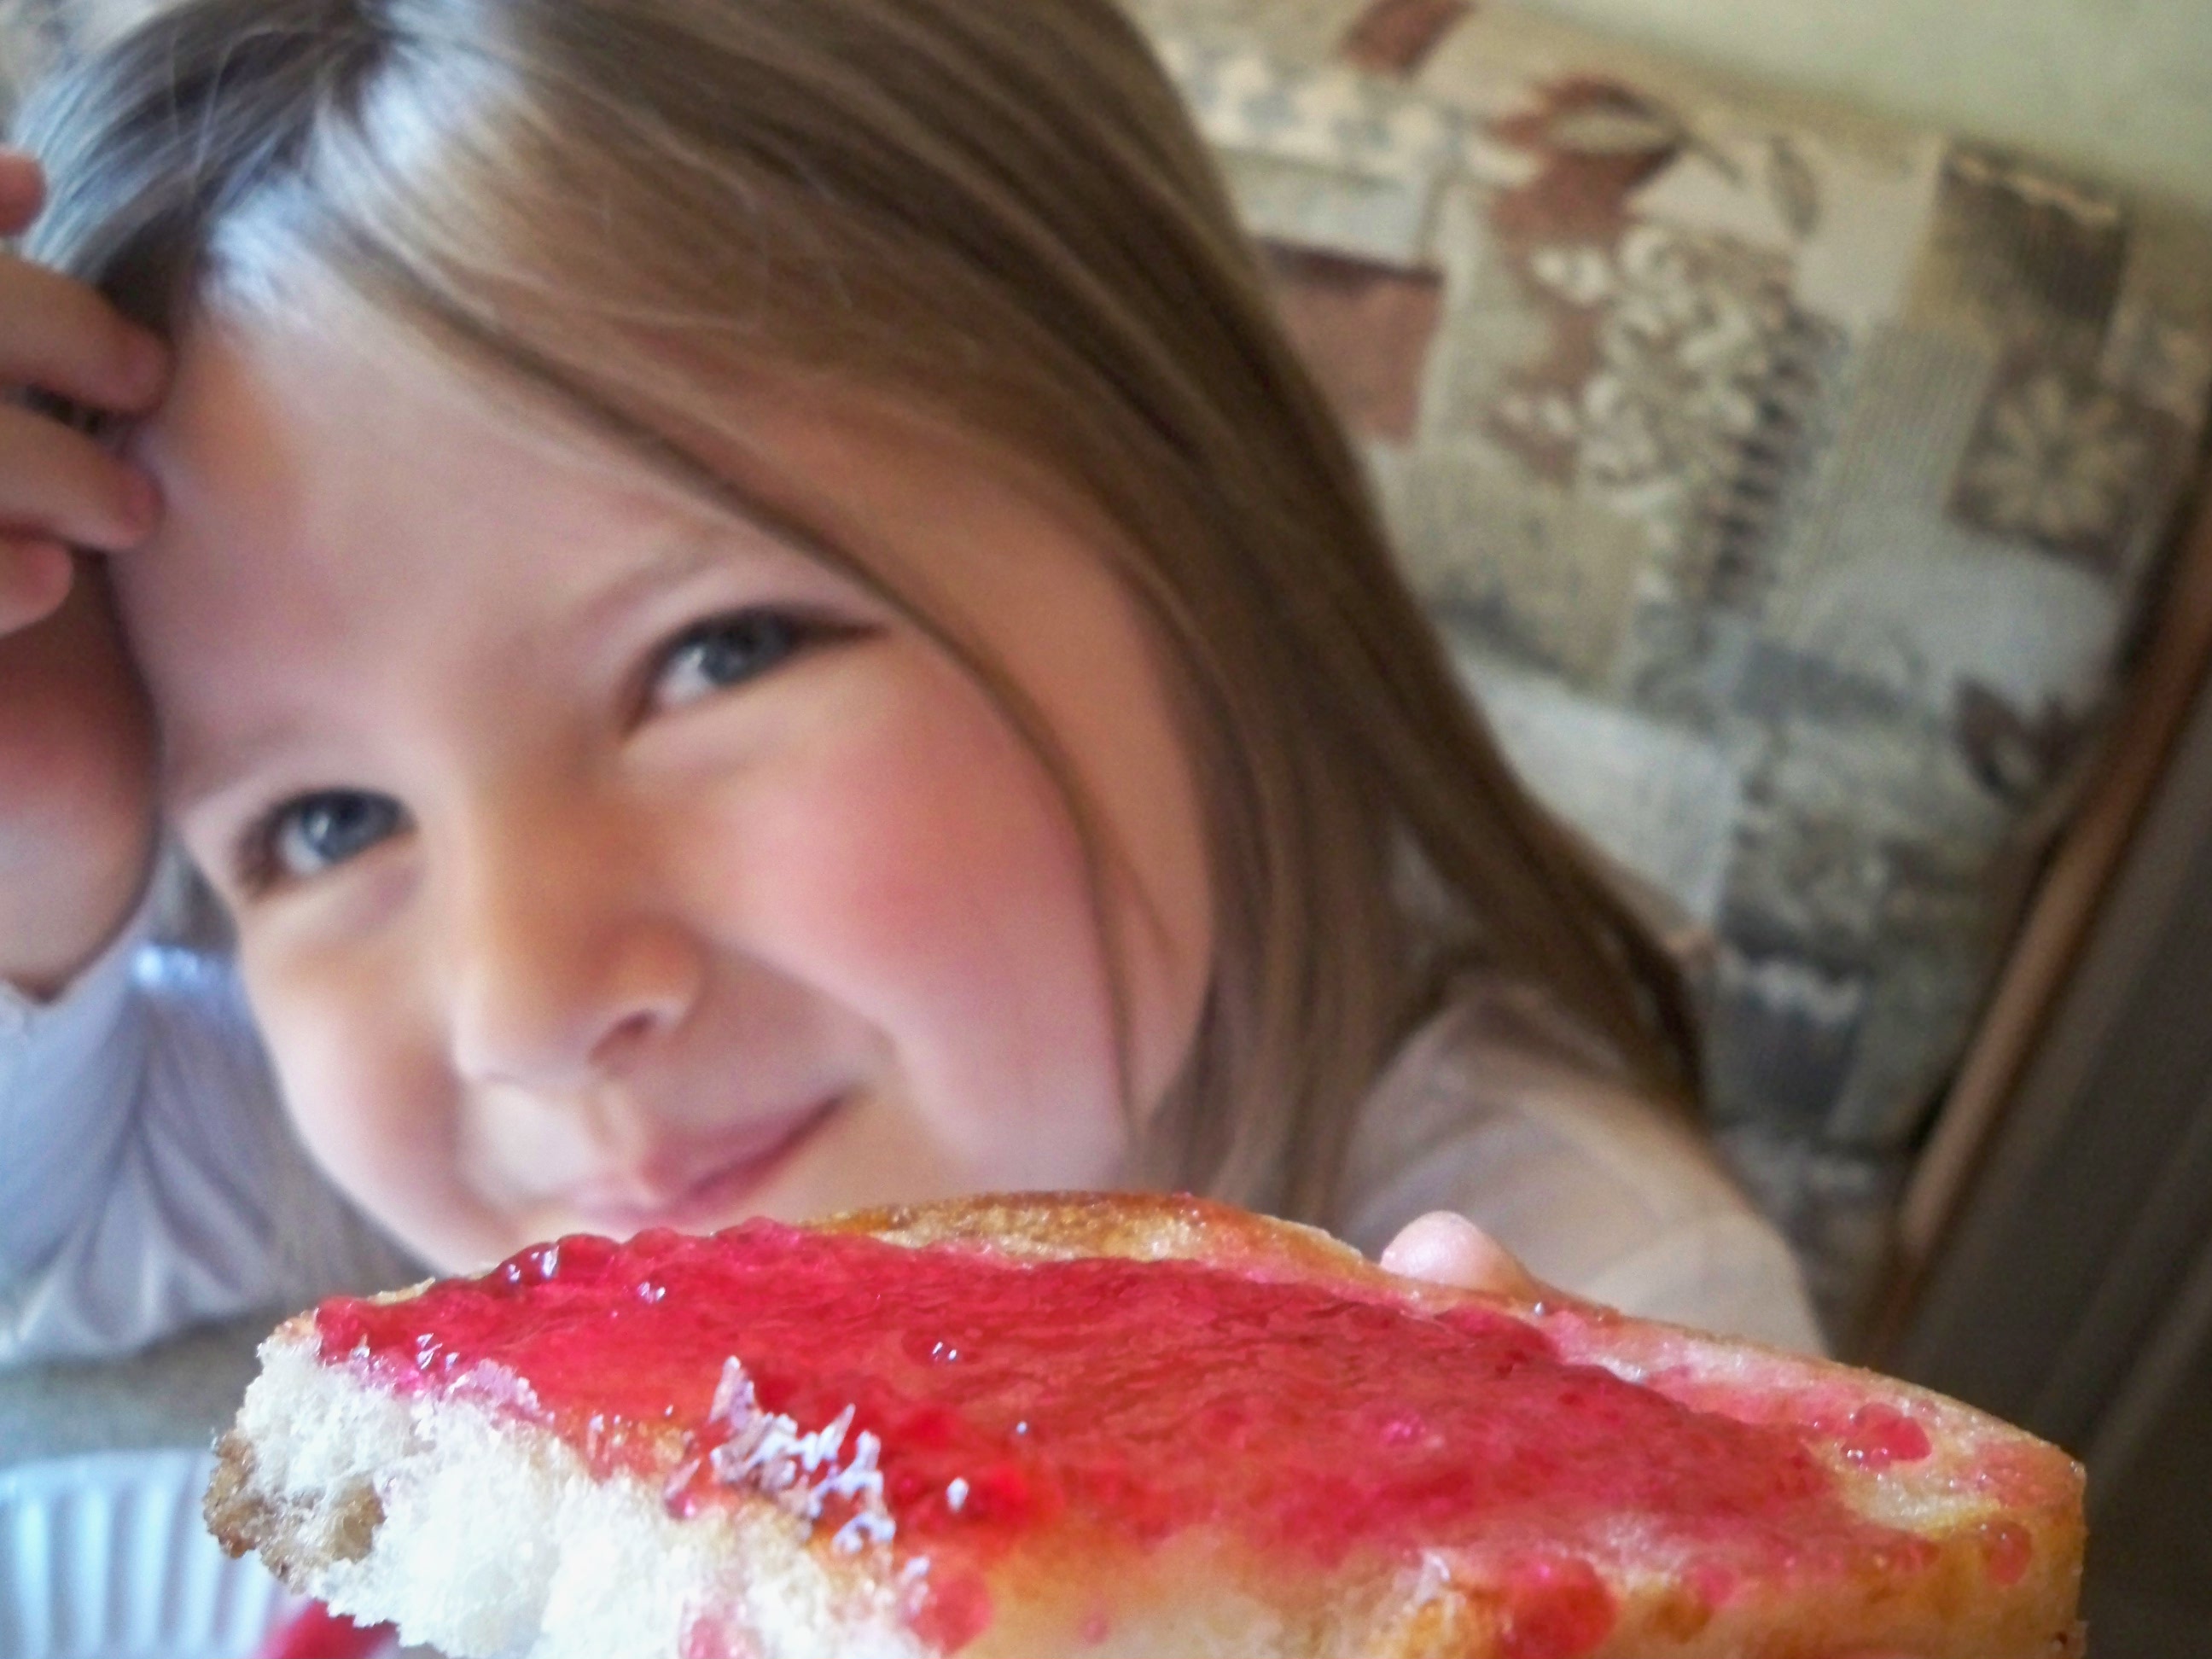
Also ironic is that one of the most priceless lessons I learned about eating, joy, and appreciation came not from the real foodies, but from those we met on our travels, specifically those who have very little food. (Of course, my hubby will tell you that he’s been saying this all along…and he would be right…again.) Those people are not calculating whether their yogurt was cultured for 24 hours or 6. They don’t have the luxury (or curse) of worrying whether their eggs are farm fresh or whether the chickens consumed soy. They’re not wondering whether their apples are organic and cleansed properly or if they were picked up off the ground and rubbed on a pair of dirty jeans (the only way to eat apples, in my book).

They are grateful for whatever is set before them and they eat it with joy.

Shouldn’t we all eat with joy?

Real Food

I’m not saying that there is anything wrong with being a real foodie. Personally, I feed my family food that is as untouched as possible. We make almost everything from scratch. We minimize the amount of sugar we consume, bake our own bread, culture yogurt, soak nuts, make granola bars, and on and on it goes. Cold cereal–what’s that? Frozen pizza–a distant memory. Store-bought salad dressing–not here.

But you know what? I refuse to let real food be my idol, and I refuse to let real foodies stress me or my family into a state of perpetual anxiety.

I know some people have never had a gram of sugar or a preservative in their lives.  Me? Well, if preservatives actually worked as well on the human body as they do on margarine (and I hope they do), I’d live to be 280 from what I consumed in college alone. I know some parents religiously monitor their children’s toxin exposure. Me? I’m very cautious, but I cannot deny the health benefits of the sheer joy that is served up with my grandpa’s chocolate malts or the occasional hot Krispy Kreme donut. I know some people will refuse food served by others if they know it is not ideal. Me? I totally enjoy myself as I fellowship over food, however imperfect. (Admittedly, I steer toward the healthy, and I dutifully turn down foods that give my nursing baby colic or me…a-hem…flatulence…for the sake of my hosts. You’re welcome.)

Real Food

Yes, there are real allergies out there and real health conditions and overall we should try to make real food a very real part of our very real lives. With that I heartily agree.

But…

We should not sacrifice real living in the process. We should not crucify joy on the cross of food perfection.

When the anxiety of eating becomes so great that the enjoyment and blessing have been replaced by fear, there is a problem. When others (or you) are made to feel inferior, anxious, or guilty because the food on their plates is not ideal, a whole new arena of hazards is being introduced–mental, emotional, joy-sapping hazards. When the food becomes more important than the relationships, there is a problem. When other people are starving and parents are flippin’ out because Grandma offered Junior a graham cracker (assuming Junior is not allergic to graham crackers), priorities are skewed…and not just a little bit.

I’m living in a place called The Real World, and living in that zipcode requires balance. If you’re a neighbor (also living in the real world), and you find yourself needing a frozen pizza or even a GASP Pepsi with crushed ice and a straw from time to time, enjoy! Eat it with a smile, because food is a blessing that not everyone has, and because that smile is good for your health…and stress will kill you faster than corn syrup.

Real Food

I may not be the ideal real foodie, or even close for that matter, and we may not live to be 120, but this one thing I know: the joy and friendship enjoyed over our meals on the road are far better for our health than the stress of striving to achieve unattainable perfection. Who wants to be perfect anyway–it’s lonely at the top, and studies show you live longer if you ditch the stress and loneliness in favor of real relationships with other real people. I’m pretty sure studies would show you live longer if you eat nachos, too, don’t you think?

I’d love to hear your thoughts…but keep it friendly. This is a bully-free zone.

Remember to visit these lovely ladies!

How to Cook White Rice and a Crockpot Chicken Adobo Recipe

White rice is a staple in many cultures. At our house full of part-Filipinos, it is an essential accompaniment to this version of our favorite Filipino dish, crockpot chicken adobo, which is featured today at Stacy Makes Cents Fix and Forget Friday.

Learning how to cook white rice is so simple, you’ll never buy instant rice again!

How to cook White Rice and Crockpot Chicken Adobo
Crockpot Chicken Adobo over White Rice

How to Cook White Rice

Ingredients

  • 1 1/2 cups white rice
  • 2 cups water or stock

Directions

  1. Combine water and rice in a medium stockpot.
  2. Bring the rice to a rolling boil.
  3. Give it a quick stir, cover, and turn down to low.
  4. Cook, covered, for 15 minutes without peeking! Do. Not. Peek.
  5. After 15 minutes, shut the stove off. Don’t peek! Leave the rice covered for another 10 minutes—no peekie!
  6. Your rice is done. Fluff it, scoop it, or shape it with a measuring cup.

You may notice that some rice brands and methods of cooking result in a stickier rice. Cultures that use fingers or chopsticks to eat their rice want the nice stick-togetherness that this recipe will provide.

No-measure tip: My Filipino grandfather-in-law always had a pot of rice on the stove, and let me tell you, Filipinos know how to cook white rice. Instead of measuring, he combined the rice and water in the pot, adding enough water so that when he touched the top of the rice with his finger, the water reached the nearest knuckle.

For a true Filipino experience, top your white rice with my family’s Crockpot Chicken Adobo, our version of a popular Filipino dish, which is featured over at Stacy Makes Cents. Your rice will thank you.

Click here for the Crockpot Chicken Adobo Recipe.

Here’s the printable recipe for how to cook white rice:

How to Cook White Rice
Recipe Type: Side dish
Author: Christy, The Simple Homemaker
Prep time: 5 mins
Cook time: 25 mins
Total time: 30 mins
Cooking white rice is so simple, you’ll never resort to instant rice again.
Ingredients
  • 1 1/2 cups white rice
  • 2 cups water or stock
Instructions
  1. Combine water and rice in a medium stockpot.
  2. Bring the rice to a rolling boil.
  3. Give it a quick stir, cover, and turn down to low.
  4. Cook, covered, for 15 minutes without peeking! Do. Not. Peek.
  5. After 15 minutes, shut the stove off. Do not peek! Leave the rice covered for another 10 minutes—no peekie!
  6. Your rice is done. Fluff it, scoop it, or shape it with a measuring cup.
Notes

No-measure tip: My Filipino grandfather-in-law always had a pot of rice on the stove. Instead of measuring, he combined the rice and water in the pot, adding enough water so that when he touched the top of the rice with his finger, the water reached the nearest knuckle.

10 Ways to Use Leftover Hard-Boiled Eggs

10 Ways to Use Up Easter Eggs

Eggs have a natural protective coating that keeps the inside of the egg fresh despite the porous nature of the shell.  When you boil hard-boiled eggs, you wash the protective coating off the shell, taking away nature’s preservative.

If properly refrigerated, hard-boiled eggs are generally considered edible for a week after they are boiled. (No need for confessions here about how long any of us actually let those eggs go!) That gives you an incredibly short amount of time to use up the 9 dozen eggs you boiled for Easter.

10 Ways to Use Up Easter Eggs

Here are 10 ways to use up the eggs before they go bad. Some are common, others are unique. The combination will keep your family from saying “Eggs?! Again?!!!”

10 Ways to Use Leftover Hard-Boiled Eggs

Eat them as is…sort of: hard-boiled eggs make a great quick breakfast, easy lunch addition, or protein-rich snack. They are less boring if you use your mama powers to transform them into an adorable family of chicks or regal egg penguins.

100_0321

Sliced on salads: a salad bar with sliced fruits, veggies, seeds, and hard-boiled egg slices makes a great lunch or light dinner.

Top soups: slice them and use them to top soups such as saimin, our personal favorite “fast food” noodle soup from Hawaii. Many saimin recipes call for scrambling the eggs, but we noticed that the locals slice hard-boiled eggs and drop them on top.

Em's birthday, Gma's visit, April 2009 003

Potato salad: use as an add-in for potato salad. There are about 3 million different recipes for potato salad, so choose your favorite or check out this impressive list of potato salad recipes from Idaho, where they know potatoes!

Deviled eggs (or stuffed eggs): try this deviled eggs recipe or the accompanying tutorial for these darling chicks if you’re feeling creative.

100_0350

Add-ins: chop the eggs and add them to just about anything, from a breakfast bake to a noodle casserole.

Egg salad: this basic recipe for egg salad also lists numerous variations as well as an egg salad quesadilla.

100_0348

Scotch eggs: If you’ve never eaten these Scottish sausage-wrapped eggs, you’ve never…well…eaten them. If you’re intimidated by the traditional deep-fried Scotch eggs, try this recipe for baked Scotch eggs.

Make meatloaf: Huh? Okay, so this Filipino style meatloaf is not exactly quick and simple, but it is Filipino, and I married a Filipino, and, seriously, meatloaf with hard boiled eggs in it? Um, yum! You at least have to take a look. (You can vary the recipe if you don’t like raisins and sweet relish in your loaf, but why not be adventurous!)

Ways to Use Leftover Hard-Boiled Eggs

Make cookies: here is a modernized approach to making Lezindoich or lemon dough cookies if you don’t have a ricer to rice the eggs. Fear not—it’s simple!  Here are a few more hard-boiled egg cookie recipes, like oatmeal and chocolate. Mmmm.

How to Use Up Leftover Hard-Boiled Eggs

And a bonus use–Target practice: if you can’t manage to eat up all the eggs before they’ve expired, send the kiddos into the woods to toss them at a tree.  The critters will thank you.

What is your favorite way to use up leftover hard-boiled eggs?


Recipe for Egg Salad–From Basic to Fancy

I have a huge soft spot in my heart (and stomach) for egg salad sandwiches. Whenever I would go on an outing as a child or young adult with my grandmother, my grandfather would pack us egg salad sandwiches on wheat bread with lettuce, cut into rectangles, not triangles. I love them to this day…my grandparents and egg salad.

A basic egg salad sandwich recipe with numerous options for add-ins and serving ideas to suit everyone! Check the comments for even more ideas, and add your own!

Enjoy this basic recipe for egg salad, along with several options for add-ins and serving variations.  Please share your favorite add-ins or variations in the comments below.

Recipe for Egg Salad

Ingredients

  • 8 hard-boiled eggs (figure two eggs per person)
  • 1/2 cup mayo (or to your preference)
  • salt and pepper to taste
  • any of the optional add-ins or serving variations below

Directions

Peel eggs and toss into a bowl.(Read How To Boil an Egg and Peeling Hard-Boiled Eggs for perfect eggs—easy to peel and a beautiful color.)

Recipe for Egg Salad

Chop or mash the eggs, based on your preference.

Recipe for Egg Salad

Add mayonnaise one spoonful at a time to your desired creaminess.

Recipe for Egg Salad

Salt and pepper to taste. Add your add-in of choice, if any. (We usually add a squirt or two of mustard.) Combine.

Serve as is or on bread, a bagel, or in a tortilla. We usually serve ours on this simple homemade bread.

Recipe for Egg Salad

Optional add-ins

  • mustard
  • chopped onion
  • chopped celery
  • chopped bacon
  • tuna
  • curry powder
  • chopped ham
  • pepperoncini or your pepper of choice
  • thawed, cold peas
  • See the comments for more!

Optional sandwich serving variations

  • lettuce
  • tomato
  • bacon
  • sprouts
  • avocado slices
  • sliced cucumbers
  • tortillas
  • your favorite bread
  • bagels

I recently heard of a creative cook spreading egg salad on one half of a tortilla, adding cheese, folding it in half, and heating it on a griddle—egg salad quesadilla! Olé!

What are your favorite add-ins or variations for this basic recipe for egg salad? Curious minds (and hungry stomachs) want to know!