How to Find Pick-Your-Own Farms in Your Area

How to Find Pick-Your-Own Farms in Your Area


Summer is upon us. It happens every year. I’m not sure why I’m surprised.

One of the best parts of summer in my hungry humble opinion is the availability of fresh produce. Fresh blows the roots off anything you can find in the grocery store.

I’ve been shocked to learn that my suspicious nature has been proven correct at farmers’ markets–some venders are receiving supplies from the same places as the grocery stores. Say wha?! That’s what I read. While the farmers’ markets are still a great option, because you can find any number of legit, hard-working farmers peddling their wares, here’s another option for you:

Pick-your-own farms.

Pick your own farms are abundant throughout the country…except maybe the desert. Here’s what I love about pick-your-owns:

  • You know exactly how fresh the food is.
  • You know exactly where the food came from, right down to the stem on the plant in the row in the field.
  • The prices are almost always significantly lower than anything you’ll find in the grocery stores, and almost always cheaper than the farmers’ markets as well.
  • It is educational. Your kids get out of the house, away from the city, and out onto the land to see where food really comes from.
  • It smells good–the dirt I mean, and the strawberries, and everything else. Maybe it’s because I grew up on a farm, but I love the smell of rich dirt.
  • Your kids can get dirty. Your kids should get dirty. Your kids need to get good and dirty as often as possible. It’s good for their immune systems. It’s good for their kid-ness. It’s just plain good for them to be outside getting sun and fresh air and, yes, dirt, without anyone telling them not to muddy their $65 shoes. Get the $12 Walmart shoes and the $2 thrift store jeans and let the kids get dirty for the love of all things real!
  • Your children are far more likely to try something new if they had a hand in it somehow. That hand can be as simple as selecting it at the grocery store, but the stakes are upped even more if they planted it or picked it themselves.
  • It counts as exercise! Woo hoo! Squats for strawberries, toe raises for cherries and apples.
  • The farmers are right there–you can ask them what goes on their plants and if they’re in bed with MonSatan MonSanto.
  • It’s wholesome family fun. Whee!

Those dirt comments totally made you want to find a pick-your-own farm near you, didn’t they? Good! Check out this website:

PickYourOwn.org

It has to be one of the worst looking sites I’ve run across in quite some time. It totally needs a rehab. I hate it. At the same time, I love it! It shares PYO (I got tired of writing pick-your-own) farms all over the country, and you can search by state and county. Each farm has a write-up and places to go for additional information. It rocks in its out-dated ugliness. Go check it out.

You can also run a quick search of your own region on Google or (my favorite search engine, since it helps me pay for Christmas presents just by searching) Swagbucks {affiliate link}. Just type in “Pick your own farms in Smyrna, Tennessee”…or wherever you live, since I’m pretty sure you don’t all live in Smyrna–nice place though.

Happy picking! I’ll see you in the fields!

What is your experience with pick-your-own farms?

How to Find Pick-Your-Own Farms in Your Area

Save

Save

Save

Cure Anemia Naturally With These Top Foods Rich in Iron

Cure anemia naturally with these top foods rich in iron. No more sleepy mama!


My daughter with Crohn’s often has to battle anemia, and I occasionally have the same problem, like right now. My daughters were excited to jump on the natural healing train when they heard my recent anemia diagnosis, and they immediately began filling my tired self with molasses and homemade chocolate, because that’s what we do–heal ourselves with food.

For those of you interested in battling the debilitating exhaustion of anemia with food, I’ve got a reasonable list of fairly normal foods rich in iron.

Iron is present in both animal and plant foods, and it does make a difference which you consume. We’ll break them up into those two categories, because categories are fun. Whee!

Top Animal-Based Foods Rich in Iron

Animal sources contain heme iron which is highly absorbable at a rate of around 30%. You do not need to eat these foods in combination with anything else to improve absorption, although you may consider not simultaneously eating the iron absorption inhibitors conveniently listed at the end of this article.

  • Organ meats
  • Beef (your best bet)
  • Lamb and pork
  • Poultry
  • Seafood (shellfish is significantly higher than fin fish)
  • Eggs (chicken are the highest, but others rank well)
  • Dairy does have some level of iron in it, but calcium is an inhibitor, so…there ya go.

I’m totally aware that I just listed all the normal available animal foods in the stores.

Top Plant-Based Foods Rich in Iron

Plant sources contain non-heme iron, which absorbs at a rate of about 5%. Not very impressive, is it? You can improve the absorption by eating these products in conjunction with a meat source (especially beef), vitamin C, and citric acid.1

  • lentils
  • beans
  • tomatoes
  • potatoes (leave the skin on)
  • spinach
  • pumpkin
  • sesame seeds
  • pumpkin seeds
  • chickpeas (check out my favorite hummus recipe)
  • dried fruit
  • nuts
  • coconut
  • rice
  • wheat flour
  • oats
  • these other grains
  • molasses
  • cocoa, especially dark

Iron-Absorption Inhibitors

The following foods often prevent or decrease the absorption of iron. Ironically, some of them are excellent sources of iron. Confusing, isn’t it? Kinda like wondering whether you should wash that red and white striped shirt with the whites or the darks. The best advice this non-medically-trained mama can give you is to avoid these foods during a high-iron meal, but not in general, since a well-rounded diet is your best friend (and you thought it was your dog).

  • protein from the yolk and white of eggs (strangely, some people cure anemia by upping their yolk intake)
  • cocoa (do not tell my girls–I’m enjoying the indulgence)
  • phytic acid–this is a common mineral stripper found in the bran of grains, legumes, and other plants that can be reduced by soaking or fermenting.
  • dairy because of the calcium
  • magnesium, zinc, copper
  • tannic acid found in tea
  • peppermint or chamomile
  • coffee–so don’t have a coffee with your porterhouse steak, ‘kay?

Why Not Just Take a Supplement?

While Hannah was prescribed a supplement and took it religiously while anemic so as not to further incite the wrath of her doctor who was not 100% on board with our dietary approach to healing, I do not. Here’s why:

  • I already have to eat. Why not eat smarter!
  • Iron supplements are notorious for causing constipation, which is something Crohnsies and pregnant women battle anyway–why make it worse?
  • Supplements cost money–again, I’m already buying food.
  • Many supplements are not very absorbable.
  • Some of them are stinky–blech. (Okay, that doesn’t really stop me, but it might stop, say, your three-year-old.)

1. Source

Check here for a more thorough list of iron-rich foods that takes considerably longer to read; optionally, go eat a steak.

What are your best tips for fighting anemia? A strong upper left hook?

That lame joke reminds me of a quote from one of my children: “Mommy, would you like some crackers to go with your jokes?” I do get pretty cheesy.

Photo credit (without text)

Save

How to Fry an Egg

This post contains affiliate links and an egg-frying technique. Beware. 

Embarrassing Confession: Until last month I couldn’t fry a decent egg to save my family. Life wasn’t always so grim. I used to fry eggs just fine. I didn’t really know what I was doing, but that didn’t seem to matter. I had a pretty good egg-frying track record. I temporarily thought I was endowed with a little extra magic in the kitchen or maybe a bit of beginner’s luck. Then somehow, I lost my egg-frying abilities. It was a sad day fifteen years. I now know it wasn’t beginner’s luck or talent that landed the rare identifiable egg on my hubby’s plate–it was just God offering my hungry husband a little mercy.

Now, however, I can fry an egg like a pro because I learned from the pros. You may think this is no big deal and a ridiculous post, but I can guarantee you there is a Frustrated Someone out there searching “How to fry a stinkin’ egg already!” I get you, Frustrated Someone. I totally get you.

I learned how to fry a stinkin’ egg (and do other amazing-to-me things in the kitchen) from the book my hungry husband gave me for Christmas, entitled The America’s Test Kitchen Cooking School Cookbook: Everything You Need to Know to Become a Great Cook. It’s a big title and an even bigger book.

In case you think my husband’s a big fat meanie, I requested the book after one too many broken eggs and dry roasts.

Anyway, this really isn’t about the book. It’s about how to fry a stinkin’ egg already! (This is a bad picture of my stinkin’ eggs, but when you live in a trailer and shoot with a cell phone, it’s how egg pictures look. Trust me that the rest of my eggs looked much better than the eggs in this picture, but we were so excited that I was making consistently (instead of randomly and rarely) awesome eggs that we ate the stinkin’ things with no pictures.)

How to Fry an Egg ... because some of us just can't.

How to Fry a Stinkin’ Egg

(According to America’s Test Kitchen, with some additions from l’il ol’ me)

What You Need:

  • non-stick pan–8 or 9 inches for 2 eggs, 10 inches for 4 (I just use what I have)
  • butter–about 1.5 teaspoons per 2-4 eggs (3 teaspoons is a tablespoon–memorize it)
  • stinkin’ eggs–2 per person is reasonable, eh?
  • spatula (turner)
  • timer

What You Do:

  1. Heat the pan over medium-high heat for five minutes. Set your timer.
  2. Meanwhile, crack the eggs on a flat surface, not on the edge of the bowl or pan. Why not? Because minuscule egg shell fragments may be forced into the egg, and you won’t see them and then you’re swallowing little shell shards and making your intestines cry. Nobody wants weepy intestines.
  3. Put the eggs in a cute little bowl, two eggs to a bowl. If you’re making four eggs, use two bowls. That way the eggs all go in at the same time and get done at the same time. Eggs like everything to be fair.
  4. After the pan has been heating for five minutes, toss the butter into the pan. When I say toss, you know I mean place gently, right?
  5. Tip the pan to melt the butter and coat the pan. The butter should melt in under a minute. If it takes longer than a minute, your pan is not hot enough–heat it longer. If your butter burns during that minute, your pan is too hot–start over, and, uh, it’s okay to cry a little, too. I mean, it’s butter!
  6. Gently tip the cute little egg-bearing bowls and gently deposit the eggs into the properly heated pan. Don’t plop them in from the heavens. Get down in there.
  7. Hurry scurry like a little bunny and salt and pepper those babies, unless your preschooler is eating them and doesn’t like pepper. Test Kitchen Guru says 4 parts salt to one part pepper. I just shake-a shake-a, but remember, my husband is a hungry man.
  8. Quickly cover the pan to maintain the temperature. If your pan doesn’t have a cover, do what my brother does and plop a cookie sheet on top. If your cover has a little steam vent, don’t do what younger and dumber me did and plug the vent with your finger. Moving on.
  9. Cook for 2 minutes, and then do a quick peek to check the eggs to see if they are to your liking. “Done” means the membrane over the yolk is white. If you like the yolk hard, cook it longer. I’m more of a 3.25-minute egg girl myself. I also like peanut butter on my eggs, so you shouldn’t go by my likes.
  10. At this point you have some options. My mom adds a splash of water to the pan to steam the eggs and cook the tops better. I flip some of my eggs when they’re nearly done and firmly set, because the people I feed like the yolks better that way. Test Kitchen Guru leaves them alone. You, Frustrated Someone, can choose.

That’s it. It’s really simple. Still, I’m going to talk on. These next points are embarrassingly obvious, but if you’re reading this to learn how to fry an egg, Frustrated Someone, you and I need people to point out the obvious. There’s no shame in that. No shame.

  • Please don’t overcook your eggs. You can always cook them a little longer, but you can’t uncook them, unless you call giving them to your dog and starting over uncooking.
  • Toast your bread while you’re waiting.
  • Have softened butter available to spread on your hot toast. Well-buttered toast helps ease the pain in case your egg fry fails. I like to pop my toast in the pan after I pull the eggs out.
  • Use a really good skillet. While I’m all about taking accountability for your actions, you really can blame this failure on the tools.
  • Don’t get distracted by a four-year-old and the word “eggs” and go off and read Green Eggs and Ham and forget that you’re frying eggs. That’s what timers are for! Also, seriously, never leave the stove unattended and scamper off on an outdoor adventure and have to call the house from the back 40 to ask someone to take your stinkin’ eggs off the stinkin’ burner and feed them to the stinkin’ dog who will be very sad you’re finally learning how to cook in a way that people will eat it.

In summary:

  1. Preheat pan for five minutes.
  2. Add butter.
  3. Gently add eggs.
  4. Season.
  5. Cover.
  6. Cook.
  7. Check.
  8. Serve.

Go for it, Frustrated Someone! Go fry an egg!

Now, I know you must have a cooking challenge of your own. If you share it in the comments, I would be happy to look it up in my cool fun new Cooking School book and write about it.  So happy!

11 Tried and True Tips for Getting Kids to Eat Veggies

11 Tips From a Mama of 8 to Get Kids to Eat Veggies


One poor mama asked me how to get her kids to eat their vegetables. She has a child that gags and cannot swallow his veggies. Poor guy.

Many people will judge. I might have after my first four girls, who ate their vegetables enthusiastically, but now I eat my veggies with a side of humble pie! Here’s why:

We went through the whole gag issue with one of our seven, our boy. He would gag with certain veggies in his mouth. If required to swallow, it would come back up. Mmm…that’s appetizing. I don’t think anyone watching the scene firsthand could say it was an obedience issue. He physically couldn’t get them down, and he was a very obedient child. We kept offering the veggies and now he inhales them all.

Here is what we did to make veggies a readily accepted part of my son’s diet.

11 Tried and True Tips for Getting Kids to Eat Veggies

1–Frozen peas and green beans are like ice cream bonbons. Okay, they’re totally not, but they’re fun to eat if your kids are beyond the choking stage.

2–Smoothies are God’s alternative to dinner table battles and McDonald’s drive-throughs. Throw in a tiny bit of veggie and gradually increase the amount.

3–I often opted for heavily veggie-based dishes instead of stand-alone veggies. Somehow, veggies are easier to eat when they’re in a different form–casseroles, veggie soup, tomato soup, stir-fry, pasta sauce, pies, even lasagna. Chop small or blend, you sneaky mama.

4–I still add veggies to as many dishes as possible, and then tell my son what he ate only after he ate them and liked them. That way he knows he has tried and enjoyed that veggie. Parsnip-mashed potatoes comes to mind. I also sneak onions into everything, and he love-hates onions. (Loves them until he finds out he just ate an onion, at which point everything is gross, although yesterday he realized he loves French onion soup.)

Help Your Kids Eat Their Veggies!
This pasty is sneaky–it has yummy veggies inside!

5–Pretty bowls of veggies set out as daily snacks are enjoyed by everyone, and he dives right in with the rest. Dip makes it more fun, but I only use that as a treat.

6–We cut out as much processed foods as possible (in our case, all the processed food) both to not give him an alternative snack and to help his health and tastes. This is particularly effective if the gag reflex is from a developing (or passing) allergy issue.

7–I kindly and respectfully asked my hubby, who sits by him at every meal and was admittedly not raised on veggies, to stop making remarks about how disgusting veggies are and to quit leaving them on his plate. Setting a good example is huge. Huge-huge!

8–We planted a garden together and ate the goods.

11 Tips to Get Kids to Eat Veggies
Gathering rhubarb from a friend’s garden.

9–Sometimes he would be my shopping buddy, and I would let him pick out whatever he wanted to try from the grocery store. We rotated kids, but it was new and exciting, so they tried it.

10–We required him to try one bite of the veggie dish, or one piece (like one pea or bean) for each year of his age. I apologize in advance, my dear future daughter-in-law, if you have to count out 42 beans for him. I really tried.

11–We held off on the foods that made him gag. Eventually, we reintroduced them and he was totally fine with them. It is possible that it’s a sensitivity issue.

Here’s a ray of hope for you mamas struggling to get veggies into your children (or hubby): When my gagger son (now 9) was six, he talked my veggie-phobic husband into trying Brussels sprouts, and they both liked them. There is hope! At six he was my least creative eater, but at 9 he loves his veggies and will eat almost anything, especially mushrooms.

11 Tips to Get Your Kids to Eat Veggies
That’s him in the background, happily munching on an “edible weed” from a friend’s back yard.

How do you get your kids to eat their veggies?

Simple Tips for Baking with Stevia and Xylitol {Guest Post}

Today we have a guest writer, cookbook author Sarah from Whole Intentions. Be on your best behavior please. 🙂

You all know my stance on the real food movement, but just because I refuse to scare the pants off of you with all the doom and gloom about food (I don’t want a bunch o’ readers in their skivvies) doesn’t mean I’m not generally careful about how I feed my family. On the flip side, just because I want effortless food perfection going into the bodies I love, doesn’t mean I get it. I also don’t get Alton Brown and Paula Deen fixing dinner in the travel trailer. It’s a life of compromise.

One area of family life that has seen some compromise is sweeteners. My main squeeze likes a bit o’ sweet, but sugar gives me…trouble. Our dads have diabetes, so sugar has the potential to give my kids quite a bit of trouble, too. Therefore we explored the world of stevia, a natural sweetener extracted from the stevia plant. (Yeah, I know cyanide is natural, too. Just for today, let’s not go there. We’ll scare away our guest.)

When Sarah and Paula wrote me about guest posting about natural sweeteners as part of their new e-cookbook launch and massive giveaway, my tummy growled. (Yeah, I think with my stomach.) Sugarless sweets made with a natural sweetener are right up my alley…as long as they don’t have that nasty aftertaste that the fake sweeteners have. Blech and gag. No thanks! Sarah touches on that in her tips below.

Speaking of tips, let’s get to it! Readers, meet Sarah from Whole Intentions. Sarah, my amazing readers. (Oo, oo, readers, check out tip number six. Sweet!)

Disclosure: All the links to the Whole Intentions site are my affiliate links. 

Simple Tips for Baking with Stevia and Xylitol

Guest Post from Sarah of Whole Intentions

During September, I had the pleasure of creating 40 dessert recipes using purely stevia and xylitol as the sweeteners. My friend Paula, who blogs at Whole Intentions, and I got this whacky idea that we’d write a cookbook. We’ll both tell you that the Lord’s hand was over the entire process because we could never have imagined that at month’s end we’d have over 70 recipes to share!

Both Paula and I have suffered with candida. Our personal struggles combined with our love for baking lead us to write The Sweeter Side of Candida. In my introduction, I wrote that the process of writing these recipes was, “almost like medicine to my soul as I created them with the anticipation that they might help some of you continue in your journey to health.” But this cookbook is definitely not just for those who suffer from candida. It’s for anyone trying to avoid refined sugar, to lose weight, or to just be healthy!

Our month-long course of baking boot camp (or paradise, for me) taught us quite a few things about our dear friends stevia and xylitol. As people tested our recipes, they couldn’t believe there was no “sweetener” aftertaste that so often comes with using sugar alternatives. Paula and I both believe that using the following “tricks” create the beautiful marriage of flavors that will delight you.

Lemon Blondies
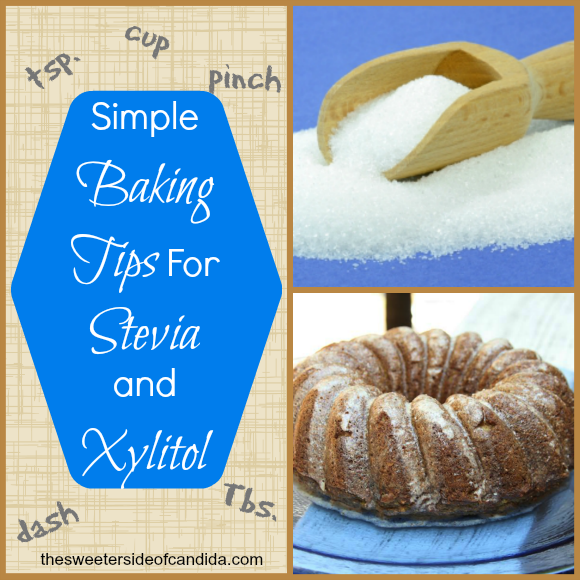
Stevia and Xylitol Baking Tips

Here are our favorite MAKE-NOTE-OF-THESE tips:

1.) There are a LOT of brands of stevia, as we’re sure you’re well aware. Some brands are sweeter than others, some have an aftertaste, some are cheap, some are spendy, and then there’s all those off-shoot brands like Truvia (more on that here).

This makes it hard to follow any cookbook that uses stevia unless you’re all using the same brand. Even Paula and I don’t use the same brand! 🙂

Every time we mention stevia in our cookbook, we say to use it ‘to taste’. You’ll probably want to ring our necks for being so vague, but really, there’s no other way around it.

The best words of advice we can give is to start out sprinkling it. Taste test, and sprinkle a little more. Stevia is a LOT sweeter than sugar (like 200-300 times sweeter), so you definitely don’t want to use equal proportions, however there is such a thing as too much stevia which can make your baked goods have a bitter aftertaste. So be sure to play, taste – play, taste. . .

2.) Stevia and salt are best friends. Some things simply taste better when they’re together. So is true with stevia and salt. You’ll find that nearly every recipe in The Sweeter Side of Candida calls for ‘a pinch of celtic sea salt’ and ‘stevia to taste’.

Stevia and salt have made friendship bracelets, buried a time capsule, and promised to be best friends until the day they die. Do. Not. Separate. 😉

Mock Cinnabons

3. Sometimes xylitol needs to be powdered first. Xylitol doesn’t dissolve as easily as refined white sugar does, so in some recipes it’s best to grind it first in a coffee grinder or high-powered blender so it’s more like powdered sugar. In some of our recipes we measured already powdered xylitol, and in others we measure the granules and then powdered them.

4. Stevia and xylitol compliment each other. Like a good marriage we’ve found that when a recipe seems like something is missing, it comes together beautifully when both sweeteners are used. Some recipes can stand alone with just one or the other, but others needed them both for that finishing touch (cue violin music).

There’s no right or wrong way to use these two sweeteners, but we found that Paula likes to add stevia first and then top it off with xylitol whereas I like to start off with xylitol. Each method works well.

If you want to play around with your own recipes, here is a good Sugar Conversion Chart.

5. Use a bit more sweetener in recipes you’re baking or freezing. When you’re using stevia or xylitol in a recipe that you’ll be baking or freezing, get it to the point of perfection, and then add just a tad more. When it’s almost too sweet – it’s perfect. Baking and freezing seem to subdue the sweeteners.

6. Get a spoon, dip your finger, or swipe the beaters. You have our complete and total permission (like you need it!) to taste your batters, dough, and frostings to tweak the sweetness factor to your liking. Just be sure there’s enough to bake with. 😉 We both taste all of our batters (a lot!) to make sure that they’re just right, so don’t be shy, taste away!

The Sweeter Side of Candida

the-sweeter-side-of-candidae-cover-CB

buy now button

Need recipes that will help you stay healthy, lose weight, and fight candida? We can help! This cookbook is *not* only for those who suffer from candida. It’s for anyone who wants to lose weight and/or stay healthy too!

Thank you, ladies, for sharing with us today!

Do you use stevia or xylitol in your baking?

A Realistic Perspective on Real Food in a Very Real World

Grace. We all need it in every aspect of life. One area that generally lacks grace is the mainstream Real Food Movement. If you are feeling overwhelmed, discouraged, or anxiety-ridden by the heavy-handedness among many (not all) real foodies, you have come to the right place. I am honored to be joining three terrific ladies offering you grace through these four posts on The Real Truth About Real Food:

Real food

My husband is a traveling Christian musician. (Hold on. This does have to do with real food.) Because we are a family that does everything together, we go with him. That, my friends, means 9 people and a 130-pound dog in a super-sized van towing a trailer all over the country meeting people from all walks of life. All walks of life.

Many of the churches we visit feed us in one way or another. We have been blessed with elaborate spreads and honored with humble meals eaten among new friends. We’ve met people who eat their food straight from the earth and those who eat their food straight off the shelves. We’ve encountered people who could afford to eat whatever they like and those who are barely scraping by, living off the church’s food bank until they can get back on their feet. All walks of life, I tell you.

Real Food

One of our tours took us through many poor churches whose members generously shared their meals with us. That experience made me rethink my fairly dogmatic view of what was truly important about food. I felt almost…embarrassed by some of the real food aspirations I held. I also grew downright indignant (to put it nicely) toward the type of real foodies who shout “You’ll be sorry!” at those whose lives necessitate veering from real food perfection. Where’s the grace in that?

Our lives necessitate not merely veering from perfection, but taking some serious detours along the way.

There are two approaches we can take as a family in our current circumstances where eating the ideal real food diet is, simply put, impossible. We could riddle first our minds and then our bodies with disease and infirmity by stressing over the potential health hazards of not attaining real food idealism. This would, naturally, involve struggling to meet what amounts to unrealistic goals for this season in life, wreaking havoc on our budget, and bearing the burden of guilt for our failures. (Sounds like fun, doesn’t it? It’s not. I tried it.) Or we could do the best that we can, ditch the unhealthy stress and guilt, and enjoy the blessings of fellowship and food on the road, however imperfect it may be. Did you catch the irony? In case you missed it, let me rephrase:

Stressing over health is one of the unhealthiest things a person can do.

Also ironic is that one of the most priceless lessons I learned about eating, joy, and appreciation came not from the real foodies, but from those we met on our travels, specifically those who have very little food. (Of course, my hubby will tell you that he’s been saying this all along…and he would be right…again.) Those people are not calculating whether their yogurt was cultured for 24 hours or 6. They don’t have the luxury (or curse) of worrying whether their eggs are farm fresh or whether the chickens consumed soy. They’re not wondering whether their apples are organic and cleansed properly or if they were picked up off the ground and rubbed on a pair of dirty jeans (the only way to eat apples, in my book).

They are grateful for whatever is set before them and they eat it with joy.

Shouldn’t we all eat with joy?

Real Food

I’m not saying that there is anything wrong with being a real foodie. Personally, I feed my family food that is as untouched as possible. We make almost everything from scratch. We minimize the amount of sugar we consume, bake our own bread, culture yogurt, soak nuts, make granola bars, and on and on it goes. Cold cereal–what’s that? Frozen pizza–a distant memory. Store-bought salad dressing–not here.

But you know what? I refuse to let real food be my idol, and I refuse to let real foodies stress me or my family into a state of perpetual anxiety.

I know some people have never had a gram of sugar or a preservative in their lives.  Me? Well, if preservatives actually worked as well on the human body as they do on margarine (and I hope they do), I’d live to be 280 from what I consumed in college alone. I know some parents religiously monitor their children’s toxin exposure. Me? I’m very cautious, but I cannot deny the health benefits of the sheer joy that is served up with my grandpa’s chocolate malts or the occasional hot Krispy Kreme donut. I know some people will refuse food served by others if they know it is not ideal. Me? I totally enjoy myself as I fellowship over food, however imperfect. (Admittedly, I steer toward the healthy, and I dutifully turn down foods that give my nursing baby colic or me…a-hem…flatulence…for the sake of my hosts. You’re welcome.)

Real Food

Yes, there are real allergies out there and real health conditions and overall we should try to make real food a very real part of our very real lives. With that I heartily agree.

But…

We should not sacrifice real living in the process. We should not crucify joy on the cross of food perfection.

When the anxiety of eating becomes so great that the enjoyment and blessing have been replaced by fear, there is a problem. When others (or you) are made to feel inferior, anxious, or guilty because the food on their plates is not ideal, a whole new arena of hazards is being introduced–mental, emotional, joy-sapping hazards. When the food becomes more important than the relationships, there is a problem. When other people are starving and parents are flippin’ out because Grandma offered Junior a graham cracker (assuming Junior is not allergic to graham crackers), priorities are skewed…and not just a little bit.

I’m living in a place called The Real World, and living in that zipcode requires balance. If you’re a neighbor (also living in the real world), and you find yourself needing a frozen pizza or even a GASP Pepsi with crushed ice and a straw from time to time, enjoy! Eat it with a smile, because food is a blessing that not everyone has, and because that smile is good for your health…and stress will kill you faster than corn syrup.

Real Food

I may not be the ideal real foodie, or even close for that matter, and we may not live to be 120, but this one thing I know: the joy and friendship enjoyed over our meals on the road are far better for our health than the stress of striving to achieve unattainable perfection. Who wants to be perfect anyway–it’s lonely at the top, and studies show you live longer if you ditch the stress and loneliness in favor of real relationships with other real people. I’m pretty sure studies would show you live longer if you eat nachos, too, don’t you think?

I’d love to hear your thoughts…but keep it friendly. This is a bully-free zone.

Remember to visit these lovely ladies!

Easy Scalloped Potatoes Recipe – Frugal, Classic, Delicious


This easy scalloped potatoes recipe is a classic dish to fit any budget.
 The original recipe which we adapted slightly to make our own creamy potato goodness is from Modern Alternative Mama’s cookbook, Wholesome Comfort: Whole Foods to Warm & Nourish Your Family.

Easy Creamy Scalloped Potatoes (www.TheSimpleHomemaker.com)

These potatoes are comfort food bliss served alongside Italian chicken in cream sauce with apple spice cake for dessert, all from the same cookbook.  Are you drooling yet?

Easy Scalloped Potatoes Recipe – Frugal, Classic, Delicious
Recipe Type: Side Dish
Author: Kate, Modern Alternative Mama
Prep time: 20 mins
Cook time: 1 hour
Total time: 1 hour 20 mins
Serves: 8
This easy scalloped potatoes recipe is not only simple to make, it’s so creamy and delicious, you won’t believe it’s not bad for you!
Ingredients
  • 8-10 potatoes
  • 1/2 onion minced
  • 1 teaspoon sea salt
  • 1/4 teaspoon black pepper
  • 1/2 teaspoon thyme
  • 4 tablespoons butter
  • 2-4 tablespoons arrowroot powder (or the thickener of your choice)
  • 4 cups milk
Instructions
  1. Preheat oven to 350.
  2. Peel the taters and slice them to a relatively uniform 1/8 inch. Spread them in a 9X13 pan. (Don’t be picky!)
  3. Melt the butter in a saucepan. Saute the onions until they are translucent. Try not to eat too many just yet.
  4. Add all the seasoning and your thickening agent of choice to the buttered onions. Whisk until smooth. (I usually get someone shorter than me to whisk. Pretend whisking is really fun and you’ll have plenty of volunteers. Eventually, they’ll wise up, though.)
  5. Add the milk slowly to the saucepan, stirring constantly until the mixture thickens. (Remember, milk can burn…and tends to do a volcanic eruption impression if overheated, so don’t go anywhere.)
  6. Pour the mixture over the potatoes. Pop them in the oven at 350 for an hour. Not being one who wants to wait an hour for my taters, I boiled them for ten minutes before putting them in the oven, so they were done in half the time.
Notes

For a little change in the ol’ scalloped tater routine, toss in some cooked bacon (cook it in the saucepan and use the drippings to saute the onion), cheese, broccoli, or all of the above.

Want to know what a real family thought of this recipe?  Because I’m off dairy to help our Little Miss Colic, I did not get to try this dish.  (Yes, it broke my heart, thank you for asking.)  So we polled the other taste testers.

Here’s what some members of the family thought…in their own occasionally incomprehensible words:

  • The cheese-obsessed Wisconsin-born teen: “I thought they were really good…but they needed cheese, sort of. I think it was good without cheese too, though.”
  • The food enthusiast: “Ooh, those were totally awesome!”
  • The contented, quiet child: Um, I loved the potatoes, um…and I don’t think they would have been better with cheese on them.
  • Gabbie Girl: I like them.
  • The boy who doesn’t eat potatoes: I only had one with salt on it and it was really good that way. I don’t know what it tasted like without salt.
  • The three-year-old who ate every bite: They taste like peppermint candy canes with pepper.  (She’s three, people.  Seriously.)

If you enjoyed this easy scalloped potatoes recipe, you’ll love the other recipes in Wholesome Comfort: Whole Foods to Warm & Nourish Your Family by Kate at Modern Alternative Mama.

Buy Wholesome Comfort here.

What’s your favorite comfort food?